Artisan tools use an intuitive paint- and sculpting-based interface to accomplish a variety of tasks in modeling, animation, rendering, and effects.
Many of the Artisan brush tools work like paint brushes; paint a stroke with a brush tool and the attributes of the brush are applied to the surface along the stroke. Typically, you create your model in Maya, then paint over it with these tools to detail and modify it. You can use your graphics tablet and stylus for greater control when you paint.
You can access some of the Artisan tools by right-clicking an object in the scene view and selecting from its Paint pop-up menu.
When you select an Artisan tool, the Maya pointer changes to a paint brush
![]() .
.
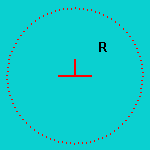
Move the pointer over a surface and Maya displays a brush outline. The brush outline defines the area affected by the tool.

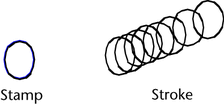
Clicking the brush on a surface creates a stamp. A stroke (created by dragging across the surface) is made up of many overlapping stamps.

Brush radius
By increasing or decreasing the radius of a brush stamp, you increase or decrease its area of influence.
If you use a pressure sensitive graphics tablet and stylus, you can set an upper and lower range for the radius. No matter how much pressure you apply to the stylus, the brush radius will not be larger or smaller than the set limits. For information on changing brush size (radius), see Table of default Artisan hotkeys.
Brush shape (or profile)
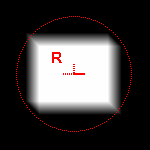
You can select a brush shape to provide flexibility as you paint. The area affected by the stamp corresponds with the selected shape. The shape of the brush outline does not change to reflect your selection. For example, if the brush shape is square, the brush outline remains circular, but the area influenced is square.

Brush opacity
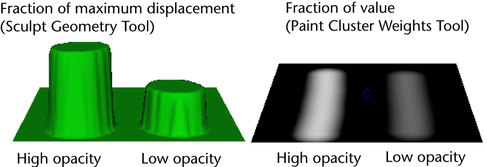
Brush opacity refers to the fraction of the maximum displacement or brush value (depending on the selected tool) to apply to each brush stamp within a stroke.

Brush values
Brush value refers to something different for each Artisan tool. For example, for the Paint Cluster Weights Tool, value refers to vertex weight. For the Paint Fur Attributes Tool, it could refer to the amount of curl.
Brush operations
For each Artisan brush you can select a paint operation that defines the behavior of the brush when you paint. For example, the Sculpt tools have Push, Pull, Smooth, and Erase operations. The Paint Cluster Weights Tool has Replace, Add, Scale, and Smooth operations. The operation is also used when flooding and when importing maps.