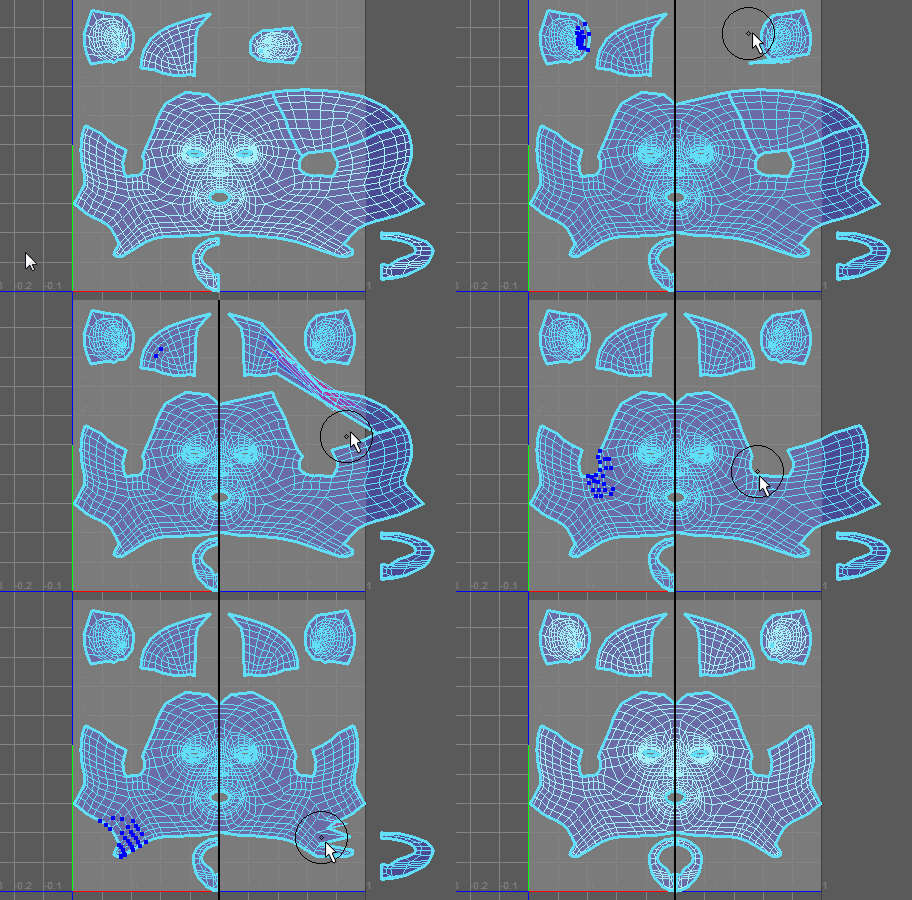
When working on a symmetrical mesh, or a mesh with symmetrical properties in certain areas, you can use the
Symmetrize UV Tool to mirror corresponding components across the U or V axis. This will allow you to quickly match component layouts you've made on one side of the mesh to the other, or even tidy up entire UV layouts to make texture mapping easier.

Note: The
Symmetrize UV Tool cannot create new UVs. It can only work with existing ones, because it uses the geometry's overall symmetry to guide it.

To symmetrize components on a UV mesh
- In the UV Editor, pre-layout the area of the mesh you want to use as a base for symmetrization along a U or V line (does not necessarily have to be the center line).
- Select the
Symmetrize UV Tool by either clicking its icon (
 ) or by going to
.
- Click an edge on the mesh to define the line of topological symmetry.
- Adjust the brush settings as necessary. In particular, make sure to set the Mirror Axis Position, either by adjusting its attribute or Ctrl + middle-dragging the bolded axis in the UV Editor window, so that it properly represents the line in UV space you want to mirror components across.
- Drag the brush along one side of the mesh to symmetrize its components.