Open this window in one of the following ways:
- In the Modeling menu set, select .
- In the
PaintEffects shelf, click
Template Brush Settings
 .
.
- In the
panel, click
Edit Template Brush
 on the toolbar.
- In a drawing, select a brush stroke, then in the Attribute Editor, select the related brush node.
- Use the Ctrl-b (Windows and Linux) or Control-b (Mac OS X) hotkey combination.
All the setting described in this topic also appear in the Attribute Editor for any brush node.
Brush Type
Select the type of brush you want to paint with. All brush types use the shape defined by the brush attributes.

- Paint
-
Applies paint to the stroke path according to the defined attributes.
- Smear
-
Distorts paint already applied to the canvas or scene. If the stroke uses fake shadowing (see Fake Shadow in Shadow Effects brush settings), the shadows also smear.
- Blur
-
Softens the look of paint already applied to the canvas or scene. If the stroke uses fake shadowing (see Fake Shadow in Shadow Effects brush settings), the shadows also blur.
- Erase
-
In the canvas, the Erase brush removes the color from the painted pixels, revealing the underlying canvas Clear Color and maintaining the shape of the brush. For details, see Erase paint from the canvas.
In the scene painting view, the Erase brush replaces the pixel color of the paint stamps it overlaps with black (alpha 0).
When you erase, the alpha values are lowered, rather than increased, which means you can use the Erase brush to erase holes in a texture or scene.
- ThinLine
-
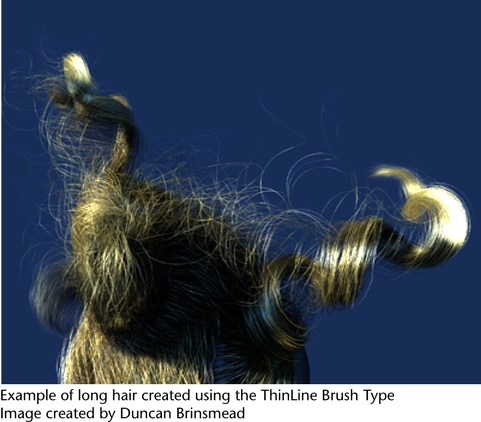
The ThinLine type of brush allows you to render large numbers of fine tubes much more quickly than the Paint brush type. It uses a direct anti-aliased line draw rather than a series of brush stamps. The Multi Streaks method is also available when the ThinLine brush type is used. In combination with the Multi Streaks method, the ThinLine brush type can be up to 100 times faster for hair than the Paint brush type with better line detail. In addition, new looks are possible using the Multi Streaks, such as wet clumping hair.
Note: When using a large value for Tube Width with the ThinLine brush type, this may result in artifacts.
- Mesh
-
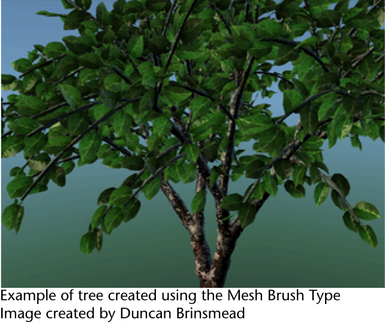
Renders Paint Effects using triangulated tubes instead of brush stamps. This results in accurate conical geometry with textures that correctly map on the surface. Flat surfaces are rendered more accurately than when the PaintBrush Type is used. While the Paint Brush Type is generally better when representing soft, fuzzy volumes, the Mesh Brush Type is better at hard surfaces.

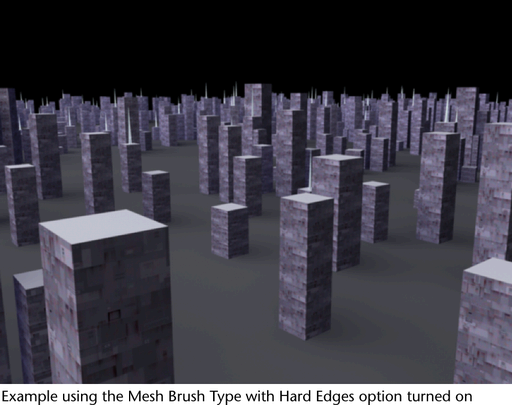
With the Mesh Brush Type you can create Paint Effects trees and plants that are convincing not just from a distance, but also close-up. You can also create shapes, such as hard-edged geometry (buildings) and do per-pixel lighting on the mesh (including specular highlights). There is also a built-in environment map on the brush that is useful when simulating reflective surfaces (see Mesh Environment Reflections brush settings). Triangle displacement and bump mapping enhance the detail of the mesh surface (see Texturing brush settings). The triangles are not kept in memory, but rather generated at render time. As a result, you can use a lot of triangles without running out of memory.
Another feature made possible by representing the tubes as triangles is converting Paint Effects to Polygons. For more information, see Convert Paint Effects to geometry.

- Global Scale
-
Use the Global Scale setting to adjust brush attribute values by a common factor. This scales the paint effect uniformly so you can paint the same effect, but in different sizes.
 Tip: You can use the b hotkey to interactively change the global scale. For information on other Paint Effects hotkeys, see Use default Paint Effects hotkeys in the Prepare to use Paint Effects topic.
Other Paint Effects Brush Settings
Topics below describe the settings available in the sections and subsections of the Paint Effects Brush Settings window.