Introduction
Consider the modeling choices made in the previous exercise:
- Does the lever really move like that?
- Although the part is in static equilibrium, the main bore can still rotate about the shaft. We can assume the axis is fixed, but must allow for local rotation.
- The reaction force, R, is located at a pin. There is potential for local rotations there as well.
- The pin at Point C was locked in place so the end of the lever shouldn't bend as it did in the previous exercise.
In this exercise, we will modify the model from the previous exercise by applying advanced constraint techniques. This will provide a more realistic simulation of the pins that are not actually modeled.
1. Remove the Incorrect Boundary Conditions
Start Autodesk® Inventor, and open modify-boundary-conditions.ipt from the Section 6 - Modify Boundary Conditions sub-folder of your training exercises folder.
Start the Autodesk Nastran In-CAD environment.
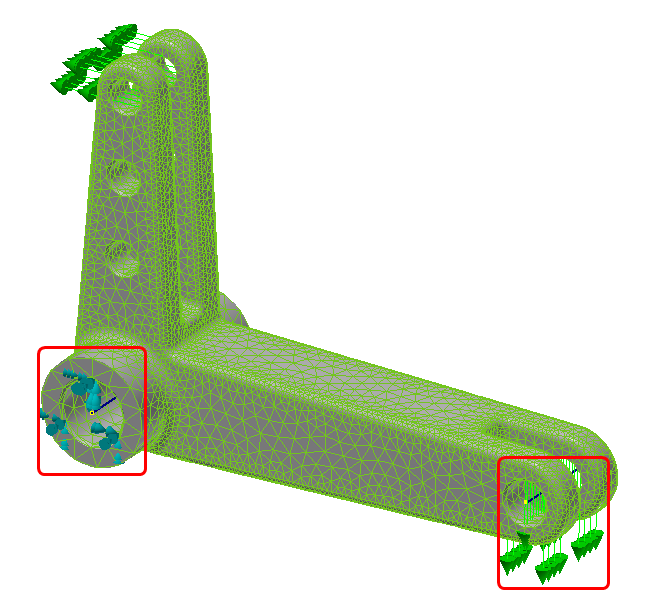
We need to remove the constraint and the load at the end of the lever:
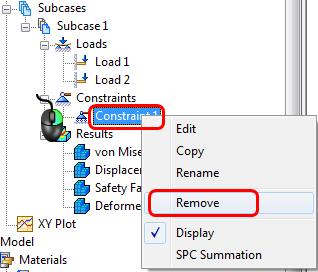
To remove the constraint, right-click on the constraint in the Tree, and select Remove:
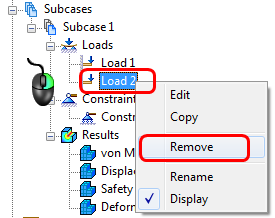
To remove the load, right-click on the load in the Tree, and select Remove. Be sure the select the correct load by ensuring that the desired condition highlights in the model, as shown above:
Info: Ball Joint Constraints
A commonly used technique in FEA is the 'ball joint' constraint to control rotations. The ball joint constraint uses rigid elements to control a reference point. The rigid elements are often called 'spokes' or 'spider webs', given their appearance. We tie the movement of an edge or surface to a reference point to allow for more natural movement. In Autodesk® Nastran® In-CAD, this is done with a Rigid Connector:

2. Create the First Ball Joint Constraint
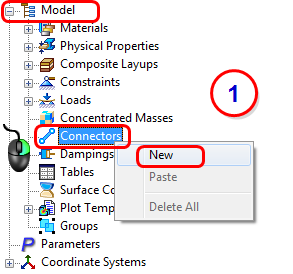
- From the Model Tree, right-click on Connectors, and click New.
- Set the Type to RigidBody.
- Select the reference point on the axis as the Independent Vertex.
- Select the two end faces of the lever as the Dependent Entities.
- Make sure all degrees of freedom are checked.
- Make sure the RigidBody Type is set to Rigid.
- Click OK.
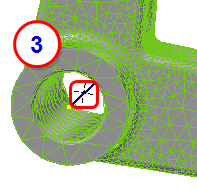
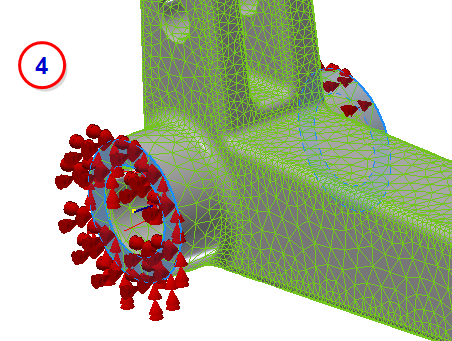
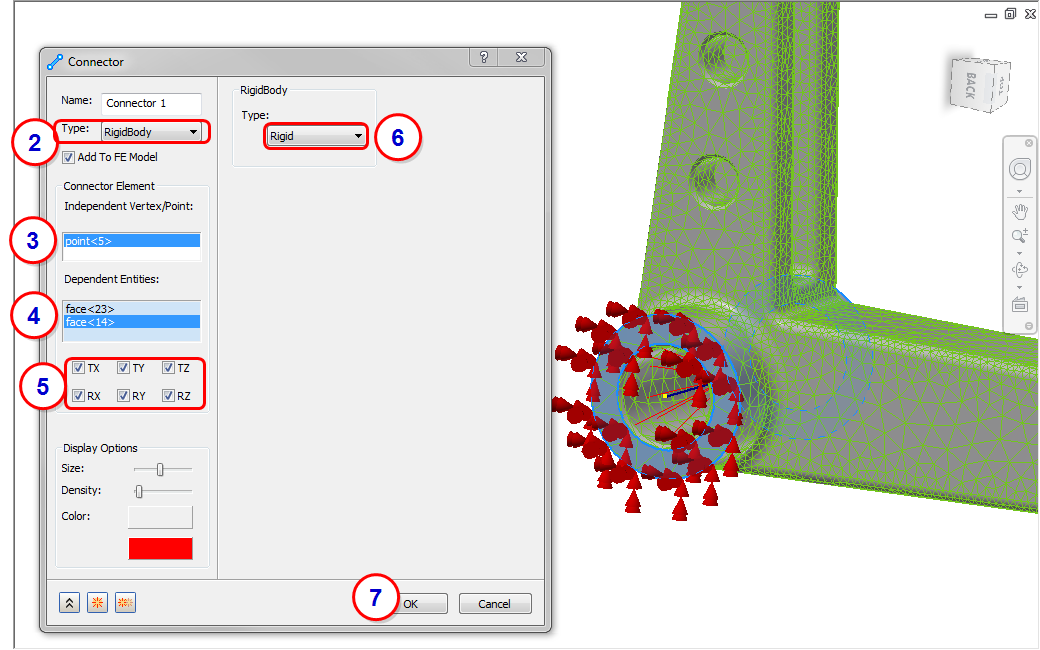
3. Create the Second Ball Joint Constraint
Repeat the procedure to create the ball joint constraint on the small hole. For the Independent Vertex, select the reference point on the axis. For the Dependent Entities, select the inner diameter surface from each hole, as shown:
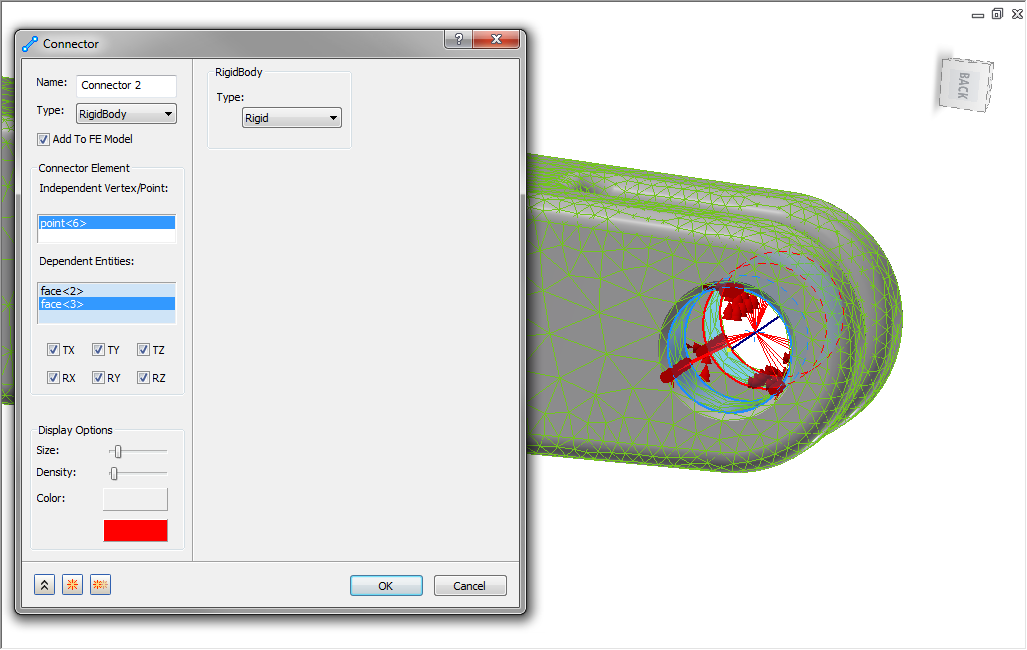
4. Constrain the Pinned Holes
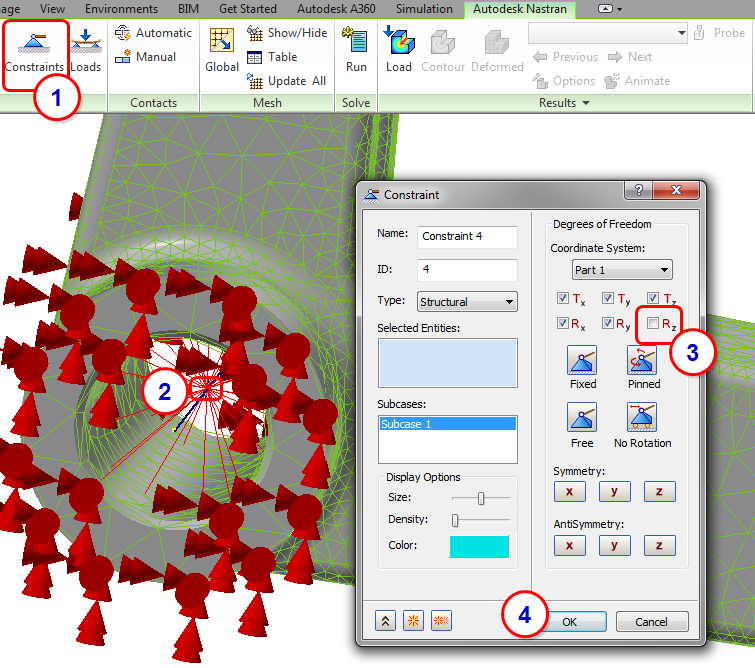
- Click Constraints from the ribbon.
- Select the reference point at the center of the large pin.
- On the Constraint dialog, uncheck the Rz degree of freedom.
- Click OK.
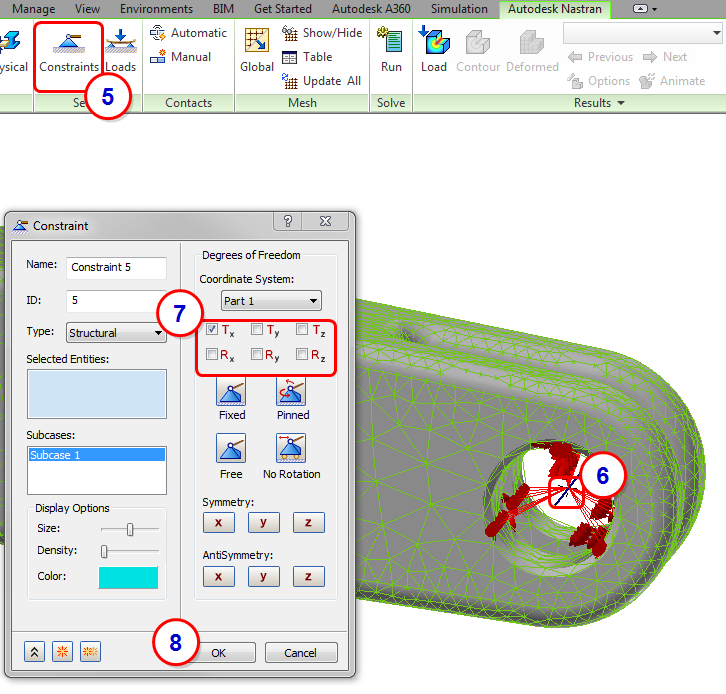
- Click Constraints from the ribbon again.
- Select the reference point at the center of the small hole.
- Uncheck all degrees of freedom, except for Tx.
- Click OK.
5. Run the Model and Review the Displacement Results
- Click Run from the ribbon. The analysis runs, and status messages appear in the Autodesk Nastran Output window.
- When the run is complete, click OK on the message box that indicates that the solution is complete.
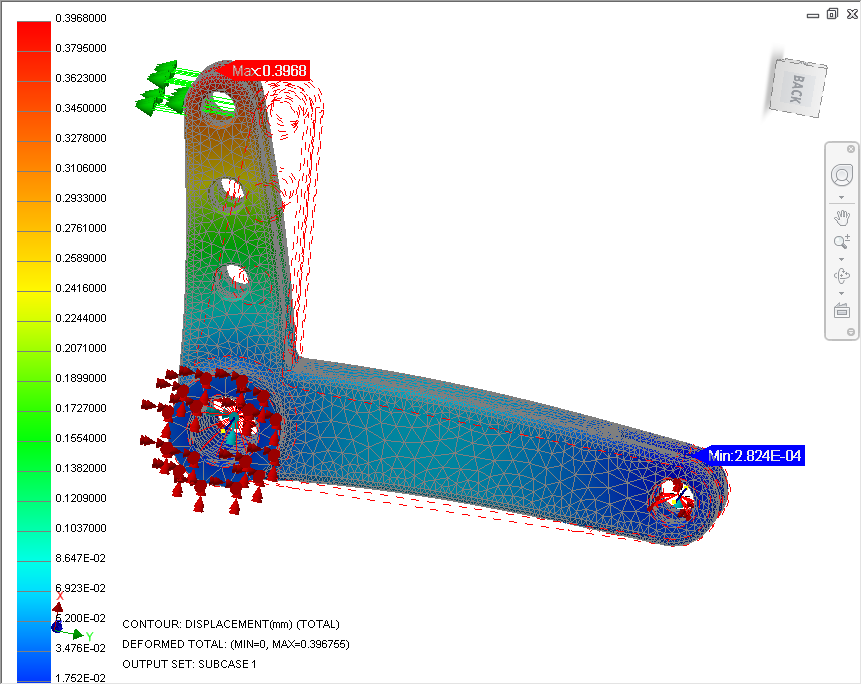
- To plot displacement, right-click on Displacement from the tree, and click Display. You should see this:
- To animate the displacement, right-click on Displacement, and click Animate.
- To stop animation, right-click on Displacement, and click Animate so that it is unchecked.
6. Review the Stress Results
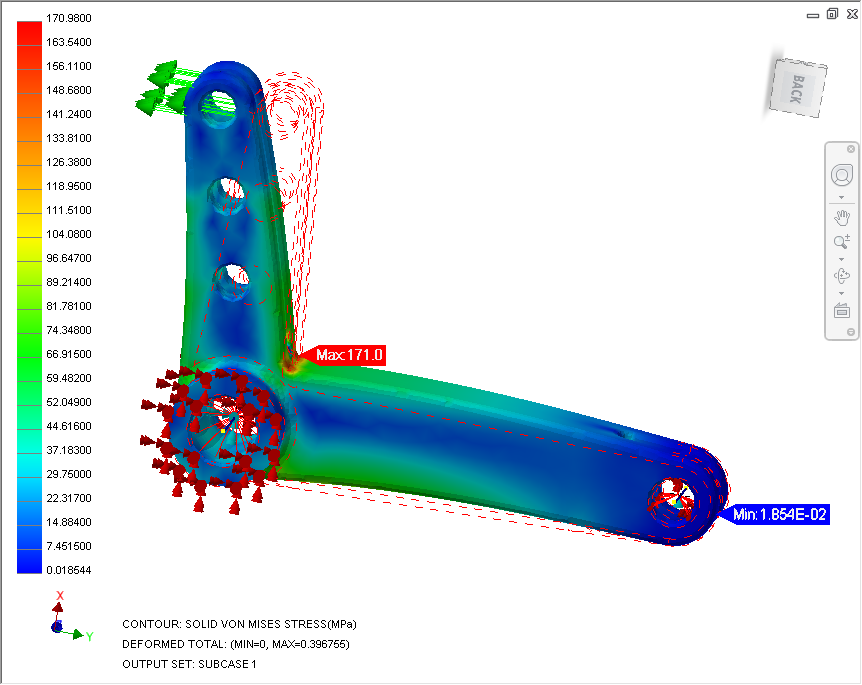
To plot von Mises stress, right-click on von Mises from the tree, and click Display. To hide the element edges, right-click on von Mises, and uncheck Element Edges:
Exercise Summary
We replaced clearly incorrect loads and constraints with advanced techniques that produced a much more realistic deformation.
Rigid Connectors have many uses beyond Ball Joint Constraints. Further research or discussion with an Autodesk Simulation expert can help identify which of these are important for your work.
Even with the improved boundary conditions, the controlling stress did not change appreciably. This should NOT be taken to mean that stress is insensitive to boundary conditions. It is, and this was simply a coincidence of this particular model.
|
Previous Topic: Cast Lever Exercise |
Next Topic: Meshing |