Tagging with Custom Data
You can tag arbitrary areas of your NavData with custom data called NavTags, which you can use to influence the way your characters plan and follow paths in the area at runtime. For example:
- You can use NavTags to identify different types of terrain or materials, such as sidewalks, grass, lava, etc. You can control which types of NavTag each of your characters is able to traverse. For details, see Forbidding, Avoiding, and Preferring NavTags.
- You can use NavTags to identify a type of smart object that you want to influence or take control of the character's pathfinding, such as an elevator, a jumping spot, or a teleporter. For details, see Monitoring PathEvents and Creating Smart Objects.
- You can retrieve NavTags using queries, or directly from the NavMesh triangles or the NavGraphs in an area. You can use this information as you see fit; for instance, you could use it in your decision logic to influence high-level behaviors.
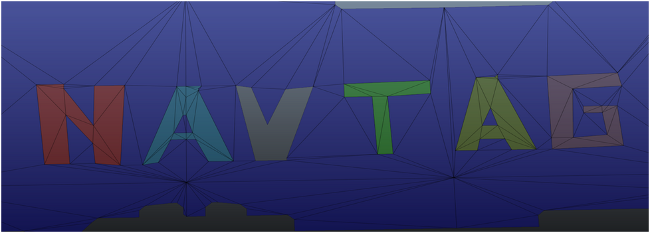
For example, the following image shows a terrain set up with several different types of NavTags:
NavTag data format
- An array of integers that you provide. The significance of these values is entirely up to you to define.
- A flag that determines whether or not the NavTag should be considered "exclusive": i.e. unwalkable by all characters. For instance, the "V" in the image above was tagged as exclusive, effectively punching a hole in the NavMesh.
NavTags may be represented by either:
- The static NavTag class. This is typically returned to you when you read the NavTag associated with a particular path event or a NavData element.
- The mutable DynamicNavTag class. You typically use this class to build NavTags that you provide to Gameware Navigation.
Embedding NavTags at generation time
There are multiple possible approaches to embedding NavTags into the static NavData that you pre-generate for your terrains.
Tagging individual triangles
Each time your GeneratorInputProducer class provides a triangle to the NavData generation system, it can tag that triangle with a particular type of NavTag.
- Call either the ClientInputConsumer::ConsumeTriangleFromPos() or ClientInputConsumer::ConsumeTriangleFromPosInClientCoordinates() method, and pass your NavTag as a parameter.
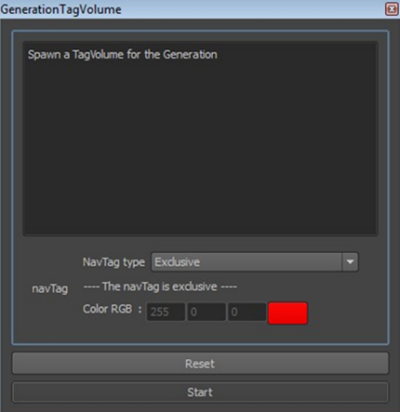
Providing TagVolumes
Your GeneratorInputProducer class can specify volumes that define which NavTags should be applied automatically to all triangles that intersect the volumes. To use this approach:
- Create an instance of the ClientInputTagVolume class.
- Set up the instance with its contour, altitude, and NavTag data in a call to ClientInputTagVolume::Init().
- Provide your volume in a call to ClientInputConsumer::ConsumeTagVolume().
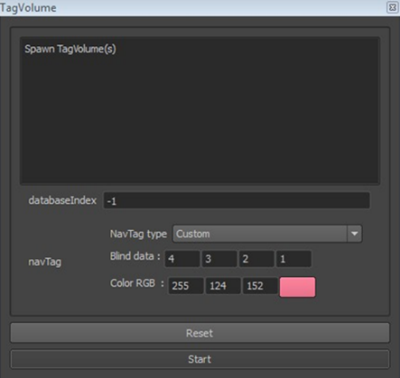
Adding NavTags dynamically at runtime
You can add NavTags dynamically at runtime either by spawning TagVolumes and assigning them to your Databases, or by using the dynamic BoxObstacle and CylinderObstacle classes provided by the dynamic obstacle management system. The NavMesh in the area of the new TagVolume or the obstacle is automatically re-generated and re-triangulated to reflect your custom NavTag.
For details, see Using Dynamic Obstacles and TagVolumes.
NavTag color
You can choose a color for rendering the triangles and TagVolume based on their NavTag. The colors help in identifying NavTags quickly.
You can set the DynamicNavTag color using these functions:
- SetColor(VisualColor color) – Replaces the color of the DynamicNavTag with the input VisualColor.
- SetColor(KyUInt8 r, KyUInt8 g, KyUInt8 b) – Replaces the color of the DynamicNavTag with the input RGB color.
If you set a NavTag as exclusive, its color is automatically set to red as shown in the following figure.
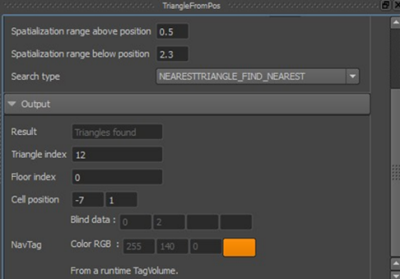
Additionally, the default color for a runtime TagVolume is dark orange as shown in the following figure.
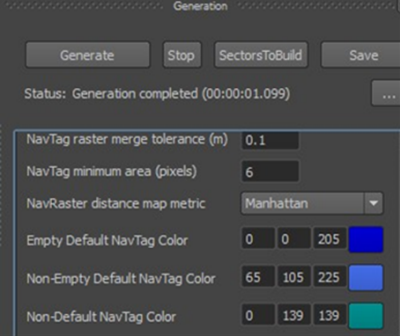
Following parameters for NavTag color are added in the GeneratorAdvancedParamaters class:
- VisualColor m_emptyDefaultNavTagColor
- VisualColor m_nonEmptyDefaultNavTagColor
- VisualColor m_nonDefaultNavTagColor
These colors are automatically set for the NavTag during the generation time. The m_emptyDefaultNavTagColor parameter or m_nonEmptyDefaultNavTagColor parameter is set for the default NavTag depending on whether it is empty. This applies to all the triangles by default.
The m_nonDefaultNavTagColor parameter is set for the NavTag in the following cases:
- A triangle is provided with a NavTag whose color is not changed by the user.
- A generation TagVolume is provided with a NavTag whose color is not changed by the user.
The m_nonDefaultNavTagColor parameter is not set if you change the color of the NavTag before adding the triangle or TagVolume.
You can modify these colors in the Advanced Parameters panel of the Navigation Lab. See the following figure:
The following methods are added in the DynamicNavTag class:
- DynamicNavTag::IsExclusive() – Returns true if the NavTag is exclusive.
- DynamicNavTag::IsOnNavMesh() – Returns true if current instance of the NavTag is associated to a NavMesh triangle.
- DynamicNavTag::IsOnNavGraph() – Returns true if current instance of the NavTag is associated to a NavGraph edge or vertex.
- DynamicNavTag::IsFromGeneration() – Returns true if current instance of the NavTag is associated to the NavMesh triangle during generation. Returns false if current instance of the NavTag comes from the dynamic NavMesh tagging at runtime.
- DynamicNavTag::IsFromRuntime() – Returns false if current instance of the NavTag is associated to the NavMesh triangle during generation. Returns true if current instance of the NavTag comes from the dynamic NavMesh tagging at runtime.
- DynamicNavTag::IsGenerationDefault() – Returns true if current instance of the NavTag is the default NavTag used for tagging a triangle during generation.
- DynamicNavTag::GetVisualColor() – Returns the VisualColor of the NavTag.
Tagging NavGraphs
If you use NavGraphs in your terrain, you can tag their vertices and edges with NavTags too.
- After you create the NavGraphBlobBuilder that you will use to set up the NavGraph, pass an instance of each type of NavTag that you want to add to any vertex or edge in the NavGraph in sequential calls to NavGraphBlobBuilder::AddNavTag(). Each type of NavTag is identified by an index that is returned by the method.
- Each time you add a vertex or edge, use the NavGraphBlobBuilder::AddVertexWithNavTag(), NavGraphBlobBuilder::AddBidirectionalEdgeWithNavTag() or NavGraphBlobBuilder::AddMonodirectionalEdgeWithNavTag() methods, and pass the index that corresponds to the type of NavTag you want that vertex or edge to be tagged with.
See also Creating NavGraphs.
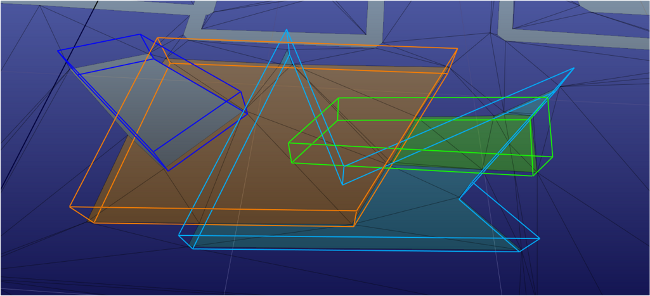
Handling merging and conflicts
When two or more areas tagged with different NavTags overlap, the NavTags are not merged. Instead, the NavTag that is determined to be lower by calling the < operator of the NavTag class is kept.
For example, in the following image, the exclusive volume is lower than the orange volume, which is lower than the green volume, which is lower than the light blue volume.
See the implementation in the navtag.h file for details.
 Except where otherwise noted, this work is licensed under a Creative Commons Attribution-NonCommercial-ShareAlike 3.0 Unported License. Please see the Autodesk Creative Commons FAQ for more information.