Autodesk® ReCap™ is your one stop shop for scan conversion, editing, and viewing. ReCap supports a wide variety of scan formats.Quickly get your point cloud data to work with simple export options and integration into Autodesk's broader portfolio of design software.
Product Tiers
ReCap is available at 3 tiers, each tier contain a subset of features (explained below). For more information on purchasing or entitlements please see the Autodesk Accounts page.

ReCap Import and view point cloud data with the base version of ReCap. It is available in all Autodesk suites, as well as, a free download on our website. |
ReCap 360 Unlock the power of advanced measurement, organization, and collaboration tools. Also transform photos to 3D models with Photo on ReCap 360 |
ReCap 360 Ultimate Speed your workflow and get increased accuracy by utilizing auto-registration functionality and extensive reporting capabilities. |
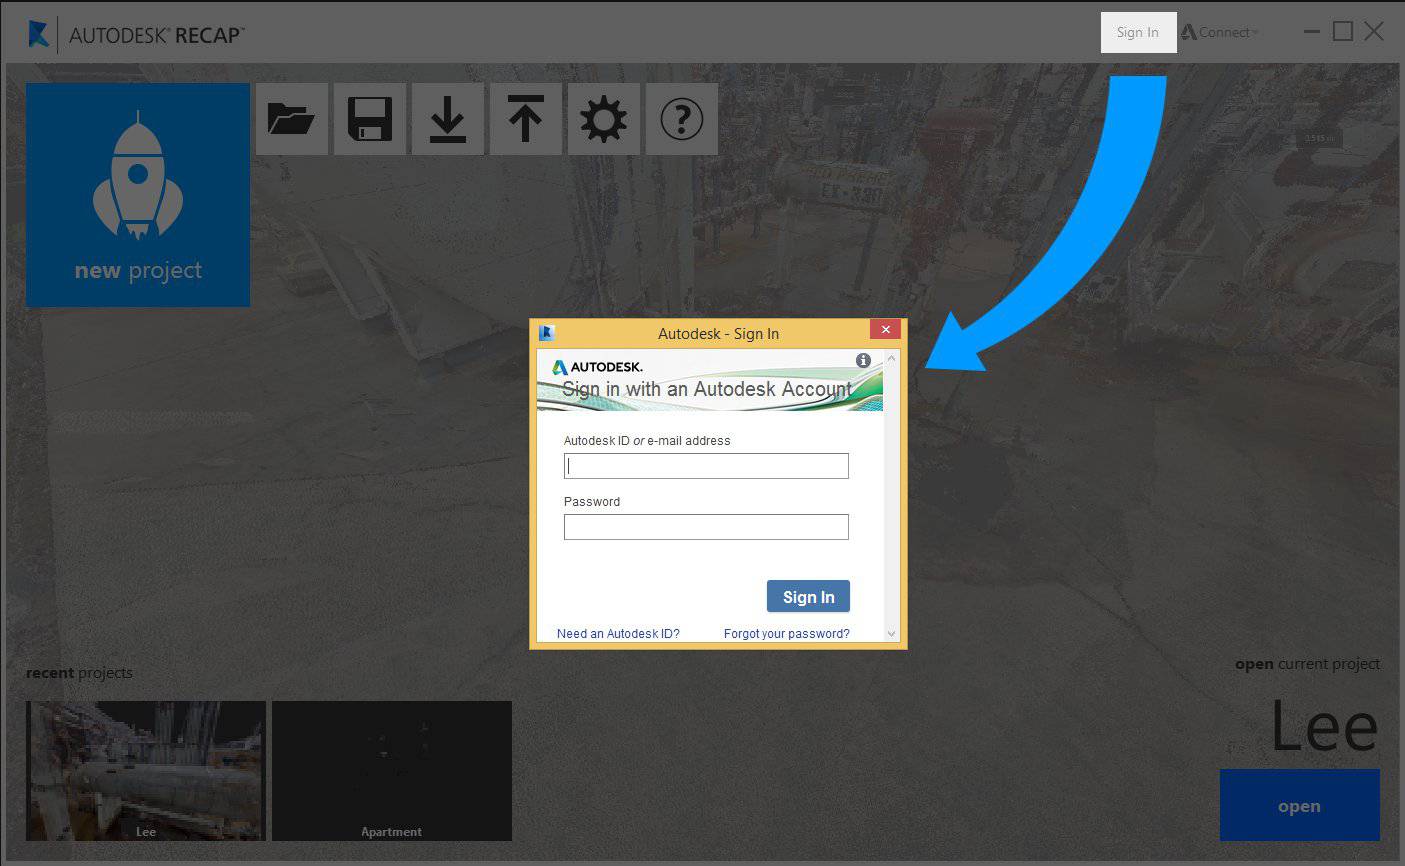
Autodesk Identity
To access project sharing and markup login to your Autodesk 360 account from within ReCap. Login can be found in the title bar:
About Reality Capture
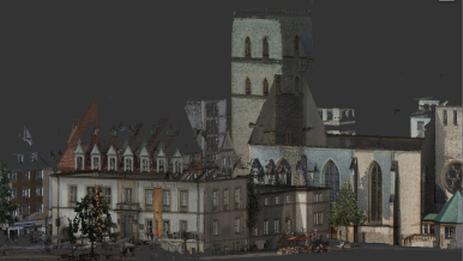
While a photograph lets you capture the real world in a 2D representation, a laser scan let’s you capture the real world in 3D representation. You can think of it kind like a 3D photograph. The typical representation of this 3D photograph is a point cloud. These clouds are comprised millions of colored points in precise 3D space. ReCap processes these massive data sets and provides the ability to aggregate, enhance, clean, and organize the data and prepare it for use in other Autodesk products.
The Creation Process
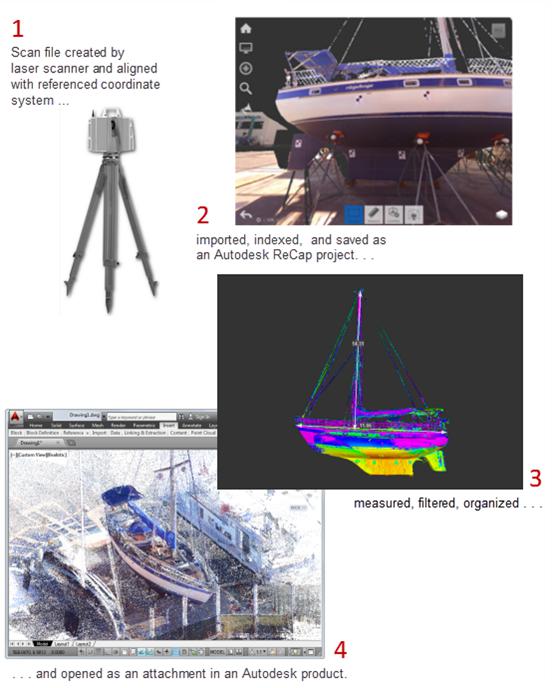
- Scanning. Point data is first captured using 3D laser scans of existing structures. In most cases, the survey company provides correctly oriented scans in the native scan format of the manufacturer.
- Importing.
Autodesk Recap converts the scan files to a proprietary Reality Capture Scan format (RCS) that can be read by other Autodesk programs.
This process, called indexing, involves importing raw scan files into Autodesk ReCap. At the start of this process, you can adjust the number of points imported by changing settings for noise, distance from the camera, intensity range, and decimation values. Save the indexed scan files in a Reality Capture Project file (RCP) that references, but does not contain, the files.
ReCap supports the import of structured scans (including RealViews and registration where applicable) for individual or multi-scan E57 files.
- Organization, Cleanup, and Analysis. A number of methods are available to organize the indexed data to remove or hide portions of the point cloud. Create scan regions that you can turn on and off, specify temporary clip regions, turn off or remove scan files, or delete unwanted points permanently. By viewing the scene using different color modes and lighting, you can gain insight into elevations, normals (which help identify surfaces), and reflectivity.
- Attaching. Indexed scan files and projects can be opened, or attached, in another program to provide realistic context for 3D models.
Supported Point Cloud Formats
| Import Formats | Export Formats |
|---|---|
|
Note: As of version 2.2 Recap supports exporting to structured E57 (individual scans, with row/column info, including registration transforms). The structured E57 export does not apply any deletions or clips created in the project: it is a complete export of all data.
|
UI Overview
ReCap’s UI focuses on contextual interfaces; providing information and tools when and where you need it. For a more in depth review of specific UI components please see the Glossary.
The Project Screen
The Project screen is where you do most of your work with point cloud data. It is divided into several areas.
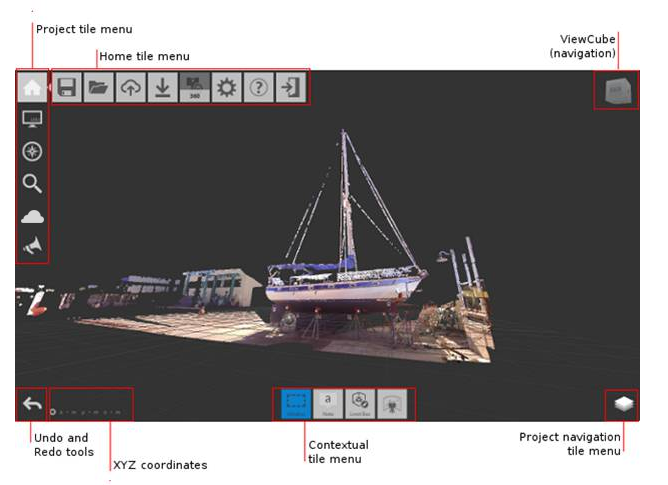
- The Home tile menu provides ways to work with the point cloud project as a whole.
- The Project tile menu analyzes and organizes components of the point cloud.
- Undo and Redo tools reverse previous actions that you've taken.
- XYZ coordinates display for the point your mouse is over.
- The Contextual tile menu changes to reflect current activities. For example, if you are editing a limit box, the tool set changes to display tools related to limit boxes.
- The Project Navigation tile menu provides access to tools such as pan, zoom, and orbit. This menu is most useful to those with a single-button mouse. Flyout navigation tips on these tiles provide information about navigating with a three-button mouse.
- ViewCube provides a quick way to change the orientation of 3D views.
The Tile Menus
A majority of ReCap’s interface is executed in a series of nested menus. These menus provide quick access to wide variety of ReCap’s options and functionality. The example below outlines the behavior.
Move the cursor over tile 1, then over 2, to expand the flyout menu (3).
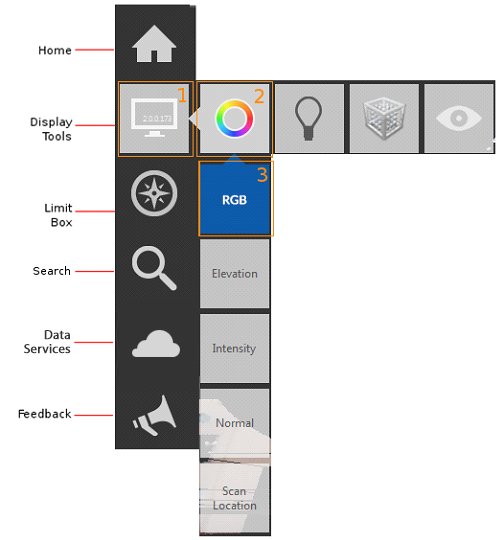
You navigate to the tools on a flyout by hovering over their "parent" tiles to expand them and then selecting the tile whose setting you want to change.