You used Site Designer to grade the toposurface and create site elements; now all views in the project show masses.
Example:
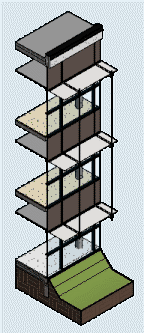
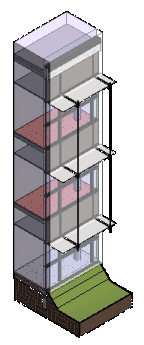
| Expected section view | Section view displaying an unwanted mass | |
 |
 |
Issue:
Several Site Designer tools create site elements using Revit masses. If masses are not visible in a view where you are creating a site element, an informational message indicates that the software wants to enable Show Mass mode. You can specify whether Show Mass mode is enabled for all existing views, or only for the currently active view.
When this message displayed, you may have chosen to enable Show Mass mode for all existing views. As a result, all views in the project now display masses.
Solution: Change the visibility setting for masses in the view, as follows:
- Open the Visibility/Graphics dialog for the view: Click View tab
 Graphics tab
 (Visibility/Graphics), or type
VG (the default keyboard shortcut).
(Visibility/Graphics), or type
VG (the default keyboard shortcut).
- On the Model Categories tab, scroll down the list to locate the Mass category.
- To turn off the visibility of all masses in the view, in the Visibility column, clear the check box for Mass.
- If you want to display some types of masses but not others, do the following:
- Leave the Mass check box selected.
- Click + to expand the list of Mass sub-categories.
- Select the check box for each sub-category to display in the view, such as SW Curb, SW Sidewalk, and SW Street.
- Clear the check box for each sub-category to hide in the view.
- Click OK.
- If needed, click Massing & Site tabConceptual Mass panel
 (Show Mass by View Settings).
This setting ensures that masses display according to settings on the Visibility/Graphics dialog.
Repeat this process for other views that display masses where you do not expect or want to see them.