In this exercise, you add dimensions to the building model to dimension the footprint of the main building, and the location of the feature wall relative to the building.
|
Objectives
- Add aligned and angular dimensions to indicate the location of the feature wall relative to the building.
- Dimension the width and length of the building.
- Use the Openings option with an aligned dimension to automatically include window openings when dimensioning the exterior wall.
Add Dimensions
- Open project GSG_11_dimensions.rvt.
- Verify that the 01 - Lower Level floor plan is open.
- Click Annotate tab
 Dimension panel
 (Aligned).
 - On the Options Bar, select Wall Faces, and for Pick, select Individual References.
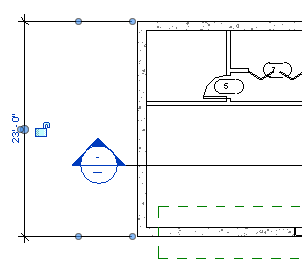
- Dimension the building width:
- Click the exterior face of the north wall.
- Click the exterior face of the south wall.
- Move the cursor to the left of the building, and click to place the dimension.
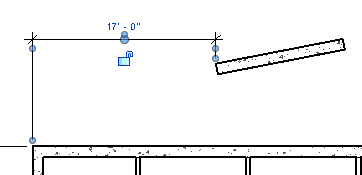
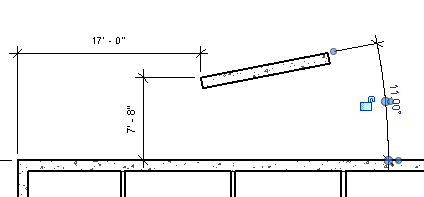
- Dimension the distance between the west wall and the feature wall:
- Click the exterior face of the west wall.
- Move the cursor over the top-left corner of the feature wall, press Tab to highlight the endpoint, then click to select it.
- Move the cursor up, and click to place the dimension.
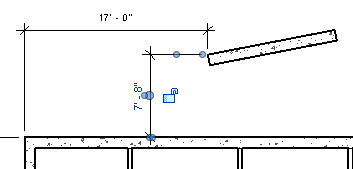
- Dimension the distance between the north wall and the feature wall:
- Click the exterior face of the north wall.
- Move the cursor over the top-left corner of the feature wall, press Tab to highlight the endpoint, then click to select it.
- Move the cursor to the left, and click to place the dimension.
- On the Dimension panel, click
 (Angular).
 - Add an angular dimension from the north wall to the feature wall:
- Click the north face of the feature wall.
- Click the exterior face of the north wall.
- Move the cursor to the right, and click to place the dimension.
- On the Dimension panel, click (Aligned).
- On the Options Bar:
- For Pick, select Entire Walls.
- Click Options.
- In the Auto Dimension Options dialog, select Openings, and click OK.
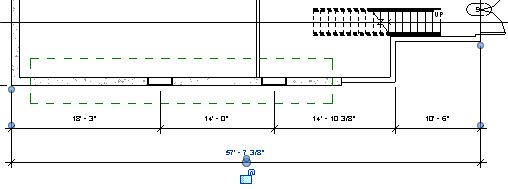
- Dimension the window openings and intersections for the south wall:
- Click the south exterior wall.
- Click the 2 adjacent south walls.
- Move the cursor down, and click to place the dimension.
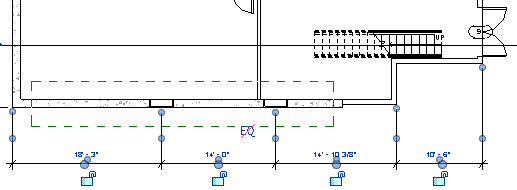
- On the Options Bar, for Pick, select Individual References.
- Dimension the length of the building:
- Click the exterior face of the west wall.
- Click the exterior face of the east wall just below the double door.
- Move the cursor below the previous dimension, and click to place the dimension.