In this exercise, you work in elevation and plan views to add windows to the model. You use alignment and dimension tools to more precisely position the windows.
|
Objectives
- Place windows.
- Duplicate and modify a window type to create a different window size.
- Use the Align tool to position windows.
- Use the Aligned dimension tool to reposition windows to be equidistant from each other.
Add Windows
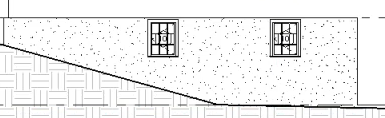
- Place 2 windows:
- Open project GSG_07_place_windows.rvt.
- In the Project Browser, under Elevations (Building Elevation), double-click South.
- Click Architecture tab
 Build panel
 (Window).
 - In the Type Selector, verify that Casement 3x3 with Trim 36" x 48" is selected.
- If needed, click Modify | Place Window tabTag panel
 (Tag on Placement) to place tags with windows.
 - Click to place 2 windows in the foundation wall, as shown, and press Esc twice to exit the Window tool.
- Create a window type:
- In the drawing area, select the window on the right, and on the Properties palette, click
 (Edit Type).
 - In the Type Properties dialog, click Duplicate.
- In the Name dialog, enter 36" x 36", and click OK.
- Under Dimensions, for Height, enter 3', and click OK.
- Select the window on the left, and in the Type Selector, select Casement 3x3 with Trim 36" x 36".
- In the drawing area, select the window on the right, and on the Properties palette, click
- Align windows:
- Click Modify tabModify panel
 (Align).
 - Click the top of the foundation wall, and click the top edge of the trim of the right window.
Check the status bar to make sure that you are selecting the top of the wall and not the 02 - Entry Level line.
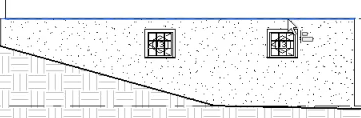
- Repeat the same steps to align the left window with the top of the wall.
- Click
 (Modify).
- Click Modify tab
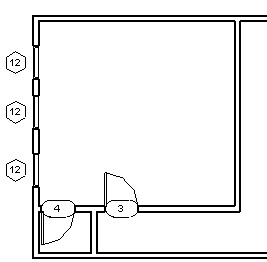
Dimension Windows For Equal Spacing
- Open the 02 - Entry Level floor plan.
- Click Architecture tabBuild panel (Window).
- In the Type Selector, select Casement 3x3 with Trim 36" x 48".
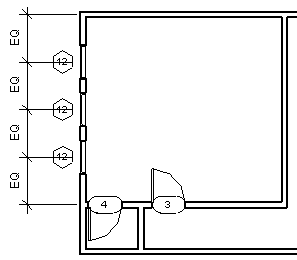
- Place 3 windows in the outside edge of the west wall, as shown.
- Click Annotate tabDimension panel
 (Aligned).
 - Select the north wall, select each of the window centerlines, and then select the horizontal interior wall.
- Click to the left of the west wall to place the dimension line.
Note that each of the 4 dimensions is different.
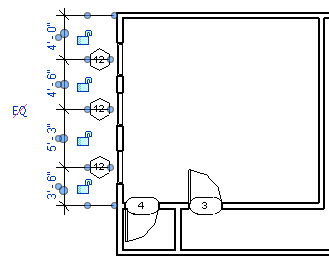
- Click the equality symbol (EQ), and then press Esc twice.
The windows are moved so that all of the dimensions are equal.
- Select the interior wall that contains the doors; position the cursor over the wall, and when you see the move icon
 , drag the wall up or down to see how the design intent is maintained.