In this exercise, you work on different levels to add foundation walls, as well as exterior and interior walls to the project.
|
Objectives
- Add foundation walls using the Wall tool.
- Add exterior walls by copying the foundation walls and using the Paste Aligned to Selected Levels tool.
- Add interior walls to the lower level using the Wall tool.
- Use the Trim/Extend tool to create an opening for a corridor.
- Place interior walls on the entry level using the Create Similar command on the context menu.
Create Foundation Walls
- Open project GSG_02_create_walls.rvt.
- In the Project Browser, under Floor Plans, double-click 00 - Foundation to open the view in the drawing area.
- Click Architecture tab
 Build panel
 (Wall).
- On the Properties palette, click the Type Selector drop-down, and select Basic Wall: Retaining - 12" Concrete.
- On the Options Bar:
- For Height, select 02 - Entry Level.
- For Location Line, select Finish Face: Interior.
- Verify Chain is selected.
- Click Modify | Place Wall tabDraw panel
 (Line).
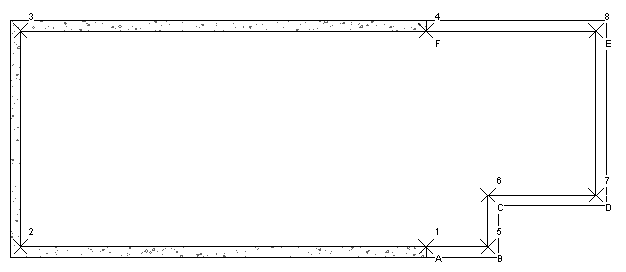
- Draw walls starting at point 1 in the drawing area and ending at point 4.
These points were added to the project to make it easier to draw the walls to specific locations.
- Press Esc to change options and place another wall.
- On the Options Bar:
- For Height, select 01 - Lower Level.
- For Location Line, select Finish Face: Interior.
- Verify Chain is selected.
- Click point A, press Spacebar to flip the direction of the wall, and click point B.
- Continue clicking points to draw walls from point C and ending at point F.
- To end the command, on the Modify | Place Wall tab, click
 (Modify), or press Esc twice.
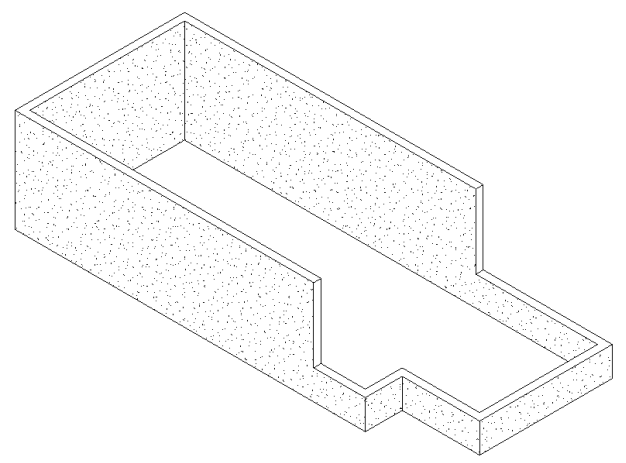
- Click View tabCreate panel
 (Default 3D View).
Add Exterior Walls
- Working in the 3D view, select all of the walls in the view by dragging a selection window from right to left.
- Click Modify | Wall tabClipboard panel
 (Copy to Clipboard).
- On the Clipboard panel, click the Paste drop-down, and click
 (Aligned to Selected Levels).
- In the Select Levels dialog, select 02 - Entry Level.
- On the Properties palette make the following changes to the selected walls, and click Apply:
- In the Type Selector, select Basic Wall: Generic-6".
- For Top Constraint, select Up to level: 03 - Roof.
- For Top Offset, enter 0'0".
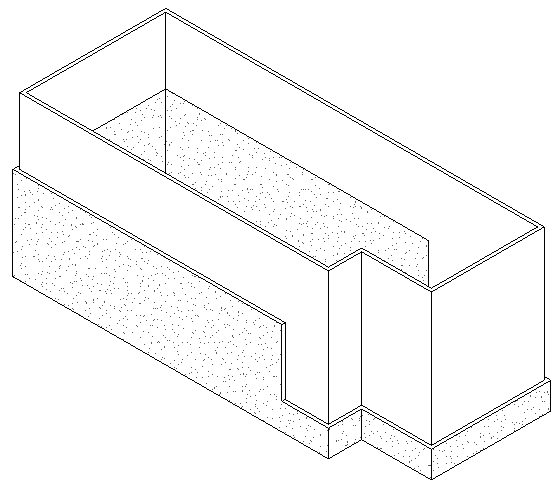
- Select the walls with the base not touching the foundation below.
Note: Press and hold Ctrl and click to select more than 1 wall at a time.
- On the Properties palette, for Base Constraint, select 01 - Lower Level, and click Apply.
Add Interior Walls
- In the Project Browser, under Floor Plans, double-click 01 - Lower Level.
- Click Architecture tabBuild panel (Wall).
- In the Type Selector, select Basic Wall: Generic - 6".
- On the Options Bar:
- For Height, select 02 Entry Level.
- For Location Line, select Wall Centerline.
- Clear Chain.
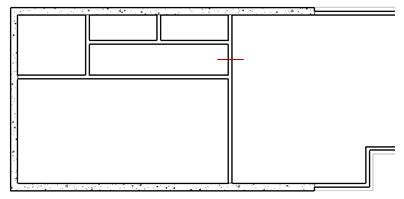
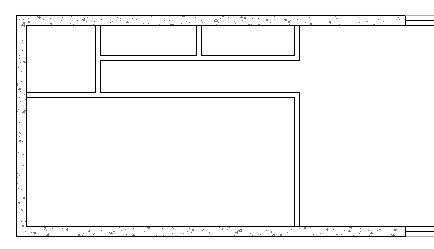
- Using the following image as a guide, place interior walls to create rooms:
- Modify walls to create a corridor:
- Click Modify tabModify panel
 (Split Element).
- Click on the wall at the location indicated by the short red line in the previous image.
- On the Modify panel, click
 (Trim/Extend to Corner).
- Trim the split wall to create a corridor as shown.
Note: When trimming in Revit LT, select the portions of the elements you want to keep.
- Click Modify tab
- Open the 02 - Entry Level floor plan.
- Right-click one of the perimeter walls, and click Create Similar.
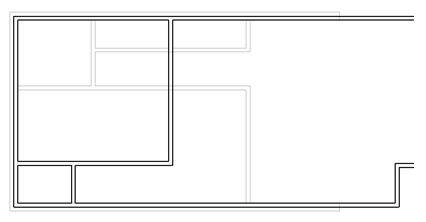
- Using the following image as a guide, place additional walls to create rooms.
- Click
(Modify) to complete the command.