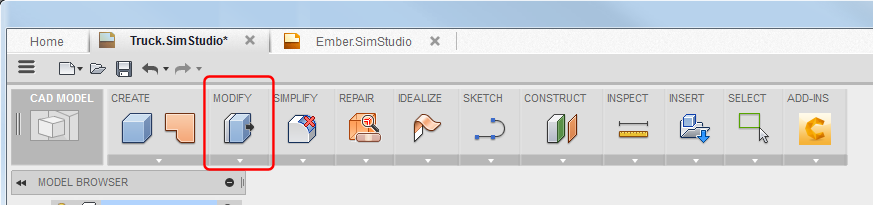
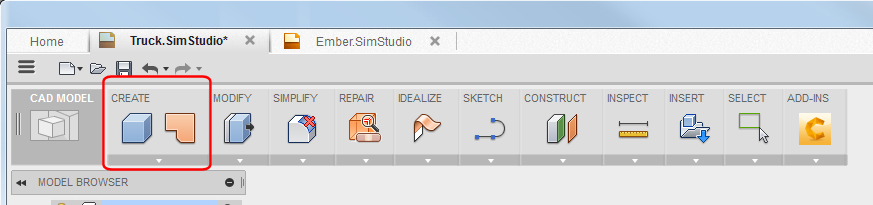
The following first group of commands are located in the MODIFY panel. Scroll-down the page to find other commands located in the CREATE panel.
Move
Use MODIFY  Move to move or rotate objects.
Command highlights:
- Cursor-based tooltips guide you through the process.
- With Transform set to Manipulator, use the manipulators and dialog entry fields to set the Distance and Angle values.
- With Transform set to Point to Point, click beginning point then endpoint to define translation vector.
- Set Pivot repositions the manipulator. Click the green check mark to return to the move operation.
Align
Use MODIFY Align to move an object by aligning with other geometry.
Command highlights:
- Cursor-based tooltips guide you through the process.
- Use Object to control selectable geometry.
- You can use snap points for object and target.
- With cursor paused over a face, hold the Ctrl (Command (Mac)) key to lock that face for snap selection.
Scale
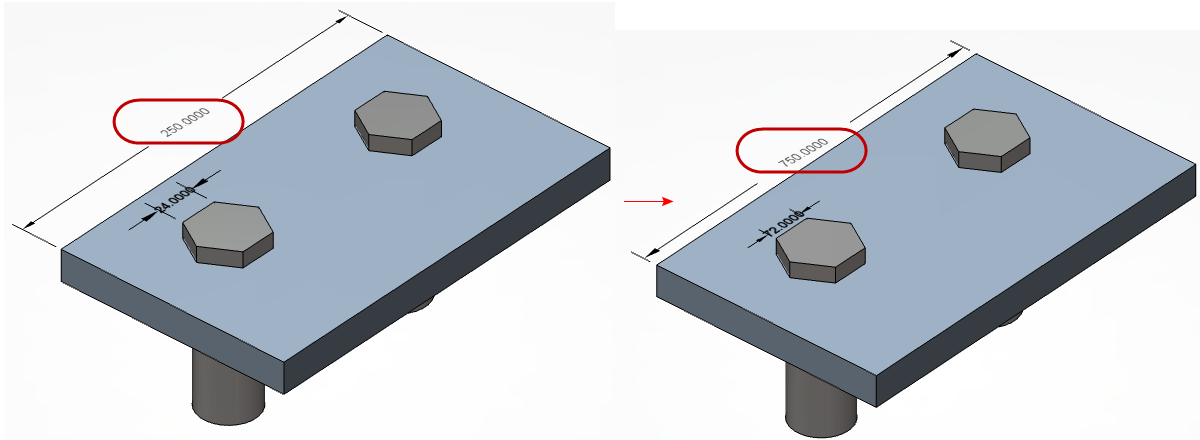
Use MODIFY Scale to scale objects.
Command highlights:
- Cursor-based tooltips guide you through the process.
- Use the manipulators and dialog entry fields to set the Scale Factor (and Distance values, if Non Uniform).
- Selected entities are scaled about the Point you select.
Mesh to BRep
Use MODIFY Mesh to BRep to convert a mesh body to a BRep body.
Command highlights:
- Cursor-based tooltips guide you through the process.
- You can select multiple mesh bodies for conversion.
- Choose the Boolean Operation appropriate for your modeling needs.
BRep to Mesh
Use MODIFY BRep to Mesh to convert a BRep body to a mesh body.
Command highlights:
- Cursor-based tooltips guide you through the process.
- You can select multiple mesh bodies for conversion.
- Use Refinement Options to quickly change slider values and obtain appropriate mesh resolution.
- Surface Deviation controls the maximum distance between the facet and surface edges.
- Normal Deviation controls the maximum angle between the normal vectors of the facets.
- Choose the Boolean Operation appropriate for your modeling needs.
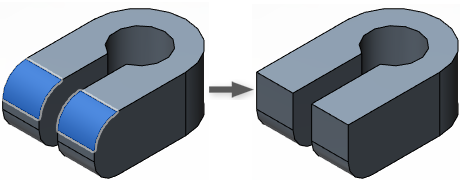
Delete
Use MODIFY Delete to delete objects from your model.
Command highlights:
- Cursor-based tooltips guide you through the process.
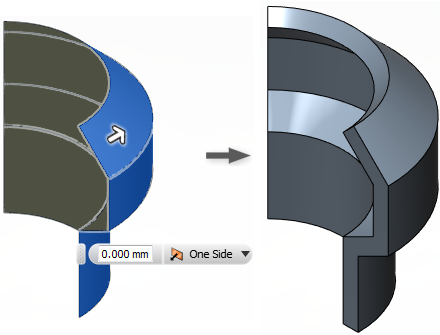
- Does not convert a solid into a quilted surface. If you delete a face on a solid, adjacent faces are extended or modified to heal the model.
- Examples:
The selected face is tangent to the radial face. The radial face is extended to the planar face.
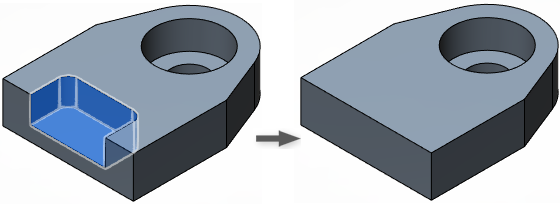
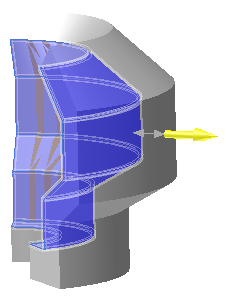
All faces in the pocket are deleted. The top and end faces are extended.
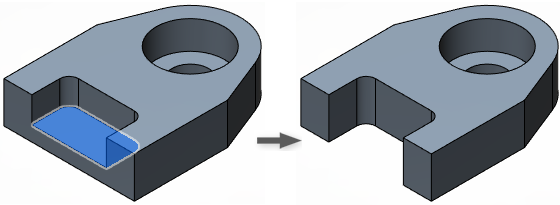
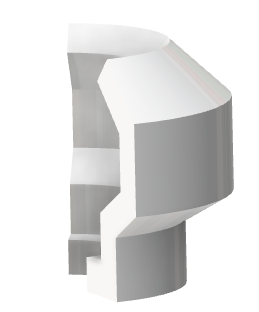
The model is cut, and the side faces of the pocket extended
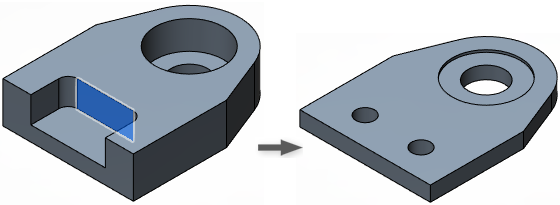
The model is cut, and the bottom face of the pocket extended.
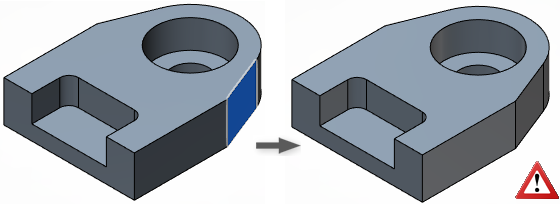
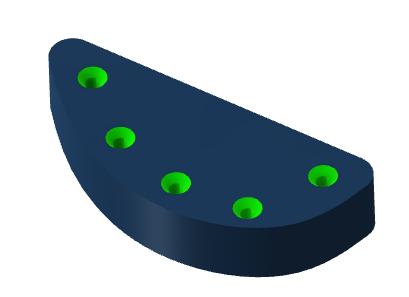
None of the adjacent can be extended to heal the model, so an error displays.
The following commands are located in the CREATE panel.
Thicken
Use CREATE Thicken to add thickness to a surface and create a solid body.
Command highlights:
- Cursor-based tooltips guide you through the process.
- You can select multiple faces to thicken.
- Use Chain Selection to automatically select tangentially connected faces.
- Choose the Boolean Operation appropriate for your modeling needs.
Boundary Fill
Use CREATE Boundary Fill to combine solids, workplanes, and surfaces into cells.
Command highlights:
- Cursor-based tooltips guide you through the process.
- Cells are formed where the selected objects intersect.
- Use Chain Selection to automatically select tangentially connected faces.
- Choose the Boolean Operation appropriate for your modeling needs.
Rectangular pattern
Use CREATE Pattern Rectangular Pattern to create copies of objects in one or two directions.
Command highlights:
- Cursor-based tooltips guide you through the process.
- With Suppress checked, each instance shows a checkbox. Click the check mark for an instance to suppress it.
- Use the manipulators and dialog entry fields to set the Distance and Quantity values, as appropriate.
Circular pattern
Use CREATE Pattern Circular Pattern to create copies of objects in an arc or circular pattern.
Command highlights:
- Cursor-based tooltips guide you through the process.
- With Suppress checked, each instance shows a checkbox. Click the check mark for an instance to suppress it.
- Use the manipulators and dialog entry fields to set the Total Angle and Quantity values, as appropriate.
Create a pattern along a path
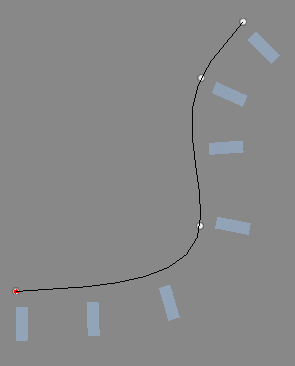
Use CREATE Pattern Pattern on Path to create copies of objects along a path.
Command highlights:
- Cursor-based tooltips guide you through the process.
- With Suppress checked, each instance shows a checkbox. Click the check mark for an instance to suppress it.
- Use the manipulators and dialog entry fields to set the Distance, Quantity, and Start Pointvalues, as appropriate.
- With Distance Type set to Extent. the Distance value represents the full extent of the pattern with occurrences evenly spaced.
- With Distance Type set to Spacing. the Distance value represents the distance from one occurrence to the next.
 |
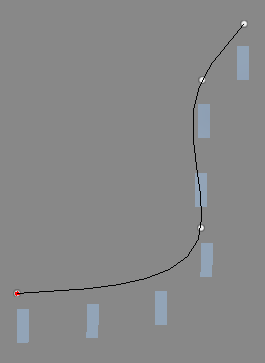 |
| Path Direction orientation | Identical orientation |
Mirror
Use CREATE Mirror to mirror selected objects across a face or plane.
Command highlights:
- Cursor-based tooltips guide you through the process.
- Creates and maintains symmetrical features, solids, and components.
Offset
Use CREATE Offset to create a surface or quilt at an equal distance from the originals.
Command highlights:
- Cursor-based tooltips guide you through the process.
- Use Chain Selection to automatically select tangentially connected faces.
- Choose the Boolean Operation appropriate for your modeling needs.
- Choose the Objects To Cut setting appropriate for your modeling needs.