A widget is a functional piece of code that can be added to a flexible web layout. Most widgets are self-contained, so they can be added to the layout without affecting other functionality. Widgets use JavaScript for client-side interaction, and some also require pages on the web tier, written in a supported language for the Infrastructure Map Server Web API.
Example 1 is a widget that is designed to be called as a command from a menu. It displays a JavaScript alert like Hello World: A Simple Invoke Script, but it uses an external JavaScript file. It uses the following files in the folder WebServerExtensionsInstallDir\www\fusion:
- widgets\Example1.js
- widgets\widgetinfo\example1.xml
The JavaScript file, Example1.js, contains a class definition for the widget. All widgets must inherit from the base class Fusion.Widget. Because this is a simple widget, it only has an initialize method and an activate method. More complex widgets require additional methods.
Fusion.Widget.Example1 = OpenLayers.Class(Fusion.Widget,
  {
    uiClass: Jx.Button,

    initializeWidget: function(widgetTag)
    {
      this.enable();
    },

    /**
     * Function: execute
     *
     * Says hello
     *
     */
    activate: function()
    {
      console.log('Example1.execute');
      alert("Hello World!");
    }
  }
);
The class name must match the file name of the JavaScript file. In this example, the class name is Fusion.Widget.Example1 and the file name is Example1.js.
The widget information file, widgetinfo\example1.xml, is used by Infrastructure Studio to describe the widget. This widget is designed to be incorporated into a menu, so its <ContainableBy> element is set to Any. See Example 3: Dialogs and Events for an example of a widget that is a stand-alone dialog.
<WidgetInfo>
  <Type>Example1</Type>
  <LocalizedType></LocalizedType>
  <Description>Simple Hello World example</Description>
  <Location></Location>
  <Label>Example1</Label>
  <Tooltip>Click to say hello</Tooltip>
  <StatusText></StatusText>
  <ImageUrl></ImageUrl>
  <ImageClass></ImageClass>
  <StandardUi>true</StandardUi>
  <ContainableBy>Any</ContainableBy>
</WidgetInfo>
The widget type must match the class name in the JavaScript file.
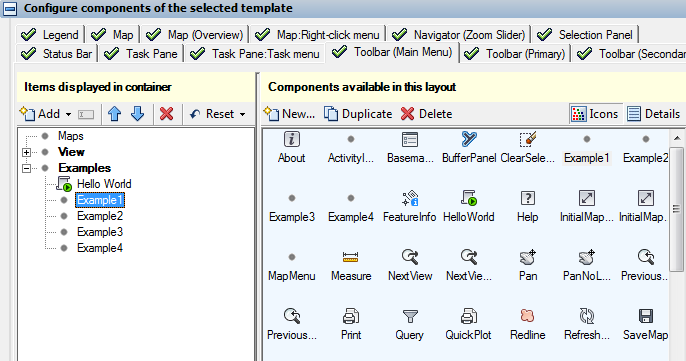
The widget information file defines a master widget type. Infrastructure Studio uses this type to create instances of the widget and add them to flexible web layouts. The sample flexible web layout already has this widget added to the menu. If you want to add a new instance to another location in the web layout, perform the following procedure:
- Select the tab for the container where you want to place the new component.
- In the Components Available in this Layout section, click New.
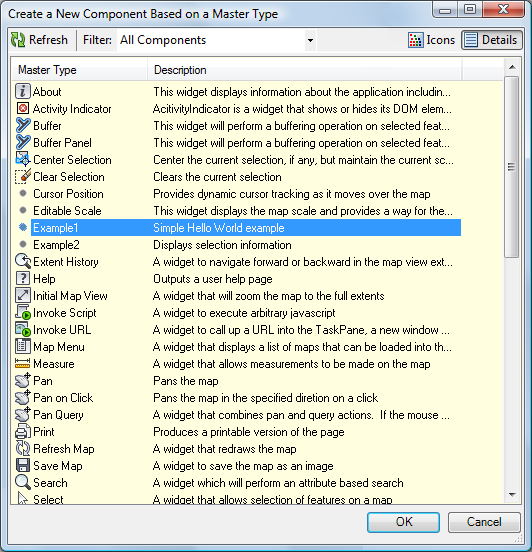
- The list of master widget types displays. Select the master type and click OK.
- This creates a new instance of the master type. Change any of the parameters for the widget, as required.
- Drag the widget to the list of items in the container to add it to the layout.
A single instance of a widget can be referenced in more than one place. The parameters for the widget are the same for every instance. For example, the widget for Example 1 could be added to the map context menu as well as the Examples menu. It would perform the same function regardless of where it was called.
Different instances of the same master type can have different behavior. For example, the standard templates have various instances of InvokeScript widgets that perform different operations.