Now that you've had some experience with MassFX rigid bodies, you can try mCloth. This is a version of the standard Cloth modifier that works in MassFX simulations. Dynamic mCloth objects can affect and be affected by other objects in the simulation, including cloth objects and rigid bodies.
In this lesson you'll create a simple setup with a window curtain blowing in the wind. As the curtain flutters in the breeze, it knocks over a bottle on the windowsill. You'll also learn a bit more about setting up rigid bodies to simulate properly.
The exercise highlights a few aspects of using rigid bodies and mCloth in MassFX:
- Tweaking a rigid body's physical shape using the Custom option.
- Setting up an object by simulating and then using Capture Transform when the object is in the desired position.
- Adding a cloth object to a simulation and attaching it to another object.
- Allowing the cloth to be influenced by a Force space warp: Wind.
- Making the cloth object interact with a rigid body.
Skill level: Beginner to Intermediate
Time to complete: 30 minutes
Preparation for This Tutorial
- If you have not already downloaded the tutorial files (MAX scenes and other assets), download them now and unzip them into a project folder called \Autodesk 3ds Max 2016 tutorials. See Where to Find Tutorial Files.
- On the Quick Access toolbar, click
 (Project Folder) and set your current project to Autodesk 3ds Max 2016 Tutorials.
Set up the lesson:
- On the Quick Access toolbar, click
 (Open File), navigate to the
\animation\massfx
folder, and open
mcloth_start.max.
Note: If a dialog asks whether you want to use the scene’s Gamma And LUT settings, accept the scene Gamma settings, and click OK. If a dialog asks whether to use the scene’s units, accept the scene units, and click OK.
(Open File), navigate to the
\animation\massfx
folder, and open
mcloth_start.max.
Note: If a dialog asks whether you want to use the scene’s Gamma And LUT settings, accept the scene Gamma settings, and click OK. If a dialog asks whether to use the scene’s units, accept the scene units, and click OK.The scene contains two objects: a glass bottle and a checkered tabletop.
Set up the bottle:
- Open the MassFX toolbar, if necessary, and set the bottle as a Dynamic rigid body and the tabletop as a Static rigid body. Note: If you're not sure how to do this, first do the Rigid-Body Physics with MassFX lesson. This lesson builds on the skills taught in that lesson.
- On the MassFX toolbar, click
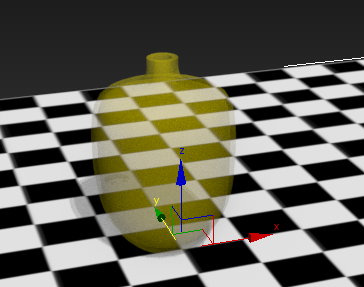
 to start the simulation.
 The bottle starts to fall to the tabletop, but then topples over. This is not desirable behavior.
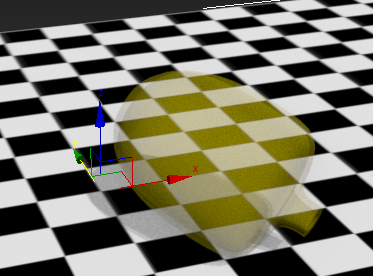
You'll determine why it's happening and then fix it.
- On the MassFX toolbar, click
 to reset the simulation, then take another look at the bottom of the bottle in the Front or Left viewport.
 The bottom is flat and parallel to the tabletop, so the problem isn't with the graphical mesh. Thus it's probably with the physical shape. But because the physical shape is coincident with the graphical mesh, it's difficult to examine it. However, it's easy to separate the two so you can get a better look at the physical shape.
- Select the bottle, then right-click and choose Hide Unselected.
The tabletop disappears.
- At the top of the modifier stack, expand the MassFX Rigid Body entry and then click the Mesh Transform item.
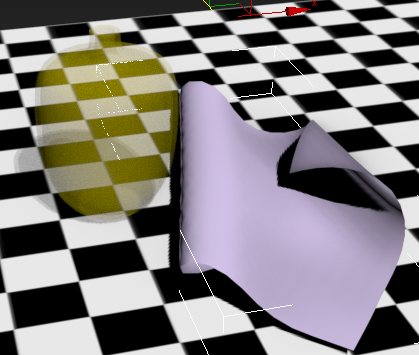
 Move the physical shape away from the graphical mesh and then orbit the viewport while examining the bottom of the physical shape.
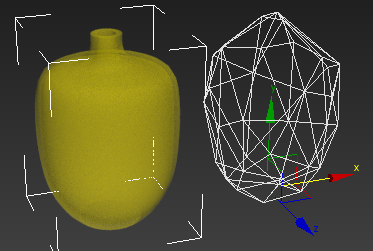
Left: graphical mesh
Right: Convex physical shape
The bottom of the physical shape is clearly uneven, which causes the instability of the bottle on the tabletop. This happens because the physical shape is a "best-fit" approximation of the graphical mesh that uses far fewer vertices. You could try to increase the number of vertices in the physical shape and generate it from the graphical mesh's vertices instead of the surface with the controls on the Physical Mesh Parameters rollout, but this would defeat the purpose of the physical shape's simplicity. An easier, more-efficient way is to use the Custom shape option.
 Undo the move of the physical shape so it's once again coincident with the graphical mesh and click the MassFX Rigid Body item on the modifier stack.
 - Right-click the active viewport and choose Unhide All.
- On the Physical Shapes rollout, click Convert To Custom Shape.
This changes the Shape Type setting to Custom and creates a new Editable Mesh object with the same name as the bottle, superimposed over the original bottle. The new object is a geometric copy of the physical shape created by the Convex shape type, and is known as the mesh source.
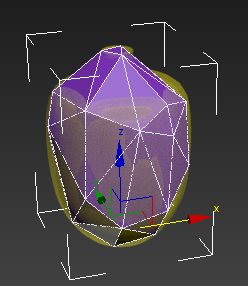
The mesh source superimposed on the original object
The name of the mesh source is reflected on the Physical Mesh Parameters rollout, which now shows the controls for the Custom physical shape type. In this case, all the controls are buttons.
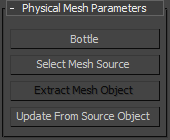
- On the Physical Mesh Parameters rollout, click Select Mesh Source.
This selects the Editable Mesh object. You'll edit this object to give it a flat bottom and then update the physical shape from the mesh source.
- On the
 Modify panel, activate the
  Vertex sub-object level and then in the Front viewport region-select the bottom-most vertices. This should be about five vertices.
 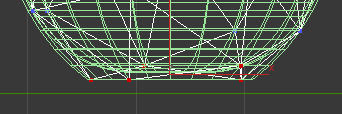 Tip: If you have trouble seeing the vertices, turn on
 (Isolate Selection Toggle) on the status bar. While active, Isolate Selection shows only the current selection and hides everything else. If you use this option, turn off Isolate Selection after selecting the vertices.
 - Activate the Top viewport, then at the bottom of the Edit Geometry rollout, click View Align.
This moves the selected vertices to the average of their Z positions, making them all the same height. However, this is slightly higher than the bottom of the bottle.

- In the Front or Left viewport, move the vertices vertically to the height of bottom of the bottle. This should be a relatively small adjustment.

- Exit the Vertex sub-object level and select the original Bottle object (with the MassFX Rigid Body modifier still applied).
- On the Physical Mesh Parameters rollout, click Update From Source Object.
This copies the edited structure of the custom mesh source object back to the physical shape of the bottle.
- On the Physical Mesh Parameters rollout, click Select Mesh Source, then press
 to delete the mesh source. Select the Bottle object again.
 The mesh source is no longer necessary for now, but you can easily derive it again from the physical shape with the Extract Mesh Object function on the Physical Mesh Parameters rollout.
- Start the simulation.
The bottle should drop to the floor without tipping over and then remain upright and still.
Tip: If you see any instability, such as the bottle bouncing in place, click on the MassFX toolbar to open the MassFX Tools dialog to the World Parameters panel. On the Scene Settings rollout, set Rigid Bodies
  Substeps to 2 or more.
 - After the bottle stabilizes for a bit around frame 40, stop the simulation by clicking Start Simulation again.
The time slider remains at its current position.
- Open the MassFX Tools dialog to the
 Simulation Tools panel, and on the Simulation rollout, click the Capture Transform button.
 This sets the bottle's initial transform (where it starts out in the simulation) to its current position.
- On the MassFX toolbar, click to reset the simulation.
The bottle stays put.

In physics simulations, the physical shape that the simulation engine uses for a dynamic object is generally not identical to the graphical mesh that 3ds Max uses to render the object. Typically the physical shape is simpler, which usually suffices to represent the object's presence in the simulation while easing the burden on the simulation engine.
However, this disparity in shapes can make it difficult to place one object squarely on another by eye. To make this easier, MassFX has a Capture Transform function. To use it, you first place one object above the surface on which it is to rest at the start of the final simulation. Then you run a test simulation so the object can fall and settle into place. Once it has done so, you stop the simulation without resetting and use Capture Transform on the object. Then, when you reset the simulation, the object stays in place.
Set up the curtain:
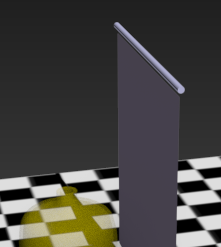
- In the Left viewport, create a Plane primitive that's about twice as high and twice as wide as the bottle. This is the curtain. If necessary, use the Top viewport to move the curtain so it's about a grid square away from the right side of the bottle. Also, the bottom of the curtain should be a little higher than the floor.
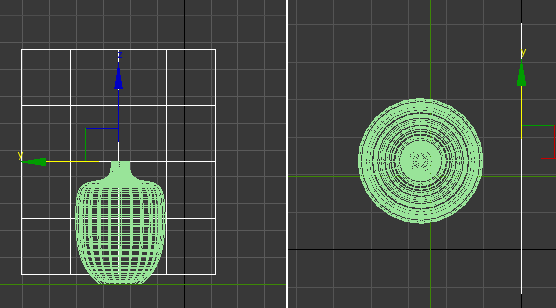
Left: Left viewport
Right: Top viewport
- On the Modify panel, set Length to 84.0 and Width to 72.0.
These settings are depicted in the preceding illustration.
- Set both Length Segs and Width Segs to 20.
This increases the mesh resolution so the cloth can bend and fold more realistically.
- With the curtain object selected, on the MassFX toolbar click
 (Set Selected As mCloth Object).
 The plane now acts like a piece of cloth in simulations.
- Start the simulation, watch the curtain collapse to the floor while folding up, and then reset the simulation.
The curtain material seems a bit stiff.
- On the Physical Fabric Properties rollout, turn off Use Ortho Bending, then run the simulation again.
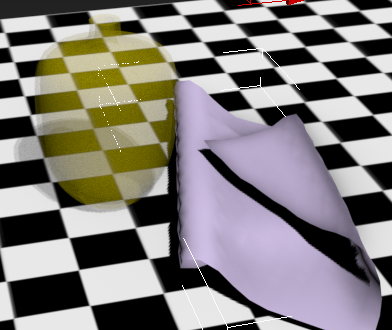
Now the cloth behavior seems a bit more natural.
Tip: Also present on the Physical Fabric Properties rollout are a number of other settings that affect cloth behavior, each with a descriptive tooltip. To learn more about how mCloth works, read some of the tooltips and try changing the settings, running the simulation each time. After experimenting with these, return all the settings except Use Ortho Bending to their defaults.Next you'll make a curtain rod and attach the curtain to it.
- Reset the simulation. In the Front viewport, create a Cylinder primitive above the curtain. Set the Radius to 1.0 and the Height to 75.0 and move the cylinder so it's just above the top of the curtain; it needn't be touching.
- Select the curtain, and on the Modify panel modifier stack, expand the mCloth entry so the Vertex sub-object level is shown. Click the Vertex entry.
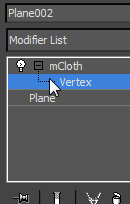
The Modify panel changes to display the Soft Selection and Group rollouts, and the curtain's vertices appear in the viewports.
- In the Left viewport, select the top row of vertices. Then, on the Group rollout, click Make Group. When the Make Group dialog appears, click OK to continue.
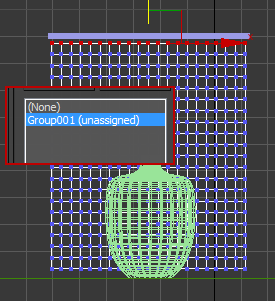
Main image: Curtain in Left viewport with top row of vertices selected
Inset: Group list on the Modify panel
The list on the Group rollout now shows the group you just created, Group001, and its unassigned status. You'll assign a Node constraint to the group, which means that those vertices will "stick" to the rod during the simulation.
- In the Group rollout Constraint group, click the Node button and then select the curtain rod in a viewport.
The Group001 item in the list now shows that it's constrained as a node to Cylinder001, the curtain rod.
Note: The curtain rod need not be part of the simulation. - Run the simulation again, then reset it.
This time the curtain remains in place.
Add the Wind force:
- Anywhere in the Left viewport, create a Wind space warp. The arrow should be pointing toward the negative X axis; that is, in the same direction as the vector from the curtain to the bottle.
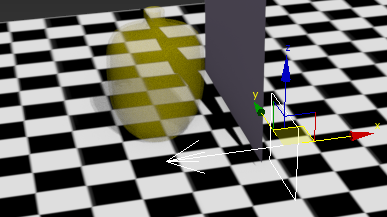
The Wind space warp selected in the Perspective viewport
Note: If you're not sure how to add the space warp, follow these steps:- On the
 Create panel activate
  (Space Warps).
 - On the Object Type rollout, click to activate Wind.
- In the Left viewport, position the mouse to the right of the curtain object and drag out a square about 2 x 2 grid squares in dimension. The size and position aren't important.
- On the
- Select the curtain. On the Modify panel Forces rollout, click Add and select the Wind space warp.
The space warp's name appears in the Scene Forces Applied list.
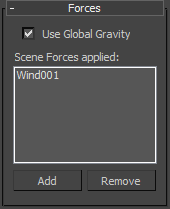
The wind will now affect the curtain in the simulation, but it won't affect any of the other objects.
- Run the simulation and then reset it.
The curtain moves a bit, but the wind at its default Strength setting of 1.0 isn't powerful enough to affect it much.
- Select the Wind space warp in a viewport. On the Modify panel Parameters rollout, set Strength to 50.0.
- Check the simulation again.
The curtain now blows forcibly agains the bottle, but doesn't move it because it's not pushing hard enough.
- Select the curtain again. On the Interaction rollout, make sure Push Rigid Objects is on and set the Push value to 100.0.
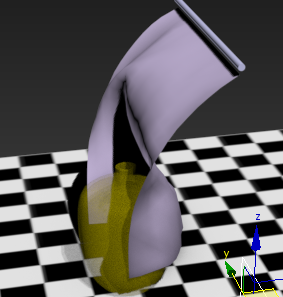
- Run the simulation.
The increased Push value causes the blowing curtain to knock the bottle over.
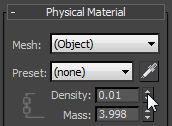
 Tip: Instead of changing the Push value, you could adjust the bottle's Density, making it lighter. In this case it wouldn't help because even at the lowest possible Density value, 0.01, the curtain pushing at a 1.0 value wouldn't be strong enough to knock over the bottle. This is because the bottle is relatively large and heavy.
If the curtain needs to knock over some items but not others, you can set Push just high enough to knock them over, then increase the Density of the heavier items.
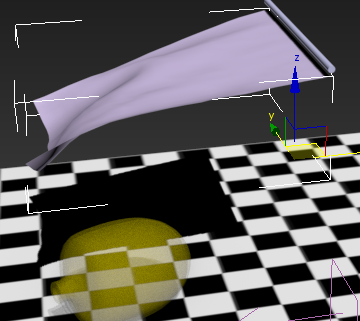
- Just for fun, set the bottle's Density to 0.01, leaving the curtain's Push value at 100. To do this, select the bottle, then on the Modify panel go to the Physical Material rollout and adjust the Density value. The easiest way to do so to right-click the spinner.
Now when you run the simulation, the curtain sends the bottle flying, even though the bottle isn't subject to the direct force of the Wind space warp.
- If you like, bake the simulation and then render it as an animation.
As you can see, even in a simple simulation such as this there are lots of variables to play with. By experimenting and adjusting a lot, you can achieve realistic or even surrealistic animations relatively easily with MassFX and mCloth.
Save your work:
- Save the scene as my_mcloth_curtain.max.
The file mcloth_final.max includes the MassFX setup described in this lesson, without baked animation.
To see a rendering of the cloth animation, play this movie:
Summary
The most efficient way to position a Dynamic rigid body on a surface at the start of a simulation is to use the Capture Transform function.
To stabilize a rigid body, it might be necessary to tweak the physical shape using the Custom shape type tools.
Cloth objects can participate fully in a simulation, both affecting and being affected by other objects. They can also be subject to Force space warps such as Wind.