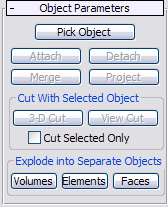
The Object Parameters rollout controls let you combine and separate Body Objects while maintaining the solid-geometry format.
Also available here are commands for subdividing objects, splitting faces, and performing simple Boolean operations. For example, you can position a spline curve over an object and then use the curve to cut through the entire object or selected faces in the view direction, thus subdividing the faces.

- Pick Object
- Click this button, select the top-level object to combine, and then click Attach, Merge, Project, or either Cut button.
- Attach
- Attaches an object by simply inserting it into the Body Object as a separate element.
- Detach
- Removes (detaches) selected sub-objects from the parent object and creates a new Body Object.
Select one or more faces or elements and click Detach (it’s not necessary to use Pick Object). The detached sub-objects are removed from the source object and become separate Body Objects.
- Merge
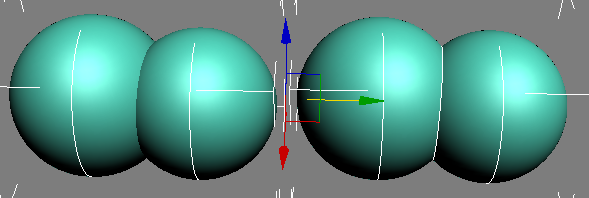
- Merges the selected object into the Body Object using the Intersection process.

Left: Spheres attached (retain element status)
Right: Spheres merged (single element, new center edge shows intersection)
- Project
- Projects a curve onto a Body Object to create new edges on that Body Object.
Projection occurs along the normal of a single face. If the Body Object has more than one face, select one face to project the curve onto before using Project.
Cut With Selected Object group
- 3-D Cut
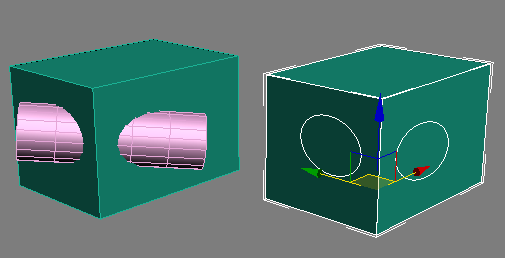
- Cuts the Body Object with a 3D object. This produces new edges corresponding to the intersection of the object with the Body Object geometry. After cutting, the cutter object is deleted.
To use, position the objects so the 3D object intersects the body Object where you want to create new faces, click Pick Object, select the 3D object, and then click 3-D Cut. The cut is performed and the cutting object is deleted.

Left: Body Object (box) with intersecting cylinder
Right: After using 3-D Cut, new edges and faces appear where the cylinder intersected the box.
- View Cut
- Cuts the Body Object using a profile projected parallel to the current active view direction. Typically the profile is a spline curve or NURBS curve.
To use, position the objects so the profile is superimposed over the Body Object to cut in the active viewport, click Pick Object, select the profile, and then click View Cut. The cut is performed and the profile is deleted.
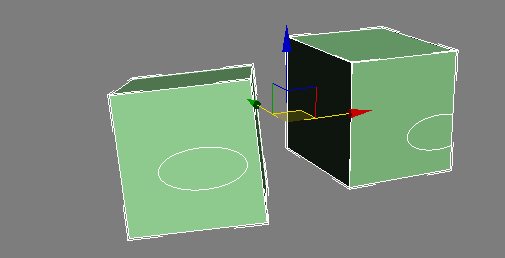
The following illustration shows two boxes, converted to Body Objects, after using View Cut with two elliptical splines. The position of each spline with respect to its box was the same, but the pairs were rotated differently, so the results are different.

Left: The spline was aligned with the box surface and the viewpoint.
Right: The spline was offset with respect to the axis between the box surface and the viewpoint.
- Cut Selected Only
- When on, cuts only selected faces or elements. Other objects that intersect are not affected.
Explode into Separate Objects group
Use the buttons in this group to break apart the Body Object geometry into separate Body Objects by decomposing it by Volume (closed solid), Element (connected face set), or Face.