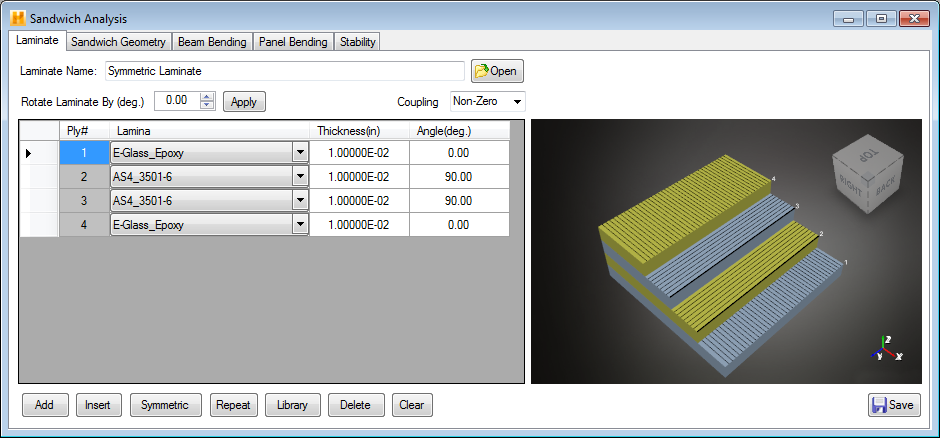
Define the laminate that will be used for the top and bottom face sheets of the sandwich panel.
The Laminate tab shown below is similar to the New Laminate window described earlier (Create a New Laminate). Using the Laminate tab, you can define the laminate in either of two ways:
- Use an Existing Laminate - Any laminate stored in the material database can be imported into the Laminate tab. To view the list of available laminates in the database, click the Open button on the Laminate tab. Select any laminate from the list by double-clicking the name of the desired laminate, which prompts Helius Composite to read the appropriate material data file and show the laminate's data. The data includes the material type, thickness, and fiber orientation angle for each material ply that makes up the laminate. You can also view a model of the laminate in the ply stack visualization window to verify the laminate is built correctly.
- Create a new Laminate - Instead of using a laminate stored in the material database, you can build a new laminate in the Laminate tab using the same procedure described earlier (Create a New Laminate). After defining the material and geometric data for the new laminate, give the laminate a name (in the Laminate Name box). Click Save to store the new laminate in the material database before attempting to perform any analysis on the laminate. (Note, the Lamina drop-down menu will include all of the laminae available in the material database when the Sandwich Analysis window was opened).
Note: The sandwich panel analysis method used by Helius Composite requires the top and bottom face sheets to be identical, balanced, symmetric laminates, i.e. [B] = [0] and A16=A26=D16=D26 = 0. See the Create a New Laminate section, discussing the use of the Coupling option.
