All created beams have default properties that are changed in the properties dialog box, which automatically appears after creating beams.
Modify the beam section
- Select the beam.
- Right click and select Advance Properties from the context menu.
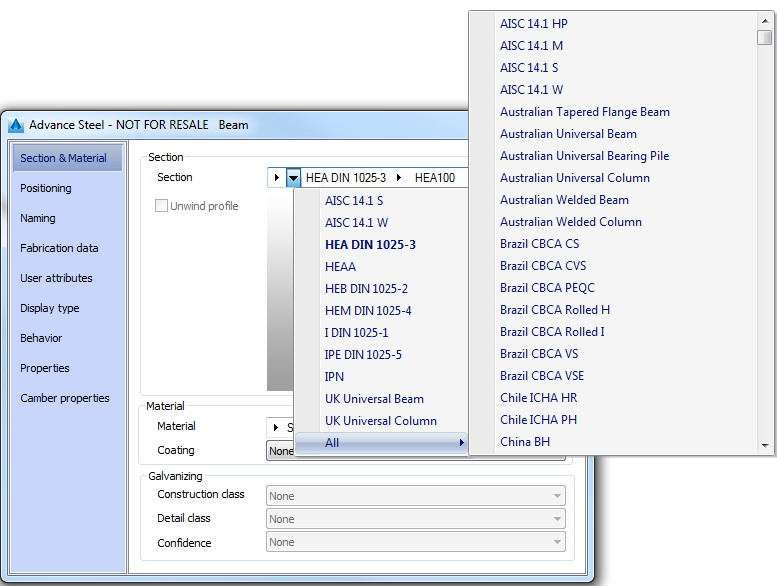
- In the properties dialog box, select the Section & Material tab.
- Select the beam section class, section type and size from the drop-down list displayed by clicking the corresponding arrow
 .
.
Note: If the desired section type (or the section size) is not in the list, selecting All displays all available section types (or section sizes) in the database.
Define an element as a main part
- Select the element (beam or plate).
- Right click and select Advance Properties from the context menu.
- In the properties dialog box, select the Naming tab.
- Click Define as main part .
- In the Assembly mark field, enter the element mark. Additionally you can define a prefix.
Define the element model role
- Select the element (beam or plate).
- Right click and select Advance Properties from the context menu.
- In the properties dialog box, select the Naming tab.
- From the Model role drop-down list select the desired model role.
Create a cambered beam
- Select the beam.
- Right click and select Advance Properties from the context menu.
- In the properties dialog box, select the Camber properties tab.
- Select the Is cambered option.
- Modify the camber properties.