Learn how to customize the weld template elements, such as the weld text, weld leader or weld symbol, to be used in detail drawings.
- Go to C:\ProgramData\Autodesk\Advance Steel 2017\Shared\Support\Symbols
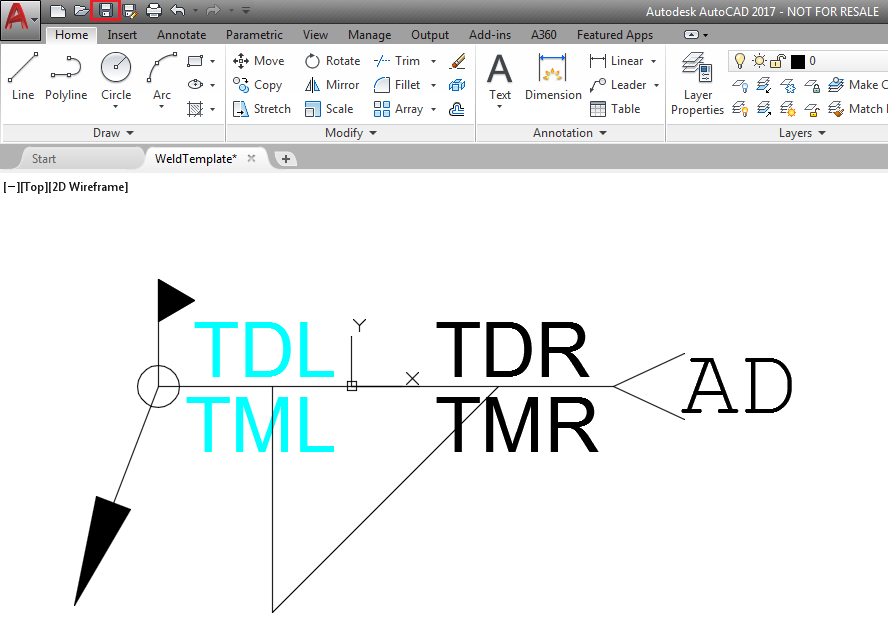
- Open the WeldTemplate.dwg in pure AutoCAD (make sure Advance Steel is not loaded):

Note: It is recommended to make a copy of the weld template DWG file to keep the original configuration intact.
To customize the weld text
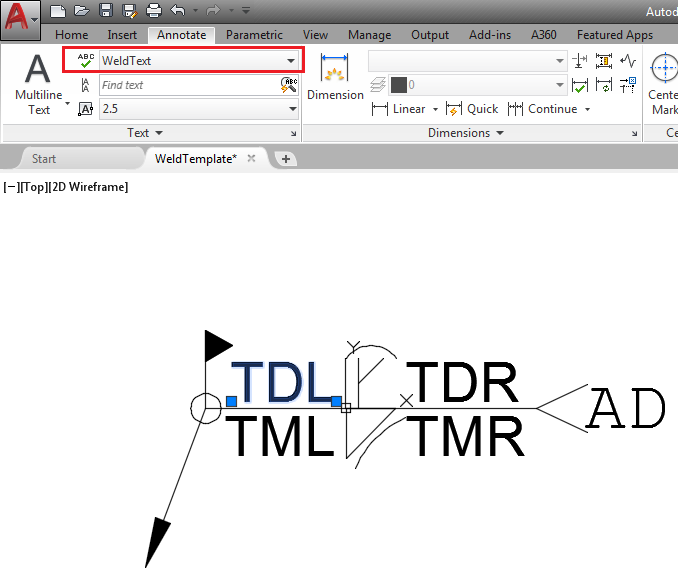
- With the WeldTemplate.dwg opened in AutoCAD, select a text block. Notice that in the Annotate tab
 Text panel, the text style is displayed for the selected text. In this example, the text style for the selected text is WeldText:
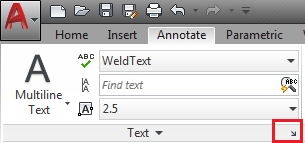
- Decide which text size you want to modify in the weld template and access the Text Style dialog by clicking the arrow in the bottom right corner of the Text panel:
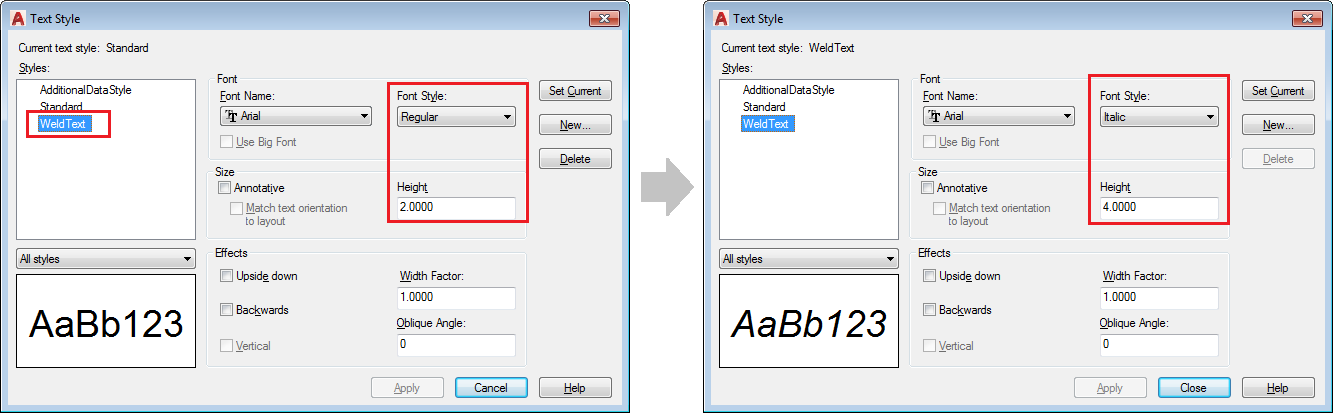
- In the Text Style dialog, choose the desired text style and make the required changes, such as, for example, the text height (4.0000) and font style (Italic):
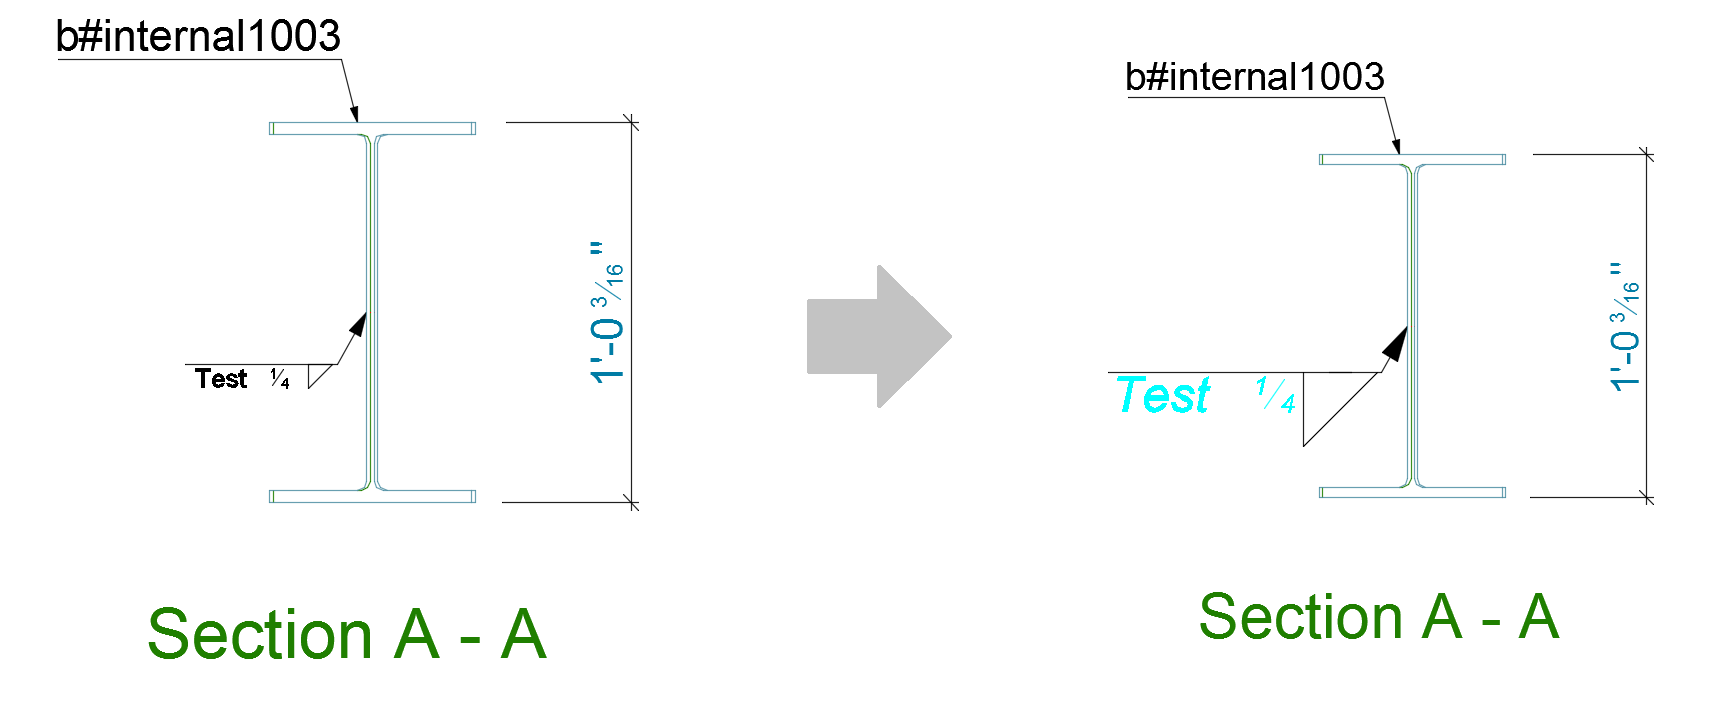
To modify the weld text color
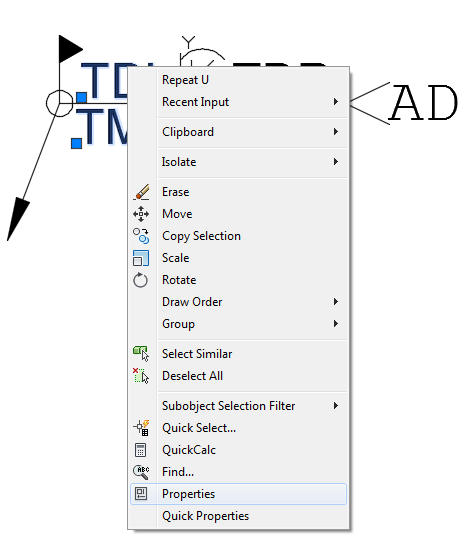
- Select the weld text
- Right-click and choose Properties from the contextual menu:
- Choose the desired color from the Color drop-down menu in the Properties dialog:

To customize the weld leader
- Select the weld leader.
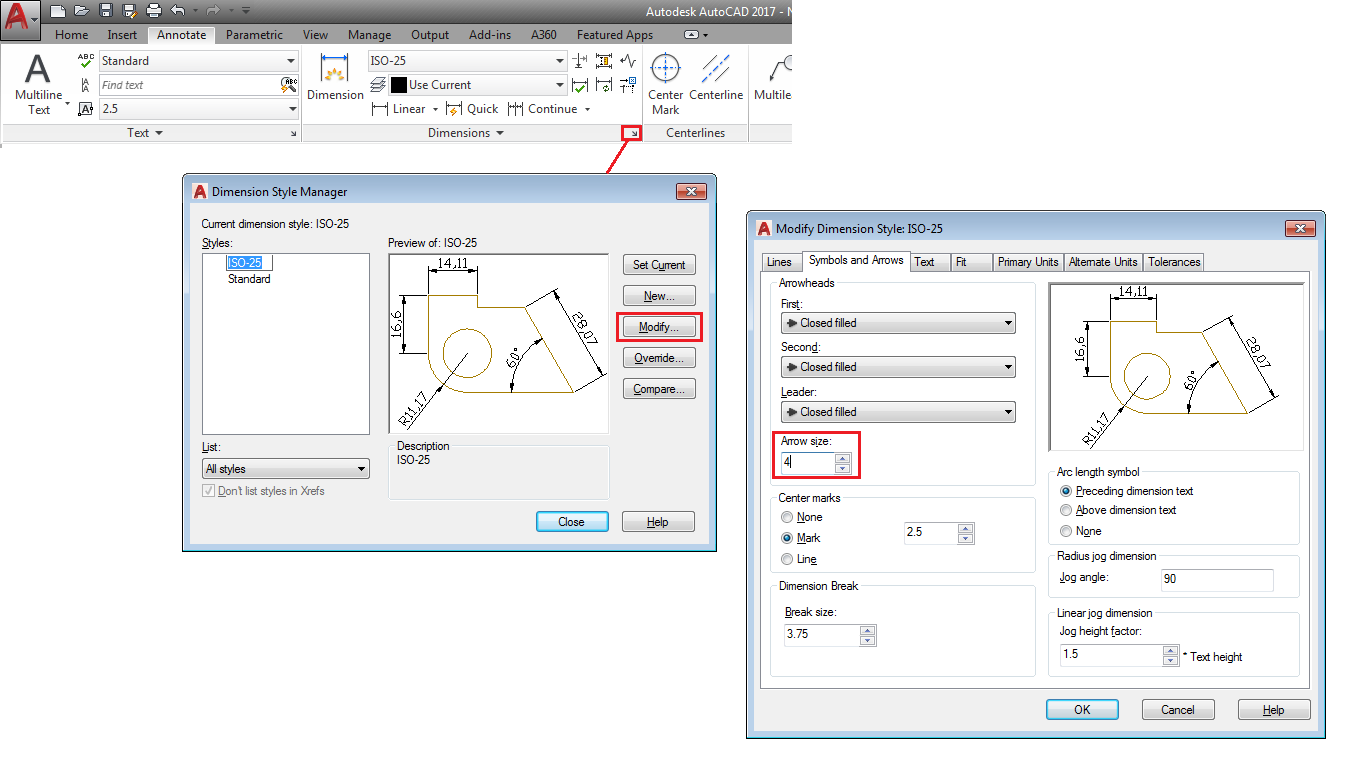
- In the Annotate tab Dimensions panel, click the small arrow in the bottom right corner to access the Dimension Style Manager dialog.
- In the Dimension Style Manager dialog, click the Modify button and make all the desired modifications (for example, modify the arrow size from 2.5 to 4):

To customize a weld symbol:
- Select the weld symbol(s).
Note: By default, the weld template only has one weld double symbol, one weld main symbol, two weld shape symbols and two weld special symbols as active (visible) layers, besides the weld leader.
To show other symbols, different from the default visible ones:
- Open the
 (layer properties manager), from the AutoCAD Home tab Layers panel.
- In the layer properties manager you can find different categories of layers, grouped by the type of symbols, to make it easier to find what you need. From these categories you can choose to make any of the layers visible, by clicking on the lightbulb symbol (yellow is on and blue is off).
- Open the
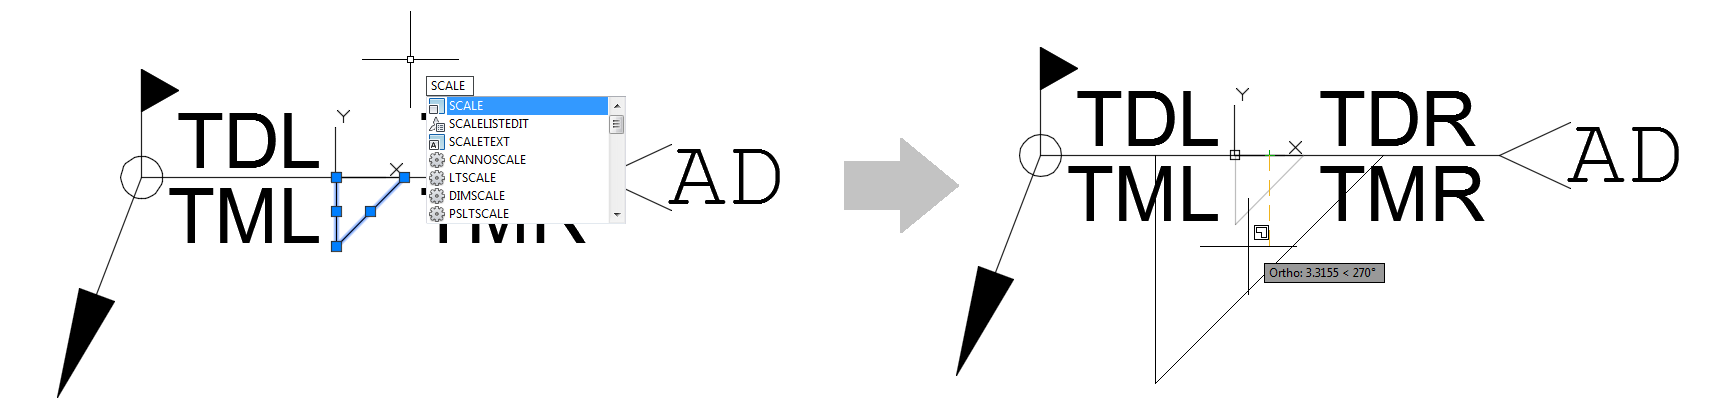
- Modify the weld symbol (WM_FilletWeld) using the AutoCAD commands (such as SCALE):
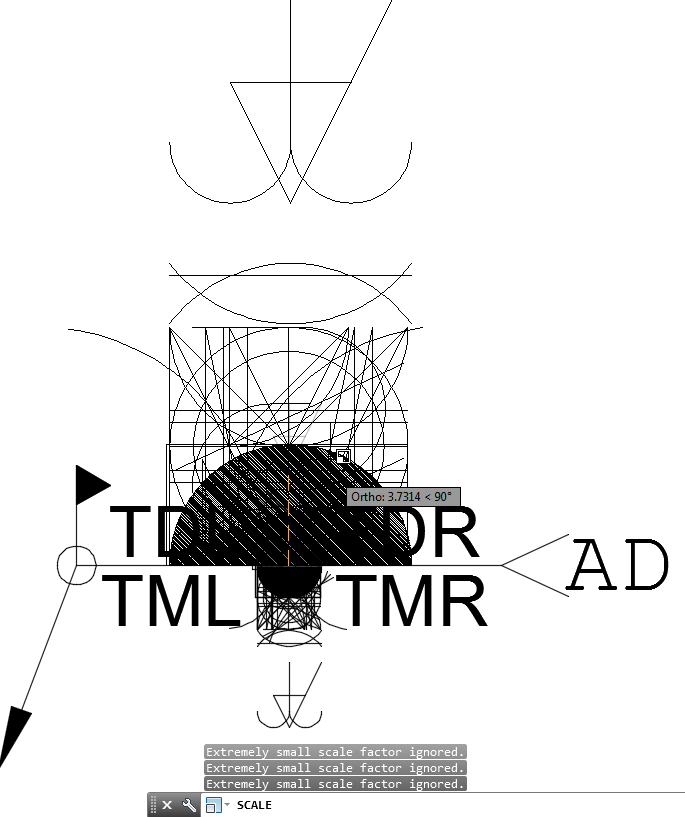
 Note: If you want to modify all the weld symbols in the template at once, right-click on All Used Layers Visibility and choose On:

This will show all the weld symbols in the template and you can select and modify them all at once (for example scale them):
After you make all the desired modifications, save and close the weld template:
Open a detail in Advance Steel and insert the specific weld label to reflect the configuration you made in the weld template:
Note: The weld template modifications will only be reflected in newly created detail drawings or in drawings where a weld symbol was never used before. Otherwise, any new weld symbol inserted in an already existing drawing will inherit the configuration of the first inserted weld symbol.