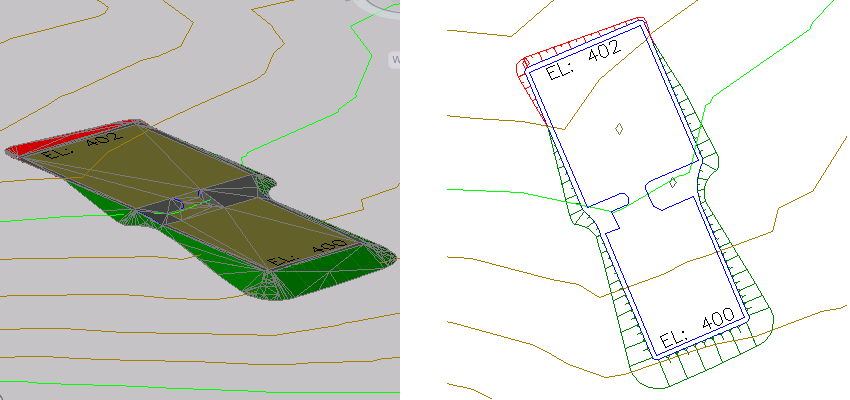
In this exercise, you will create infill gradings to fill in the open areas inside the grading group.
An infill grading has no criteria applied to it. Any area bounded by feature lines or lot lines that is not already a grading can be converted to an infill grading. Using infill gradings to fill in holes in a grading group ensures correct contour display and volume calculations.
This exercise continues from Exercise 2: Grading from a Building Footprint to a Surface.
Create infill gradings
- On the Grading Creation Tools toolbar, from the Select A Grading Criteria list, select Grade To Distance. Note:
Although an infill has no criteria, you select its grading style from an existing criteria.
- Click
 Expand The Toolbar.
 - From the Style list, select Shoulder.
This setting specifies the grading style to apply to the infill.
- Click
 Create Infill.
 - Click in the area between the building footprint and the offset feature line (near the right side of the ramp).
A diamond is displayed in that area, indicating that an infill has been created. In the left viewport, notice that the infill grading fills the entire area between the two blue feature lines.
- On the Grading Creation Tools toolbar, from the Style list, select Pad.
- Click inside the building footprint to create an infill using the Pad grading style.
- Press Enter to end the command.
In the left viewport, the gray area is the infill grading that represents the shoulder. The gold area is the building pad infill grading. The green and red areas are the grade-to-surface slope grading.

This exercise uses Grading-6.dwg with the modifications you made in the previous exercise.
To continue to the next tutorial, go to Using Feature Lines to Modify a Grading.