The same workflow (with a few minor differences) is possible whether you work in the GMask Tracer node or Action to perform matte creation. If you only need to create a matte for a particular image, then the GMask Tracer may be less taxing than Action to accomplish the task.
Here are a few tips for working in the GMask Tracer:
- You can save and load setups between GMask Tracer nodes, and also between GMask Tracer and Action nodes. You can also copy and paste compatible nodes between GMask Tracer and Action nodes.
- When accessed from the GMask Tracer, the GMask menu' s Mask tab has one extra setting: the GMask Tracer Colour field is available for you to set the blend percentage between the outgoing and incoming images inside the mask.
- You may notice a difference when using GMask blend modes within the GMask Tracer node versus Action, since the GMask Tracer works with images, while Action GMasks work with geometries.
- You can perform location-based keying operations on a GMask within the GMask Tracer or Action, using the Tracer settings. The tracer allows each GMask to host a key based on its associated media. See Creating a Location-Based Key With the GMask Tracer.
Rendering Outputs from the GMask Tracer
Use the multi-pass rendering capabilities of the GMask Tracer's Output menu to manage your outputs. You are limited to Matte primary outputs, but you can have multiple render passes. The overall functionality of the Output menu is otherwise similar to the
Action Output menu.
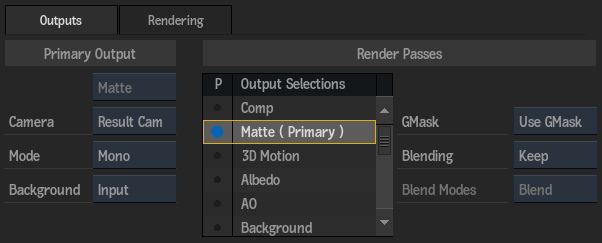
The Comp output of a GMask Tracer outputs the input, so it can be used as a pass-through, or can be used in the Camera FX pipeline.
One difference from Action, is that you have an extra option in the Matte Background box for GMask Tracer outputs. The Input option allows you to set the incoming Media Front and Matte as the Background for both the Comp and Matte outputs respectively.
Note: If you accessed the GMask Tracer as a Timeline FX, you are limited one Matte output.