Position and prepare the model for 3D printing.
The 3D Print Environment provides tools for additive manufacturing. You can print models whole or in-part based on the 3D printer in use. This environment is available only in the Part document. To print an assembly (not available in Inventor LT) use the same method that was used previously, that is, save the assembly as an STL file and send the file to a printer or print service provider.
The 3D Print is based on component and feature visibility. For features you do not want printed, change the visibility state or suppress the feature if doing so does not affect other features.
Upon entering the 3D Print Environment the model is oriented with the Z axis pointing upward. You can: change the orientation and position of the component, modify the component for printing, and partition the component. Partitions can be nested in the same printer build space or exported for use in a different print session.
Many of the standard Part modeling tools and Sketch tools are available while in the 3D Print environment so that the print model can be modified. Modifications while working in 3D Print affect only the printed part not the model.
The Additive Manufacturing 3D Print environment is accessible after you start or open a part model.
- Click Environments tab, 3D Print panel,
 to enter the environment and display the 3D Print ribbon.
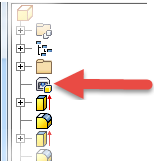
- After completing work in the 3D Print environment and exiting the environment, a 3D Print part browser node populates the model browser.

You can double-click the browser node to re-enter the 3D Print environment.