How To ... Develop A Face Area XView Checker - Part 4
| How To > Develop A Face Area xView Checker - Part 4 |
The following tutorial extends the scripted xView Check created in Part 1, Part 2, and Part 3 with a MacroScript that can be added to the Viewport Menus for easier access.
The xView Checker is available in 3ds Max 2010 and higher.
MacroScript xView_Face_Area_Checker
enabledIn:#("max")
buttonText:"Face Area"
category:"xView"
internalCategory:"xView"
tooltip:"Face Area Checker Display Mode"
(
Based on the existing xView MacroScripts already shipping with 3ds Max 2010 and higher, we can create a new MacroScript header for our Face Area Checker.
on isChecked return
xViewChecker.getCheckerName xViewChecker.activeIndex == "Face Area Checker" and xViewChecker.on
When 3ds Max wants to see whether an ActionItem in the UI has to be checked (when displayed as a button, a menu item, or a Quad menu item), it calls the isChecked handler. Here, we return true if the name of the currently active checker matches our checker's name and checking is generally enabled.
When the MacroScript is actually invoked, the execute handler will be called.
if (xViewChecker.getCheckerName xViewChecker.activeIndex == "Face Area Checker" and xViewChecker.on) then
We perform the same check as in the isChecked handler.
If our checker is the active one and checking is enabled, we simply disable the xView checking.
Otherwise, we will have to enable the checking, but first we have to find out the ID of our checker to set it as the active one.
We initialize a user variable to zero,
for i = 1 to xViewChecker.getNumCheckers() do
if xViewChecker.getCheckerName i == "Face Area Checker" do theIndex = i
and loop from one to the number of existing checkers, comparing their names with our checker's name. If we find a match, we record its index in the variable theIndex.
if theIndex > 0 do
(
xViewChecker.setActiveCheckerID(xViewChecker.getCheckerIDtheIndex)
xViewChecker.on = true
If after looping through all checkers registered with the xView system, the variable theIndex contains a value higher than zero, our checker is actually available and we can access it.
We set theactive checker ID to the ID of the checker with the index we detected.
Then, we enable the xView system.
Using the Script
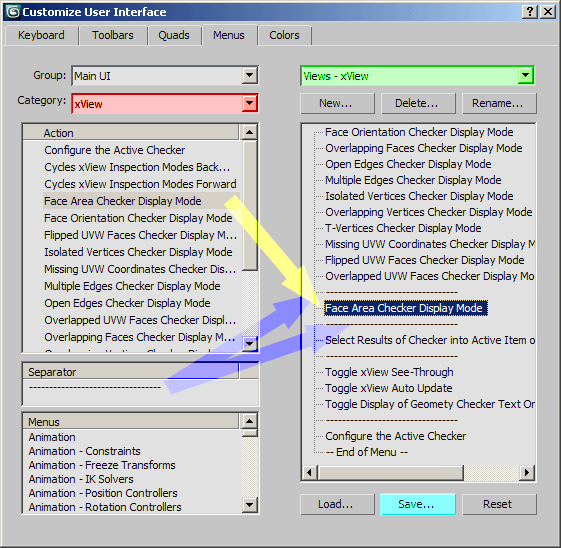
Now, that we have an xView checked and a MacroScript to control it, we can customize the Viewport Menus to add our checker to the list of available xView Checkers.
Evaluate the script by pressing Ctrl+E to create an ActionItem. A copy of the MacroScript code will be saved automatically in the \usermacros folder of 3ds Max and will be available in future 3ds Max sessions. It is NOT necessary to put the MacroScript source code in a \Startup or \Plugins folder.
At this point you can go to Main Menu > Customize > Customize User Interface and select the Menus tab in the Customize User Interface dialog.

