How To ... Develop a Bitmap Painting Tool - Basic Utility
| How To > Develop a Bitmap Painting Tool- Basic Utility |
The original code of the complete advanced version was developed in less than an hour and showcases the flexibility of MAXScript for prototyping applications of any kind.
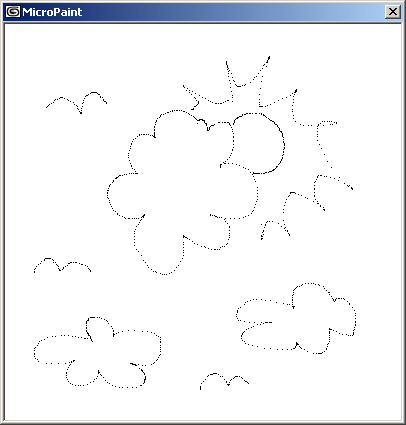
Here is the very basic initial version:
Step-By-Step
We define a macroScript called MicroPaint which will appear in the "HowTo" category.
In order to be able to close any existing dialog from previous sessions, we define the variable of the rollout to be used as dialog as a global variable.
Then we try to destroy any existing dialog from a previous session. If there is none, the try()catch() error trap will prevent any error messages.
This local variable will be used as a flag for enabling drawing. When the variable is false, the mouse move event handler will not draw. When the left mouse button has been pressed, this variable will be set to true and allow drawing until the left mouse button is released.
These local variables will contain the size of the bitmap to be painted. Simply changing this value would resize the tool to paint on a different canvas size!
This variable will contain the canvas to draw on. We initialize it to a white bitmap with a size of 400 by 400 pixels.
This is the rollout which will define the dialog with the bitmap canvas.
This is the bitmap User Interface control. It is aligned to the upper left corner of the rollout and displays the 400 by 400 canvas bitmap.
that there are two different constructors with the name bitmap- the User Interface control used here and the bitmap value constructor used two lines higher! MAXScript knows which one you have in mind based on the context - if you are inside a rollout definition scope and type in
MAXScript will create a User Interface control.
If you are inside the same rollout and type in
a new local bitmap value will be created and NOT a User Interface control!
This function will be called to draw a point on the bitmap. The argument pos will contain the 2D coordinates to place the new point at.
setPixels is used to change the color of one or more pixels in a row. The pos defines the location in the bitmap (where 0,0 is the upper left corner) the paining should start at.The colors to be changes are provided in an array. In our case, the array contains a single element, the color black.
After the black point is drawn into the bitmap, we assign it to the user interface control to update the drawing.
This dialog event handler is called whenever the left mouse button is pressed while the mouse is located over the rollout. The argument pos will contain the 2D position in rollout coordinates.
We raise the flag to notify the mousemove handler (see below) that the drawing can be started.
We also call the paintbrush function by passing the currently clicked point to it. This way, simply clicking without moving the mouse will cause a black point to be placed on the bitmap.
This dialog event handler is called whenever the left mouse button is released. We just lower the flag again so the drawing can be stopped.
This dialog event handler is called whenever the mouse movies over the rollout, regardless of the button state. The argument pos contains the 2D position in pixels inside the rollout, coinciding with the position in pixels inside the bitmap (remember? Both have the same origin [0,0].
We check to see whether the left mouse button has been pressed but not released yet by looking into the isDrawing variable. If it contains true, we call the drawing paintbrush function with the current position of the mouse inside the dialog.
Finally, we create a dialog using the rollout we just defined.

