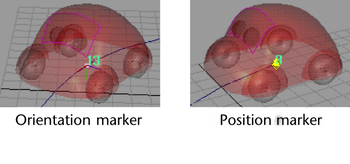
When you create a path animation, you will see markers with numbers drawn along the path curve. These are motion path markers, and each one represents a key of an animation curve. The number on each marker is its frame number, as seen in the Time Slider.

There are two types of motion path markers:
- Position markers are created at the beginning and end of the motion path when you first attach the object to the path, and you can add others if desired. The node name of the first one created on a motion path is positionMarkerShape1; the final integer increases with each one created.
- Orientation markers can be created at key frames where you want to modify the automatic rotations that are computed for the object when the Follow option is used. The node name of the first one created on a motion path is orientationMarkerShape1; the integer increases with each one created.

Position markers
Each position marker has a U value that represents the marker’s position on the path, ranging from 0 at the start to 1 at the end. After creating a path animation, you may decide to change the object's start point on the path, the end point, or the speed of travel between key frames. You can slide position markers along the motion path, or adjust their Time values in the Attribute Editor.
Orientation markers
Each orientation marker records the Front Twist, Side Twist, and Up Twist rotation values applied at a key frame along the path. These Twist values are added to the default rotations computed by the path animation when you use the Follow (and optionally Bank) options. You cannot slide orientation markers along the path, but you can adjust their location by changing Time values in the Attribute Editor.
Markers display in both the scene view and Graph Editor. They are very useful for editing the timing of path animation, instead of having to open the Graph Editor to edit the timing.