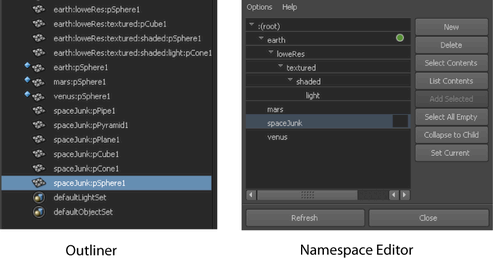
There may be situations where you need to remove nodes from a particular namespace and subsequently remove the reserved namespace from the scene. These situations might be as follows:
- You imported the reference file directly into your parent scene and plan to export selected nodes to a new file or reference.
- You need to clear a namespace currently in use so the file can be referenced by other users without introducing namespace conflicts. This is a good practice if you are exporting a file that may contain unwanted, reserved namespaces.
When removing namespaces, you have the option to merge referenced or imported object namespaces with a namespace that exists in the parent scene. When duplicate namespaces occur, the namespaces are merged and duplicate object names are incrementally suffixed with a number.
Remove namespaces using the Namespace Editor
- Determine the namespace for a node by selecting any object/node that uses the namespace.
The namespace for the object/node appears highlighted in the Channel Box and Outliner. For example, an object’s name with an assigned namespace can appear as follows:
spaceJunk:pSphere1
- In the
Namespace Editor, select the namespace you want to remove.

- Click
Delete.
If the namespace you want to remove contains nodes, the Delete: namespace window appears.

- In the
Delete: namespace window, click one of the following:
- Merge with Root to merge the namespace and move the nodes contained by the deleted namespace to the root namespace.
- Merge with Parent to merge the namespace and move the nodes contained by the deleted namespace to an immediate parent namespace.
- Delete to delete the namespace and the nodes contained by the namespace.