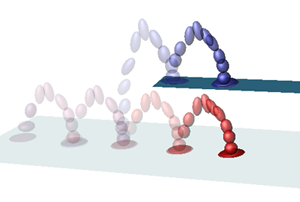
Animation layers let you create and blend multiple levels of animation in a scene. You can create layers to organize new keyframe animation, or to keyframe on top of existing animation without overwriting the original curves.

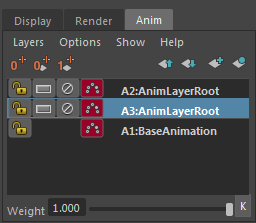
Animation layers hold animation in your scene, with each layer containing animation curves for attributes that have been assigned to it. The animation layers appear stacked in the Animation Layer Editor, and depending on various settings, blend together to create the result animation that plays in your scene.

For example, you might load an animation sequence with a character running and jumping, then create a new animation layer on top to experiment with modifications to the jumping action. You can watch the original animation to identify a point where you want to exaggerate the character’s movements on the Y-axis, then set keys on the new layer to see how changing the translateY values affect the jump. If you like the modified jump motion, you can choose to merge the animation layers. If you decide to leave your original animation unchanged, you can discard the layer.
You may be familiar with using layering features in 2D image editing programs. In addition to the expected basic layer functions, Maya LT animation layers let you:
- Modify animation without overwriting original curves.
- Keep track of the keyframes you set for various objects and attributes.
(For example, see Keyframe two characters on separate animation layers.)
- Change specific elements of your scene without affecting others.
(For example, Use animation layers to enhance motion capture data.)
- Assign single or multiple objects and attributes onto separate layers.
- Set whether layers override those that are lower in the stack.
- Organize layers by parenting them to one another.
Similar to 2D image editing programs, animation layers in Maya LT also let you do the following:
- Re-organize and change the order of layers.
- Mute, unmute, and weight the effect of each layer.
(See Mute, Lock, and Solo animation layers and Keyframe the weight of animation layers.)
- Make incremental changes and compare the results on different layers.
- Preview and test changes.
- Merge layers together.
The Animation Layer Editor gives you all of the tools and options you need to create and manipulate animation layers.
For more information on what you can do with animation layers, see Example workflows with animation layers. To start creating animation on layers, see Create an animation layer and Animate on layers.