Make sure you have gone through this entire sequence of tasks in the
Study Tasks pane before you start the analysis.
Note: Double click on each task to open the appropriate tool or dialog needed to complete that task. Each task is ready for analysis when a green tick
 appears next to it.
appears next to it.
 or
or
 or
or
 Mesh
Mesh
 Analysis Sequence
 Material
 Injection Locations
 Process Settings
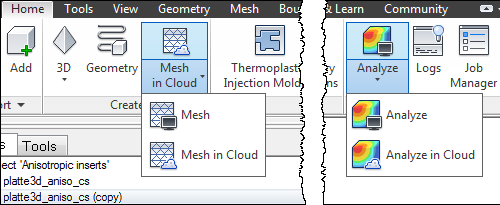
Cloud vs Local solve
Select where you would like to run the analysis using the Home tab of the ribbon in Synergy. When you first launch Synergy, the jobs default to local solve. Whenever you relaunch Synergy, it defaults to the last setting you selected.
Note: To run jobs on
the cloud, you need a current
Autodesk® Account, an
Autodesk ID and password, and
Cloud Credits.
When you run jobs on the cloud, if you lose your internet connection, analyses already scheduled will not be affected, and can be downloaded when your internet connection is restored.
- Click
 () to run the analysis locally.
As soon as the first set of intermediate results are available, they will be listed under the
Results node in the
Study Tasks pane. Select a plot to view the results.
() to run the analysis locally.
As soon as the first set of intermediate results are available, they will be listed under the
Results node in the
Study Tasks pane. Select a plot to view the results.