Grouping Story clips
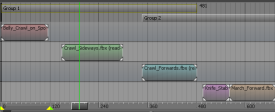
A new Create Clip Group option in the Story Clip context menu makes it faster and easier to group Story clips. While grouped, you can perform most clip operations, such as using the Razor or Cut tool. You can add clips from different Story tracks to the same group.
When you need to move multiple Story clips along the timeline, use Create Clip Group rather than using the previous method of adding clips to a folder and then creating a summary clip.
Insert merged animation in Story clips
You can now update the animation of Story clips using the merged animation of Animation Layers. When you create a clip on a Story Animation or Character Track, by selecting Insert Current Take from the Story clip context menu, the clip is connected to the merged animation layers. Your Story clip must be in writable mode (See Story clip context menus) to be connected to the merged animation layers.
When connected, any updates you make to the merged animation, such as adding new keys to an animation layer, creating a new layer, or editing existing keys, can be inserted into the clip by selecting Update From Current Take from the Story clip context menu. This replaces the previous animation on the clip. You cannot edit the Story clip by editing its keys while the clip is connected to the merged animation layers. You must first turn off Connected To Current Take in the Story track context menu before you can edit the keys directly on the clip.
Custom option for Clip Ghost Mode
Show Ghost Mode has been renamed to Clip Ghost Mode. A new Custom option for Clip Ghost Mode lets you specify a custom frame for the ghost clip to display. To do this, in the Properties pane, select Clip Ghost Mode > Custom, and then set the frame number.
Ghost Manipulator Time Mode
New Ghost Manipulator Time Mode options now let you display the Story ghost clip manipulator at any frame in the timeline. These new modes include:
- Current displays the manipulator based on current time.
- Start displays the manipulator at the start of the clip (default value, similar to legacy behavior).
- Stop displays the manipulator at the end of the clip.
- Custom displays the manipulator at a user-defined time in the clip. The value is clamped between start and stop time of the clip.
You can access the new Ghost Manipulator Time Mode options for the Story clip in the Properties pane of the Resources window.
Assign travelling nodes to Story clips
You can now assign travelling nodes to Story clips. New Average and Project on XZ plane options for travelling nodes let you project the ghost clip manipulator as an average of the travelling node, or on the XZ plane. You can access these options from the Properties pane of the Resources window.
Note that when you assign a travelling node to a clip, these settings override the Track settings.
Change Character
A new Change Character feature lets you quickly re-assign an imported clip's animation to any character contained in the file. This feature works similar to the existing Change Take, and simplifies the workflow of populating Story tracks from a file that contains multiple characters.
Mirror animation
You can now mirror animations, including character extension animation, across all three axis using a Story animation clip.
Additional changes
MotionBuilder 2017 also includes these additional changes to the Story tool.
- Double-clicking a Story clip now opens the Asset Settings in a floating window. The window displays with the Character Clip Settings tab open, making it easier to see options such as Interpolation settings.
- You can now copy and paste clips while aligning them with the source clip.
Interpolation Fade options added to Story clip context menu
Fade In Interpolation and Fade Out Interpolation options for animation and audio Story clips are now accessible from the Story Clip context menu.
See Set custom fade in and fade out interpolation for Story clips.