Autodesk Netfabb's functions are accessible in several locations:
- Main menu
- Toolbar
- Context menus
- Part Tree
- Viewing screen, both of a part or empty space
- Tabsheet
- Shortkeys
Main Menu
The Main menu contains all available functions, sorted by purpose into File, Edit, Prepare, Analyze, Modify, Arrange, View, System, and Help.

The Main menu
- File: Contains all the loading and saving operations both for entire projects and individual parts, also screenshot and printing functionality.
- Edit: A collection of functions that affect the editing itself rather than the actual editing functions. Undo and Redo can be found here, as well as selection tools, grouping, and coloring.
- Prepare: If your part or project data is pretty much ready to go, and all you need is steps like slicing, repairing, supporting, compensating for Z deformation in the lower slices, and making your project ready for particular machines, you will find the most common procedures to get to manufacturing as quickly as possible here.
- Analyze: Examine projects and parts for their various properties, compare meshes, check for collisions, Z-Removability, create printable reports from document templates.
- Modify: Anything that significantly changes geometries by cutting, mirroring, hollowing, or scaling, or generates new structures such as text labels is located here.
- Arrange: Contains functions that modify first and foremost the position and/or orientation of parts, from simply translating parts to packing them automatically.
- View: Controls and switches that change the camera's perspective as well as the display of parts and user interface elements such as Part Names or the Platform.
- System: Holds the software's Settings, provides to undock and focus the various frames, and lists shortcuts to the various Utilities.
- Help: Links to this Online Help, the Netfabb homepage, license and version dialogs and a dialog listing a history of any warning or error messages.
Toolbar
The toolbar above the viewing screen offers many features with one mouse click. The availability of functions in the toolbar depends on the currently selected mode or module. The Repair module, for example, has a different toolbar than the default view.

The default toolbar
Context Menus
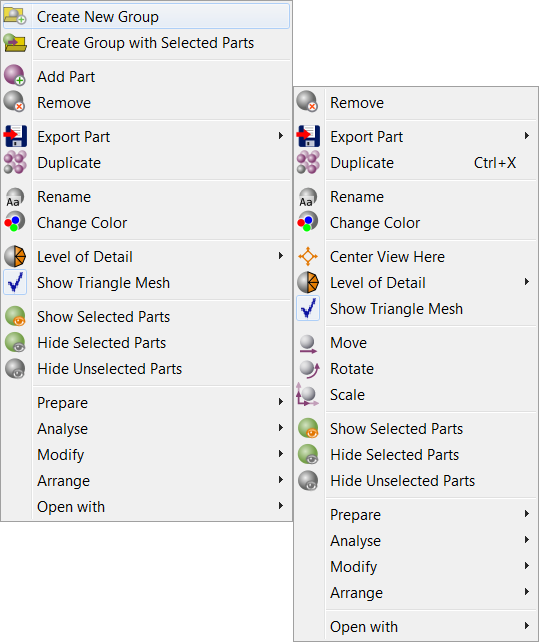
The context menus after right-clicking the same part in the Project Tree (left) and the Viewing Screen (right).
Tabsheet
Additional functions are available in the tabsheet in the bottom half of the context area. In the default view, the tabsheet provides options for the Clipping and Cutting, provides the dimensions of selected parts and tells you how many parts are selected and how many parts are shown or hidden. For many modules, such as the Boolean Operations module or the Measuring tool, the options in the tabsheet represent the main features of the module.
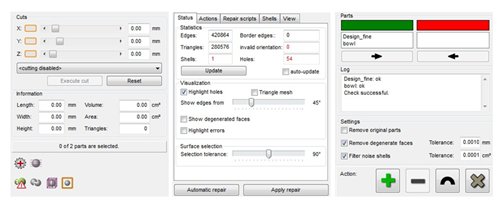
Tabsheets of default view, repair module and Boolean Operations module
Shortkeys
To create a smoother workflow, you can perform many functions with shortkeys on your keyboard. When you are working in the viewing screen, F2 starts the Zoom to selection mode, F5 provides the platform overview, F7 activates the Align to bottom plane mode and F3 switches back to the normal mode. Other shortkeys are specified in the description of the concerned function in this document.