You can make your own digital certificate for testing or using within your company.
To create your own digital certificate
- Create a digital certificate using the MakeCert.exe tool.
- Create a Personal Information Exchange (pfx) file using the Pvk2Pfx.exe tool.
- Digitally sign a dll using SignTool.exe.
- Import a Digital Certificate to Windows Certificate Store. (CertMgr.msc or CertUtil.exe)
Create a Digital Certificate
You can use MakeCert.exe tool to make your own digital certificate for testing and internal use. The following is the command format:
|
Command Region: Make a certificate command format |
MakeCert.exe -r -sv <name-of-private-key-file>.pvk -n "CN=<developer-name>" <name-of-certificate-file>.cer -b <start-data> -e <end-date> |
Where <name-of-private-key-file> is the name of the file where the private key is stored, <developer- name> is the name of the developer, <name-of-certificate-file> is the name of the certificate file, <start-date> is the date when the certificate became valid (format is mm/dd/yyyy), and <end-date> is the date when the validity of the certificate ends.
For example:
|
Command Region: MakeCert.exe example |
"C:\Program Files\Microsoft SDKs\Windows\v7.1\Bin\MakeCert.exe" -r -sv MyCert.pvk -n "CN=DevABC" MyCert.cer -b 01/01/2016 -e 12/31/2016 |
Or:
|
Command Region: MakeCert.exe example |
"C:\Program Files (x86)\Windows Kits\8.1\bin\x64\makecert.exe" -r -sv MyCert.pvk -n "CN=DevABC" MyCert.cer -b 01/01/2016 -e 12/31/2016 |
This command will bring up "Create Private Key Password" dialog. Enter the private key password in the dialog. If it asks for password, enter again. When everything is done, you will see a message "Succeeded" in the command window and .cer and .pvk files are created.
Convert to PFX
The next step is to convert a digital certificate to a Personal Information Exchange (pfx) file using the pvk2pfx.exe tool. In this step, you need the .pvk file, .cer file, and password you created in the above step. The command format looks like this:
|
Command Region: Convert to PFX command format |
pvk2pfx.exe" -pvk <name-of-private-key-file>.pvk -pi <password-for-pvk> -spc <name-of-certification-file-name>.cer -pfx <name-of-pfx-file> -po <password-for-pfx> |
Where <name-of-private-key-file> is the name of pvk file you created, <password-for-pvk> is the password you assigned to the pvk file. <name-of-certification-file-name> is the name of the certification file or .cer file. <name-of-pfx-file> is the name of the .pfx. <password-for-pfx> is a password to be assigned to the .pfx file.
For example:
|
Command Region: Convert to PFX example |
"C:\Program Files (x86)\Windows Kits\8.1\bin\x64\pvk2pfx.exe" -pvk MyCert.pvk -pi password123 -spc MyCert.cer -pfx MyCert.pfx -po password234 |
When the operation succeeds, the command ends without error message and a .pfx file will be created.
Once you have a pfx file, you can use SignTool tool to sign your dll.
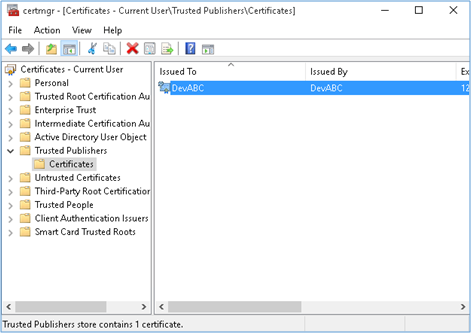
Import the Digital Certificate to Windows Certificate Store
One more step you need when you are making your own digital certificate is to import it to your computer. You can do this in Certificate Manager (CertMgr.msc) or CertUtils.exe tool. Here we use the UI tool. Please refer here for alternatives.
- From Start >> Run >> CertMgr.msc. (Or on Windows 8.1/10, right click on Start >> Run >> CertMgr.msc) CertMgr opens.
- On CertMgr dialog, right click on Trusted Publishers >> All Tasks >> Import …
- Follow the instructions on Certificate Import Wizard. Click Next.
- On a dialog which asks "Files to Import", choose the pfx file you want to import.
- On the "Password" dialog, enter the password. Keep "Include all extended properties" checked.
- Choose "Place all certificates in the following store" then Click Next.
- Confirm and Finish.
- If you see "Import a new Private signature key" dialog, click OK. (This part may differ depending on your environment.)
- Repeat the same step with Trusted Root Certification Authorities. This step is to validate digitally signed binary files.