If the image sequence you are tracking has multiple moving objects, you can perform object tracking to track these objects relative to the same camera. Since you perform camera tracking first, you can use the camera data generated from the camera tracking analysis. For example, you can perform a camera tracking analysis on the complete scene, then use masks or mattes to perform multiple object tracking passes focusing on various moving objects in the scene. Each result can be converted to separate point clouds or axes, but all results conform to the 3D camera synced to the original camera tracking.
To create an 3D track analysis based on object properties:
- Create a camera track analysis, as explained in Camera Tracking.
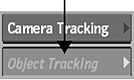
- Click Object Tracking to switch to the Object Tracking menu.
- From the Object Motion box, make a selection about the object you are tracking in relation to the camera.
Select: To: Free 3D Motion Track an object moving independently from the camera. Orbit Around Cam Track an object rotating around the camera, or far away from the camera. Auto Detect Motion Automatically detect the motion type of the object and track accordingly. For small objects, Auto Detect may not be able to establish the proper motion. In this case, select Free 3D Motion or Orbit Around Cam. - Set any needed constraints:
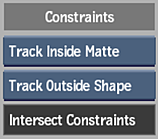
- Use the Matte Media box to select whether to use the Action matte for object tracking. If you select to track inside the matte, white areas of the matte are considered for calculating the solution, and black areas are ignored (vice-versa for tracking outside the matte).
- Use the GMask Option box to select whether to track inside or outside of an attached GMask node. This option is only available if a GMask node is attached to Analyzer tree. If you used a GMask constraint while camera tracking, the opposite option is automatically selected for object tracking.
The GMask Option box is unavailable on Smoke, unless a setup is loaded in Action with an existing Action Gmask node.
The tracking analysis uses an intersection of the constraints, so you may choose to hide or disconnect gmasks if you want to perform a separate object track for each one.
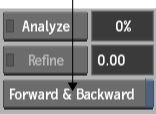
- In the Object Tracking section, enable Forward and Backward to track the image sequence backward after the forward tracking has completed. This option takes longer, but you may get better results.
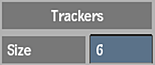
- Set the size of the automatic trackers in the size field.
- Click Analyze.
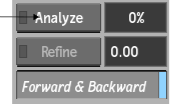
You can see a progress indicator beside the Track button. You can interrupt the analysis and resume it by clicking Track again. After tracking has completed and you press Confirm, the Track button changes to Update, and you can see the 2D tracks and 3D points in your image.
Filtering Trackers to Fine Tune the Track Analysis
Use the Filter settings to delete lower quality trackers.
To fine-tune the track analysis:
- Use the Quality slider to adjust the number of good trackers kept. The higher the quality setting, more low quality trackers are selected, such as trackers that drift off their initial reference point. Click Delete to delete the selected trackers.
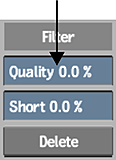
Trackers of lower quality may hinder the accuracy of the camera tracking.
Note: After you have made a change that requires the 3D tracking analysis to be refined or updated, notice that the LED next to the Refine and Update buttons turns yellow. This signifies that a Refine or Update is required, but you do not have to perform it until you have completed your tracker selections. - Adjust the Short slider to select short duration trackers, that is, trackers that only track a feature for a few frames. Click Delete to delete the selected trackers, leaving the longer duration trackers intact.
- You can manually select and delete trackers from the image that you feel are not tracking properly. Do one of the following:
- To select an individual tracker, click the tracker, and then click Delete.
- To select multiple trackers in the same area, Ctrl-drag a selection box over a series of trackers, and then click Delete.
- With Delete mode selected in the Tools box, select trackers in the image.
Setting the Scale
After tracking has occurred, you can set the scale of the tracked object. Since you are tracking a specific object as part of an image, setting the relative scale of the object in relation to the image helps you to position objects in the reconstructed scene when you convert the 3D points into a point cloud or axes.
Refining or Updating the Track
Once you are satisfied with your fine tuning changes, you can refine or update your Analyzer.
To refine or update the 3D track:
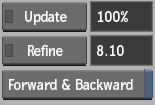
- Depending on the changes you have made, you can choose to refine or update the 3D track. Do one or both of the following:
- Click Update.
- Click Refine.
The track analysis uses the current results as a starting point, and refines from this point.
Note: The update operation deletes all previous 3D points and starts over based on the new information. Depending on your footage, and how many trackers you added, deleted, or linked, multiple updates may yield different results.
Click Refine again to stop the process once an acceptable pixel error value is reached. The pixel error value is a representation of the distance of the 2D tracks from the computed 3D points.
Converting Object Tracking Results
When you are satisfied with the results of the 3D object tracking analysis, you can convert the selected reconstructed points to a point locators object or actual axes in your scene. The point locators object is useful because you can easily snap objects to the locators. An image that does not deform is the best candidate for the point locators.
To create a point locators object or axes from the 3D object tracking results:
- In the Analyzer view, select the points in the image that you want converted. Selected points are displayed as green squares with red crosses. Tip: Press ctrl and draw a rectangle over multiple points to select them. If any points are already selected, they become unselected.
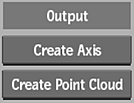
- Do one of the following:
- Click Create Point Locators.
Selected point are converted to a point locators object with a parent axis. Double-click the newly created point locators object to access its menu, where you can change display settings and enable snapping. See Using the Point Locators Object.
- Click Create Axis.
Selected points are converted to axes with a parent axis. The axes synchronize to the results of your 3D camera tracking, and any further changes you make to the 3D track are reflected in these axes.
Note: If you want to apply settings manually to a synchronized axis, change its name so that it does not update automatically when Analyzer settings are changed. If you reset the Analyzer settings, the synchronized axes become regular Action axes.
- Click Create Point Locators.
- Use the created point locators or axes to view the reconstructed scene geometry or camera motion.
You can attach objects such as surfaces, 3D text, and 3D models to the new point locators or axes to help position them in 3D space.