Launch Autodesk® Inventor® or SolidWorks®, and perform the following procedure:
- In Inventor, click
 Get Started
 Launch Open. You can also click Open in the Quick Access Toolbar, Application Menu, or File pull-down menu, depending upon your CAD application.
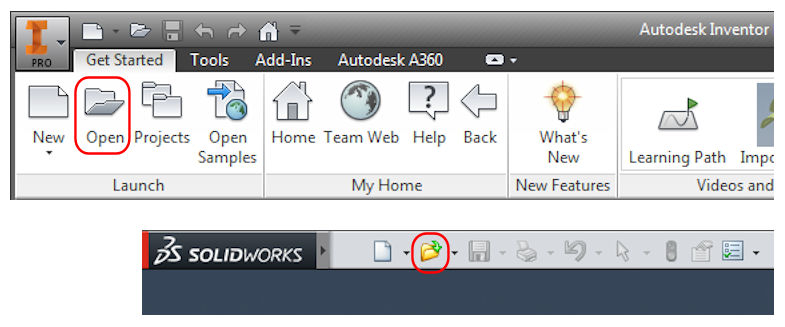
Refer to Figure 1.a – 1.c for the following three steps.
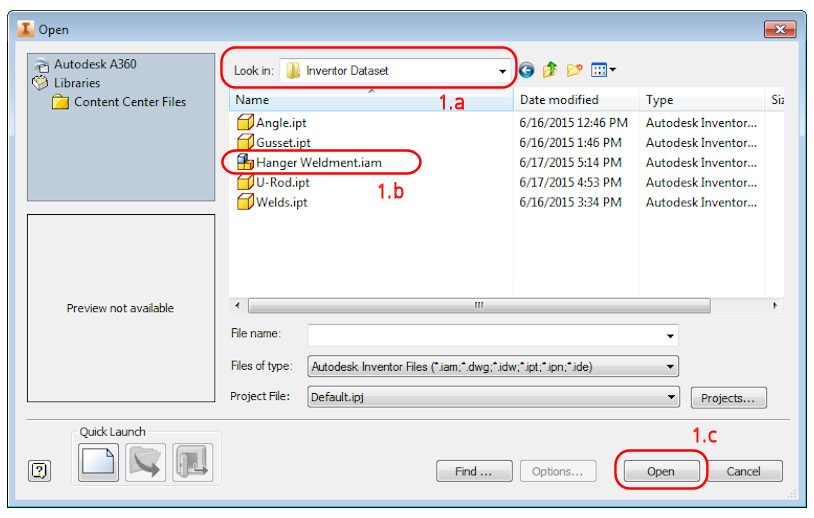
Figure 1.a – 1.c
- Navigate to the folder to which you extracted the quick start tutorial dataset.
- Select the file, Hanger Weldment (.iam or .sldasm ).
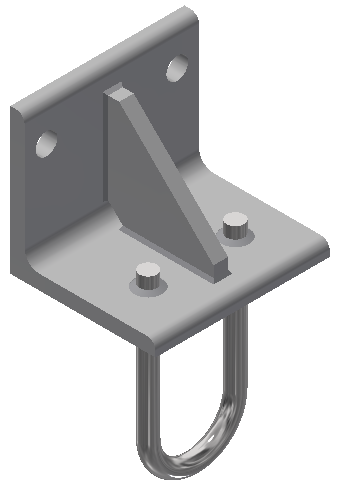
- Click the Open button. The model appears in the canvas as shown in the following image:
- Click
 Save As from the Application Menu.
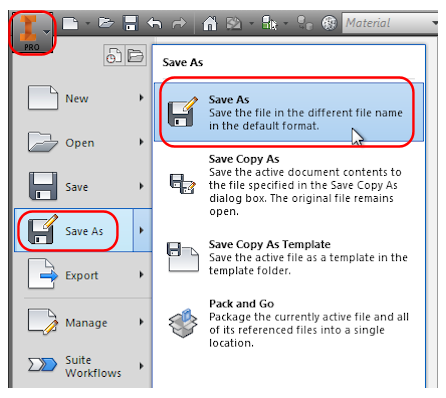
- In the File name field, add _QST to the end of the filename, making it Hanger Weldment_QST (.iam or .sldprt ). Here, QST stands for Quick Start Tutorial.

- Click the Save button.
Note: This action preserves the original model file for later reuse. - In the File name field, add _QST to the end of the filename, making it Hanger Weldment_QST (.iam or .sldprt ). Here, QST stands for Quick Start Tutorial.
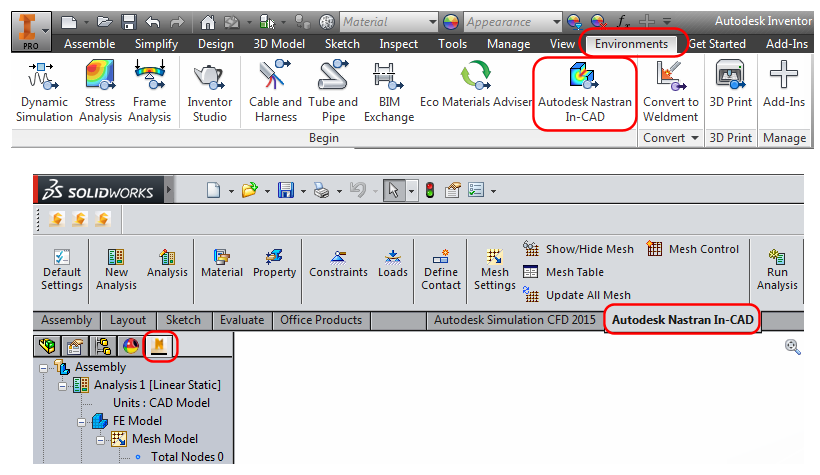
- Enter the Autodesk Nastran In-CAD environment, using one of the following methods, depending upon your CAD application:
- In Inventor, click
 Environments Autodesk Nastran In-CAD. The browser automatically changes to the Autodesk Nastran Model Tree.
 - In SolidWorks, click the Autodesk Nastran In-CAD ribbon tab, and also activate the Autodesk Nastran In-CAD browser (tree view).
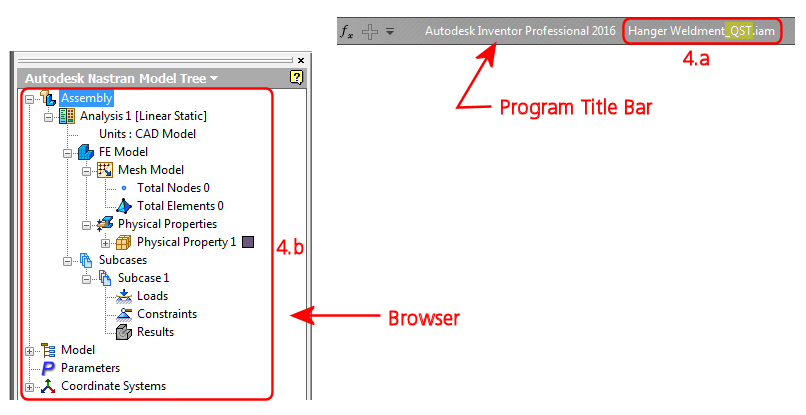
 Note: A default analysis is automatically created the first time you enter the Nastran In-CAD environment. The following are the default settings:
- Analysis Type: Linear Static Stress
- Units: Same as CAD model units
- Contact Type: Bonded
- Contact Tolerance: 0.1
These and the remaining settings are suitable for this tutorial. There is no need to edit the analysis settings.
- In Inventor, click
- To make sure that you have successfully set up the analysis model:
- Verify that the new model name (with _QST added) is shown in the CAD program title bar.
- Verify that the browser is showing the Autodesk Nastran Model Tree.
| Previous Topic: Linear Static Stress Analysis of a Welded Steel Hanger | Next Topic: Define the Materials and Element Properties |