In this exercise, you will learn how to rearrange labels in data boxes.
Data box labels may overlap one another if the points they label are close together. In this exercise, you will learn how to stagger a series of labels in a data box, and then move individual data box labels to specific locations.
This exercise continues from Exercise 1: Adding Data Boxes to a Profile View.
Stagger data box labels
- Open Profile-6B.dwg, which is located in the tutorials drawings folder.
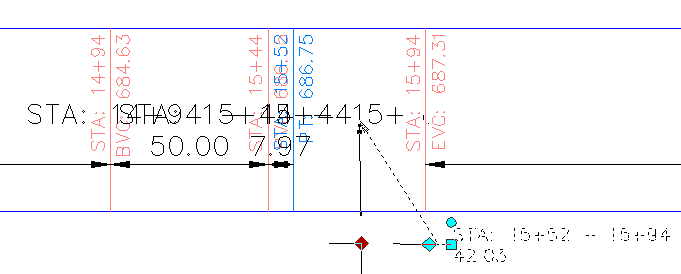
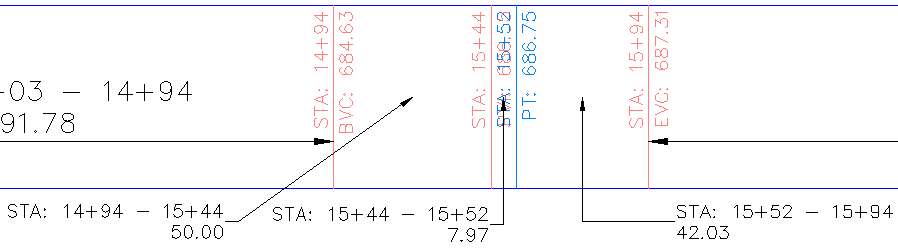
The data boxes at the bottom of profile view PV - (3) annotate the horizontal and vertical geometry of the proposed road alignment, and the level of each profile at the major chainages.
- Zoom in to the following area.
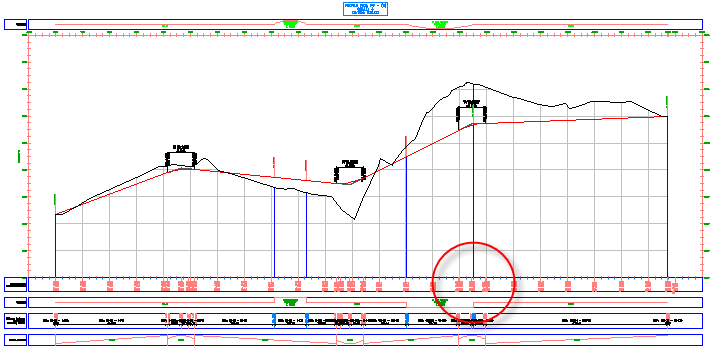
The horizontal and vertical geometry labels overlap in this area.
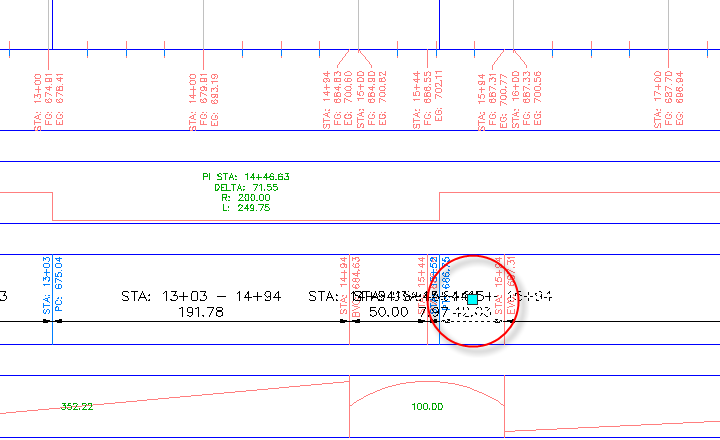
- Select one of the geometry labels in this band. Right-click. Click Properties.
- In the Properties palette, under Staggering, specify the following parameters:
- Auto Stagger: Stagger Both Sides
- Stagger Line Height: 0.0250
The band labels are evenly spaced along the data box, and leader lines are created to the label anchor points.
Move data box labels
- In the bottom data box, Ctrl+click the following label.
- Drag the grip down and to the right. Click to place the label.
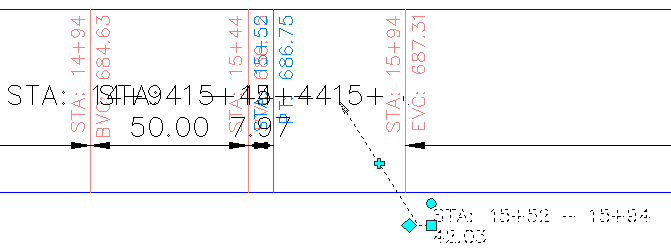
- Click the
 grip. Drag the grip to the left. Click to place the grip.
 A new vertex is added to the label leader line.
- Repeat Steps 1 through 3 to move the labels that are to the left of the one you just moved.
To continue this tutorial, go to Exercise 3: Modifying a Data Box Style.