This section describes how to create the model and the vectors for the Reception plaque.
To create the model and the vectors:
- Create the model:
- Display the New Model dialog.
- Enter a:
Width (X) of 500.
Height (Y) of 300.
- Select mm as the Units.
- Specify a Resolution of approximately 1500 x 900 points.
- Click OK.
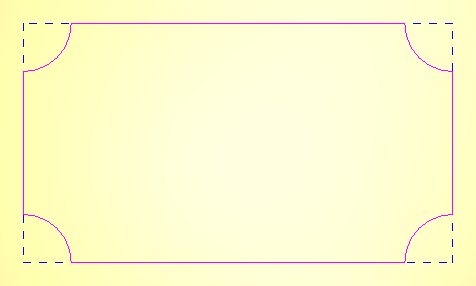
- Create the vector to represent the plaque's edge:
- Select Vector > Create > Rectangle. The Tool Settings: Rectangle Creation panel is displayed.
- Select Rectangle.
- Enter a:
Width of 450.
Height of 250.
Corner radius of 50.
- Select the Invert corners check box.
- Click
Create.
ArtCAM creates the vector and displays it in the 3D view:
- Create an offset vector from the plaque's edge to create a border:
- Select Vector > Offset. The Tool Settings: Offset Vectors panel is displayed.
- Enter an Offset distance of 30.
- Select Inwards/left.
- Select Chamfered.
- Click
Offset.
ArtCAM creates the vector and displays it in the 3D view:
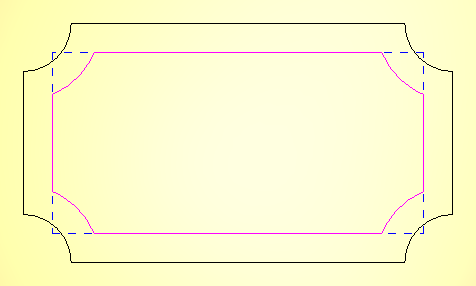
- Click the 3D view to deselect the vectors.
- Create the vector text:
- Select Vector > Create > Text. The Tool Settings: Text Tool panel is displayed.
- In the Font list, select Tahoma.
- Select a Size of 55 mm.
- Click the 3D view and enter Reception.
- Click Create. ArtCAM creates the vector and displays it in the 3D view.
- Select
Vector > Align > Centre in Model to position the vector text within the centre of the plaque:
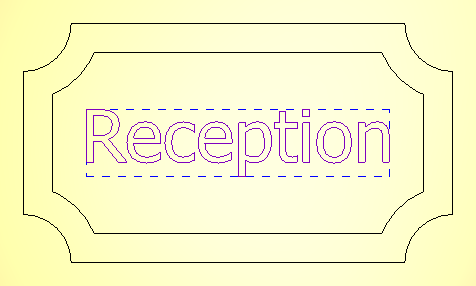
- Click the 3D view to deselect the vectors.