To add bridge locations to a vector with the Create Bridges tool:
- Select the vector to which you want to add bridges.
- In the
Toolpaths Operations area of the
Toolpaths panel, click the
Create Bridges
 button. The
Tool Settings: Create Bridges panel is displayed.
button. The
Tool Settings: Create Bridges panel is displayed.
- Select an option from the drop-down list to specify how you want to position the bridges:
- Constant number — Select this option then enter the number of bridges you want to add to the vector in the box.
- Adaptive spacing — Select this option then enter the distance you want to maintain between bridge locations. ArtCAM uses this distance as a guide and moves the bridges to better locations if maintaining the spacing means the bridge would, for example, be on a corner.
- Constant spacing — Select this option then enter the distance you want to maintain between the bridge locations. ArtCAM positions the bridges at the specified distance, regardless of whether the bridge location falls on a corner or not.
- Enter the length for each bridge the Length box.
- Enter the thickness for each bridge in the Thickness box.
- From the
Type list, select:
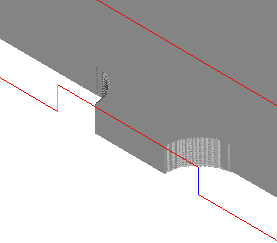
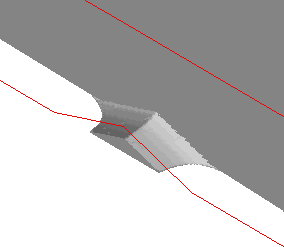
- 3D bridges if you want the bridges to have a triangular cross-section without any associated plunge or retract moves; or
- 2D bridges if you want the bridges to have a flat cross-section.
2D bridges
3D bridges
- Select Add bridge on start points if you want to add a bridge location at the start point of the vector.
- Click Add. Bridges are added to the vector.
After you have added the bridges, you can choose to edit them individually, or simultaneously.
Note: Use the
Selected Bridge area to edit existing bridges.
Note: When you calculate a profile pass with vectors that have added bridges, select
Add Bridges in the panel to account for the bridges.