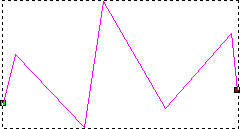
To create a polyline using the cursor:
- Select the vector layer on which you want to create a polyline.
- Click the
Create Polyline
 button to display the
Tool Settings: Polyline Creation panel.
- In the 2D or 3D views, click once to create the start node of the polyline.
- Move the cursor to draw the polyline:
- If you want to attach a linear span to the node, move the cursor to preview its angle and length. A solid red line indicates where the linear span in the polyline is to be drawn.
Note: Hold down Ctrl when you move the cursor to constrain the angle of the linear span drawn between nodes to 15
 increments.
- If you want to attach a Bézier span to the node, click Draw smooth polyline. Move the cursor to preview its angle and length. A solid red line indicates where the Bézier span in the polyline is to be drawn.
- If you want to draw a freehand curve, click and hold down the left mouse button while dragging the mouse.
Note: If the cursor's position aligns with the previous node's X or Y axis, the cursor changes to
 or
or
 ; if the cursor's position is orthogonal to the start node and the previous node, the cursor changes to
 .
.
- If you want to attach a linear span to the node, move the cursor to preview its angle and length. A solid red line indicates where the linear span in the polyline is to be drawn.
- If you are creating a linear or Bézier span, click to create a node in the polyline.
The span that connects the two nodes is drawn on the selected vector layer.
- Repeat the last two steps if you want to create any further nodes and spans in the polyline. If not, go to the next step.
- Click on the start node of the vector to end the polyline and create a closed vector. Right-click to end the line and create an open vector.
The new polyline is magenta and surrounded by a bounding box.
