Select this menu option to create reliefs from bitmap artwork or closed vectors. The Tool Settings: Shape Editor Tool panel is displayed. You can control the profile, angle, and height of the relief, and how the relief combines with the active relief layer.
Note: The
Shape Editor
 button on the
Relief Creation toolbar is a shortcut for this menu option and the keyboard shortcut is
F12.
button on the
Relief Creation toolbar is a shortcut for this menu option and the keyboard shortcut is
F12.
button on the
Relief Creation toolbar is a shortcut for this menu option and the keyboard shortcut is
F12.
Tip: Select the
Open on double-click check box in the
Options panel to display the
Tool Settings: Shape Editor Tool panel when you double-click vector artwork, bitmap artwork, or a colour swatch in the
Palette.
The Tool Settings: Shape Editor Tool panel contains the following settings:
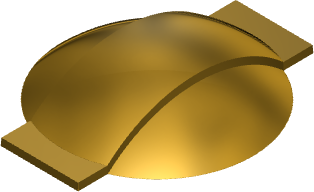
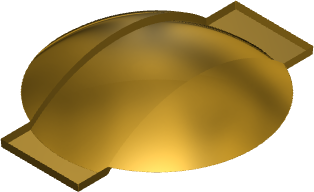
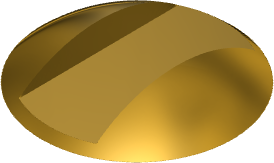
- Shape Profile — Select the profile of the relief.
- Round — Click to create a rounded profile.
- Square — Click to create an angled profile.
- Plane — Click to create a flat profile.
- Angle — Enter an angle or move the slider to specify the angle of the profile.
- No limit — Select to enable the shape to grow to the height that it would naturally reach.
- Limit to height — Select to enable the shape to grow to a specific height and then plateau. Specify the maximum height in the Height box.
- Scale to height — Select to enable the shape to grow to a specific height by applying a scaling factor in its Z-axis. Specify the height in the Height box. This does not create a flat top in the shape.
- Constant height — Select to enable the shape to grow to a specific height. Specify the height in the Height box. This creates a shape where its angle or curvature changes to maintain a constant height, even when its width varies.
- Height — Enter the maximum height of the profile. This box is only available if you have selected Limit to height, Scale to height, or Constant height.
- Corner angle — If you have selected Constant height, enter the radius of the corners in the shape. This enables you to taper all areas of the constant height relief that are of a smaller radius than that specified.
If you are creating a Round or Square profile, use the following settings to control the angle and height of the profile:
- Start Height — Specify the Z height at which the shape is created. For Round and Square profiles, this creates a vertical side wall in the shape. If you have selected a Plane profile, this value controls the height of the plane.
- Scale — Select to apply a scaling factor to the shape in its Z axis, then enter the scaling factor in the Scale box.
- Relief Combine Mode — Select how you want the shape to combine with the active relief layer. Select:
- Add to add the new relief to the active relief layer.
- Subtract to subtract the new relief from the active relief layer.
- Merge High to merge the new relief with the active relief layer, so that only its highest points are kept.

- Merge Low to merge the new relief with the active relief layer, so that only its lowest points are kept.
- Replace to cut through any existing relief on the active layer and replace the active relief layer's content with the new relief. The new relief cuts through any existing relief if necessary, replacing it on the active layer.
Note: The combine mode selected here controls how the sweep is combined with the currently active relief layer only. It does not control how the sweep is combined with the composite relief. How the sweep is combined with other relief layers to form the composite relief is affected by the combine mode assigned to the layer. - Add to add the new relief to the active relief layer.
- Node Editing — These options are also available on the Tool Settings: Node Editing panel.
- Maintain Smooth Curves — If selected, all spans between smooth nodes are converted to smooth curves. When you move a node, the smoothness of the curve between it and its adjacent nodes is maintained. This does not affect spans between sharp nodes.
- Display Virtual Mid-points — Select to display mid-points between adjacent nodes. When you click a mid-point, a new node is created in its position. This enables you to quickly add more detail to a vector.
- Apply — Click to create the relief. The panel remains open and the button changes to Preview.
- Preview — Click to preview your changes. The panel remains open and the button changes to Apply.
- Cancel — Click to close the panel without creating the relief. Any changes made to the vectors while the panel was open are retained.