Flame Family 2018.2 Update Highlights
 |
 |
 |
 |
|
Connected Conform Workflow
|
Action Updates
|
Python API
|
Pybox
|
Make sure to check
http://www.autodesk.com/flame-docs for the latest Flame Family documentation (including Installation Guides, Release Notes, and other documents). Also, many new feature videos (as well as other workflow videos) are available at
https://www.youtube.com/user/FlameHowTos. This Learning Channel is updated frequently, so be sure to subscribe or bookmark the page. Links to specific 2018.2 Update videos are also provided in this What's New topic, denoted by this icon:

 tag throughout the documentation for sections indicating new or updated 2018.2 Update content.
For details on all the new features and enhancements in this release, follow these links to navigate to the sections below:
- Action
- Animation
- Batch and Batch FX
- Burn-In Metadata
- Colour Management
- Configuration
- Conform / AAF
- Connected Conform
- Effects Tools
- GMask Tracer
- Look
- Lustre
- Lustre / Flame Interoperability
- Markers
- MediaHub
- Media Import
- Media Export
- Media Library
- Miscellaneous
- Modular Keyer
- Open Clip Creator
- Paint
- Preview
- Pybox
- Python API
- Shotgun
- Timeline
Action
Improved Projector Object
The projector node is now improved. You can now:
- Shade the projector result with a new option under the Rendering tab.
- Occlude Projector result with a new option under the Rendering tab.
- Only project on the front face of an object with a new option under the Rendering tab.
- Attach any texture map to the Projector node, due to support for multi-channel data.
- Add a GMask link to limit the result of the projection.
- Using button
, lock the projection at a specific frame and then have the projection stick to the objects as its topology and position change.
Projection locking works on Geom, 3D Text, 3D Shape, Particle Generator and Surface objects.
For more details, see these videos from the Flame Learning Channel:
Contextual Menu Improvements
You now have access to more Contextual Menu options in the Action schematic. You can now use the Contextual Menu in any Action View. The improved contextual menu gives you access to many hidden functions that used to be accessible only through keyboard shortcuts. It also allows you to use Action without having to constantly switch back to Node Bin to add a node. Flame ships with a standardized contextual menu, but you can reconfigure it using a contextual menu configuration file.
See Using the Contextual Menu.
For more details, see these videos from the Flame Learning Channel:
New Maps
New input maps are available in Action:
For more information on Action's Output menu, see Output Options.
Miscellaneous Action Improvements
- A new Lens Flare Occlusion option makes the lens flare behave like a 2D lens flare, making such a lens flare twice as fast to render.
- You can now rename an Action Media node, similar to any other node.
- Flame Family products are now compatible with assets created in Substance Designer version 6.x.
- 30 new Substance Assets are available in the Substance PBR library.
- Flame now supports FBX version 2018.1.1.
Animation
The Info mode of the Animation menu is now streamlined with other tables in the software.
Batch and Batch FX
Frame 1
- "Frame 1 on Segment Start" offers the same workflow as in previous versions.
- "Frame 1 on Media Start" can be used in conjunction with the Media Range option inside Batch FX to avoid having to go to negative frames when you want to access frames that are in the head of your segment.
Render & Write File Nodes
The default destination of a Render node can be set from Preferences > Timeline / Batch / BFX > Render Node Destination.
Shot Name is now available as a Render node / Write File node setting.
- The setting can be modified from the Render node, but not from the Write File node.
- The setting can be modified for both a Render node and a Write File node from the Render list.
- T+click can be used to propagate the Shot Name of a clip to a Render node or Write File node.
Clicking in the Name, Shot Name, and Tape fields of an unselected item within the Render List will now select the item first. A second click is required to modify them.
The Shot Name and Tape/Reel/Source tokens are now available in the following locations:
- Render Node name
- Write File node name
- Write File node Media Pattern
- Write File node Create Clip
- Write File Node Include Setup
Batch Group Enhancements
- There is now a Shot Name field in the Render node, Write File node, and in the Render List.
- Shot Name and Tape Name Tokens in Render Node and Write File Pattern fields.
- Shot Name metadata from source clips is now propagated to renders from Batch and Tools.
- Shot Names can be propagated using the T+Click shortcut in the Render node, Write File node and Burn-In Metadata nodes.
- A new Smart Replace option is available in the Renders Destination section of the Render node. When enabled, a Batch Render automatically replaces the Shot in the Shots Sequence and in any sequences that contain the Shot. The Smart Replace option is disabled if the Batch Scene does not have a Shot Name attribute.
- A new Preference setting in Timeline FX / Batch / BFX: Render Nodes Destination enables or disables the Smart Replace setting. When enabled, any new Batch Render nodes will have Smart Replace enabled, but you can still manually disable the Smart Replace in the Render node itself.
- The Shot Name can be modified using the contextual menu in the Media Panel. This applies to Source Clips only.
- A new Smart Shot Replace function is available in the contextual menu, from your Batch Renders Reel, in the Media Panel to manually perform a Smart Replace based on Shot Name data. It can be useful to disable the Smart Replace option in the Render node, enabling you to render, iterate and validate. Then, once you are happy with your shot, perform a Smart Replace in your Timeline. A keyboard shortcut is also available in the Shortcut editor.
Burn-In Metadata
The Burn-In Metadata Timeline FX render is modified when any of the following attributes are modified:
- Markers attributes
- Segment Markers attributes
- Segment Name
- Shot Name
- Comment
Colour Management
You can now modify the Tagged Colour Space of a Timeline Segment directly at the timeline level, using the Colour Mgmt Timeline FX. The Tagged Colour Space option is available from the Colour Mgmt Timeline FX Ribbon submenu in the following modes:
- Log to Lin
- Lin to Log
- Gamma
- EXR Display
- PhotoMap
The Tagged Colour Space option is available at the first level of the Colour Mgmt Timeline FX Ribbon in the following modes:
- 1D LUT
- 3D LUT
- Colour Transform
The Edit Colour Space function is now available to clips generated within the application, from the Contextual menu. "Tag Only" is the only available option for these clips. If a mix of imported and generated clips is selected, you are offered the option of affecting the imported media only, generated media only or both. If both are selected, then "Tag Only" is the only available option.
New Colour Transforms have been added for RED Log3G10 and REDWideGamutRGB.
DCI-P3 has been added as a Working Space option.
For more details, see this video from the Flame Learning Channel:
Centralizing Colour Management.
Configuration
New AJA Driver
For Linux, it is in the new DKU, available from the system requirements web page. For macOS, the new driver 12.5.1 can be downloaded directly from the AJA website.
Creation of Flame Family Users Now Configurable
Up to this release, the installer created Flame Family accounts on the system. These users were optimized for flame by having several environment variables set up. It is now possible to turn this off from the graphical installer.
A Flame Family user account can now be created post installation with this command: /opt/Autodesk/<Application name>/bin/res/customizeUser.py --createUser <Application name> --createUserHome /opt/Autodesk/<Application name> --createUserDesc="<Application name>/". Where <Application Name> is the name of the application folder.
New Script to Modify Existing OS User Accounts
Existing OS users can be updated with the Flame Family environment variables such as keyboard shortcuts, with the terminal command:
/opt/Autodesk/<Application
name>/bin/res/customUser.py --customUser=<user account
name>
For usage, do:
/opt/Autodesk/<Application name>/bin/res/customizeUser.py --help
Improved OS Group Display
In the Project Management UI, OS groups are now sorted alphabetically.
Improved Support for Secondary Groups on macOS
It is now possible to start with a project that had been created by a group other than your primary group. In this case Flame relaunches with the correct effective group so content created will have the correct permissions.
Web Apps Now Use HTTPS
Web browser access to Backburner and Wiretap Central now uses HTTPS (secure Hypertext Transfer Protocol) for secure communication via authentication. Use https://localhost to access these web applications.
WiretapCentral and Backburner Web Monitor Security Upgrade
The new DKU includes the Apache authorization module mod_authnz_pam to enable authentication of user sessions on Linux for WiretapCentral and Backburner Web Monitor. Once installed, authentication and sessions support will be enabled. By default, the idle timeout is 30 minutes. It can be modified by modifying SessionMaxAge in either of: /etc/httpd/conf.d/wiretapcentral.conf or /etc/httpd/conf.d/backburnermonitor.conf.
This feature is Linux only since macOS does not have an Apache authentication plugin. If you use macOS to access WiretapCentral and Backburner Web Monitor running on a Linux server, authentication is used.
The authentication for Lustre Second Screen does not use OS users. Since the web service is enabled from Lustre user settings and is used in the finishing suite, managing access with secure user profiles is not required. Use the current credentials to access the Lustre Second Screen as in previous releases. Username and password are both lustre.
Wiretap Central on macOS
With Safari on macOS 10.11.x, if you have difficulty accessing Wiretap Central, try the following:
- In Safari, go to Preferences > Security.
- Enable Fraudulent sites: Warn when visiting a fraudulent website.
- Go to the Autodesk web services page (localhost).
- Select Wiretap Central and update the Certificate. This should start Wiretap Central.
Click To Focus Window Behavior Restored for Flame Family Users
CentOS window behaviour is now Click To Focus for Flame Family user accounts. For Dual DVI configurations when running Lustre and Flame/Flare simultaneously, you need to click on the application to set the focus to that application, for example to use keyboard shortcuts. The setting can be changed per user at: KDE menu > Settings > System Settings > Window Behavior.
Conform/AAF
AAF conform sees improvements in FrameFlex and UID support, while illegal UNIX characters sometimes found in FCP X XML are now handled better.
Support for the FrameFlex Effect From Avid Media Composer
In Avid Media Composer, source content with resolution different from the sequence has a Source Side effect to control the framing called FrameFlex.
Most parameters are now translated into a Resize FX, with some limitations. See FrameFlex.
New Unique ID in Conform View
When conforming AAF sequences from Avid Media Composer, multiple media Unique Identifiers (UID) are now available in Conform View. Hidden by default, enable the columns through the contextual menu.
- Essence UID: A media file's unique identifier, mostly found in MXF, Panasonic P2 and RED .r3d files.
- Source UID: When transcoding media files in Avid Media Composer, this UID is the one assigned to the media that results from the transcoding. Media files referenced by a multi-track Master Clip (i.e. video and audio tracks) have the same UID for all tracks.
- Original Source UID: When transcoding media files in Avid Media Composer, this UID is the one from the original media. In the case of a multi-track movie file imported in Media Composer, this UID will be the same for every track from that file.
These Unique Identifiers can be used as Match Criteria to ensure you relink your sequence with the expected media stream. MediaHub also displays UID information for clips. When exporting a sequence as an AAF, these UIDs are also exported where the sequence references media with UIDs.
Additional AAF Improvements
- When you import an AAF sequence with a custom resolution, there is no longer a Resize effect applied to the segments if the source media matches the sequence's attributes.
- The bit depth of the Flame project is now used to define the bit depth of the sequence. This used to be the bit depth of the first segment of the sequence.
- Clips muted in the AAF now show as Hidden in Flame.
- ASC CDL metadata from AAF created in Avid Media Composer is now translated in a Look Timeline FX.
FCP XML
Flame is now better at handling illegal UNIX characters found in FCP XML files from Apple Final Cut Pro, Adobe Premiere Pro CC, and Blackmagic Design Resolve. Illegal characters are read-only in the imported sequence, and replaced by an underscore when edited.
Connected Conform
Create Connected Segments on GapFX
It is now possible to Create Connected Segments on GapFX. These can be copied and pasted within your sequence. The GapFX can then be synced to propagate the changes in the effects settings throughout the sequence. Connected GapFX are available when creating or updating the Shots Sequence.
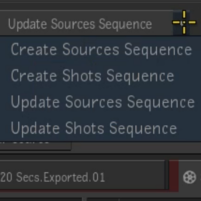
Update Sources Sequence
When adding new sequences to the Reel Group, it is now possible update source clips that were previously imported, so they can be used in new sequences and get updated in order to have the right amount of media to cover all sequences. This is useful when you have imported content with limited handles and where the new sequences require media not available in the Reel Group. When you select Update Sources Sequences, the sources already in the Sources Sequence are extended to cover the required duration.
Markers are now shown in the Sources Sequence when updated:
- Yellow: The source has been extended to fit the new sequence(s). The amount of added Heads & Tails is shown in the marker's comment field.
- Green: New source(s) added to the Sources Sequence
Update Shots Sequence
It is now possible to update the Shots Sequence when adding new sequence(s) to the Reel Group. When doing this, the following actions are performed:
- The new sequences are analyzed and matching content from the Shots Sequences gets Shot Naming and Segment Connections.
- Timeline FX, including BFX, from the original Shots Sequence, are synced with the newly added sequence.
- Shots Track (the resulting content from Batch Group creation in a Shots Sequence) is also added to the new sequences.
- New content that is not part of any deliverable sequence is appended at the end of the Shots Sequence. A green marker is displayed to indicate the inclusion of new content.
- A Red marker is displayed when content is only part of the Shots Sequence, meaning that no deliverable sequences are using this content.
When creating or updating Sources Sequence from EDLs: Sequence analysis for the Sources Sequences uses Clip names, Source Time-code and Tape name. Make sure all of your sequences have content with matching data for these three metadata points.
Connected Conform Timeline
New options are now available to control the Timeline segment colour as well as the Show/Hide status of Connected Segments. You can enable / disable Connected Segments / Link Colours and Connected Segments / Link Visibility On Sync from the Timeline Options dropdown menu, in order to share a colour between all connected segments and / or to share their visibility status. The visibility status is propagated after a Sync. If there are multiple colours defined for the corresponding segments in multiple sequences, the colour defined for the longest segment is used.
New Menu Items
- Conform View Options menu: Copy TimelineFX when using Create Shot Sequence: Use this option to copy the TimelineFX from your deliverables sequences to the Shots Sequence.
- Contextual Menu: Copy TimelineFX when using Create Shot Sequence: Use this option to copy the TimelineFX from your deliverables sequences to the Shots Sequence.
New Scope of Action Options on Connected Conform Operations
It is possible to select the scope of action of the following Connected Conform operations. See the table below for a detailed breakdown of which elements are affected by the scope of which Connected Conform operations.
| Connected Conform Operation | Scope of Action Options |
|---|---|
| Create Source Segment Connection | You can determine how this action is applied:
|
| Update Sources Sequence | A dialog is shown, prompting you to select the type of media to be used, when different content with matching data is found in the sequences. This can happen when you have mixed source material: source content from import and source content generated in Flame, for example. |
| Update Shots Sequence: Analyze | You can select which sequences are used to generate the Shots Sequence:
|
| Duplicate Connected Segments | You can define the scope of the duplicate action:
|
| Smart Shot Replace | You can select the scope of the Smart Shot Replace action:
|
Connected Conform Miscellaneous
- The Clip Name is no longer taken into account when generating the Sources or Shots Sequence.
- Different content that share a similar Tape Name and source timecode while referencing different media files are no longer merged when creating the Sources Sequence.
- Audio Tracks are no longer taken into account when creating or updating the Shots Sequence. Previous to this release, if you had sequences with the same video content, with and without audio, similar Shots would be duplicated in the Shots Sequence.
- Sources Sequence now supports different content sharing the same Tapename and Source Timecode but from different media files. This modification enables you to work with original camera content and graded content in the same Reel Group.
- Duplicating a Reel Group now preserves the Opened Sequence status.
- Updating Sources and Shot Sequences now displays a progress bar showing the remaining time for the operation to complete.
For more details, see these videos from the Flame Learning Channel:
Effects Tools
Motion Analysis has been updated with a new algorithm. The previous algorithm remains available. They use a different approach to compute the vector flow.
The previous algorithm, renamed Motion Local, uses a neighbour approach. It loses precision with fast motion, and produces those warped results we often see. But in some cases, it can still provide interesting results.
The new algorithm, called Motion Global, takes a holistic approach in analyzing the image. It offers a greater stability without the warping the results. Motion Global also exposes a few parameters you can animate over time to get the best motion flow, according to the image sequence content.
GMask Tracer
GMask Tracer blending has been updated to include all of the options found in the Comp Batch node. This affords more flexibility to the GMask shape, by allowing not only Colour blending, but also Transparency blending. GMask shape intersections and combinations are now easier to produce, using the Matte blending operation.
For more details, see this video from the Flame Learning Channel:
Masking and the Region of Interest.
Look
Look is a new tool that can be used to create a CDL from scratch or to import an existing one. See Look for details within the User Guide.
For more details, see this video from the Flame Learning Channel:
Look Development with CDLs.
Lustre
Colour Space Metadata
Colour Space metadata is now included in exported OpenEXR files from Lustre:
- When selecting the “Original Media” Media Export option, the working colour space of the source content is used.
- When selecting the “One Sequence” Media Export option, the colour spaced defined in the Render/Output menu is used. If the colour space is set to “From Source”, the colour space of the first shot of the sequence is used.
- When selecting the “Source Grading” Media Export option, the colour spaced defined in the Render/Output menu is used. If the colour space is set to "From Source", the colour space of the shot is used.
Grade Bin & Still Store
Grade Bin and Still store reference images are now 16-bit. In previous versions of Lustre, the Grade Bin and the Still Store used only 8-bit PNG media. The PNG file is still generated, alongside a higher fidelity16-bit Open EXR file. The PNG file is generated to maintain compatibility in environments where various versions of Lustre are used. The new OpenEXR generation does not impact the Grade Bin / Still Store saving time. A Grade Bin saved in previous release displays an 'L' icon to indicate it is not in 16-bit float OpenEXR (L stands for Legacy). You can resave your Grade Bins in order to display the high fidelity reference.
Lustre Second Screen SSL Certificate
To use Lustre Second Screen with an SSL certificate, on an iOS device running iOS 10.3, you must manually trust the certificate, within the Settings app. See https://support.apple.com/en-ca/HT204477 for details.
Lustre Plugin API
It is now possible to add a file browser and one text field, using the Lustre plugin API.
Storyboard
It is now possible to mute the Multi-Channel, Container and Matte Container icons displayed on the Storyboard. This makes monitoring colour continuity easier, when working with the Large Storyboard View on the AJA SDI.
Tangent Panel
The following functions have been added to the Tangent Mapper:
- Keyer Matte Functions
- Keyer On/Off
- Picker On/Off
Keyboard Shortcuts
The Go to Previous Keyframe (Shift+Left Arrow) and Go to Next Keyframe (Shift+Right Arrow) shortcuts have been updated in the Lustre user profile to match the recently added keystrokes in Lustre. As a result, the Select Previous Clip and Select Next Clip shortcuts are now unassigned in the Lustre user profile.
Miscellaneous
Content generated using Background Render Services, such as Lustre Burn, Shot Reactor and Transcoding, now has the correct file permissions.
The reference image for the Still Store now includes the image’s Reposition and Resizing attributes.
Lustre / Flame Interoperability
- Look CDL data is now transferred to the Lustre CDL grading information when a Flame clip is loaded in Lustre using the Source Grading option.
- The CDL grading information from Lustre is not transferred back to Flame. Only the rendered image is returned.
- When using a Matte Container in Flame for Secondary grading in Lustre using Mattes, make sure the Comp FX on the foreground layer has Background Matte Control set to Matte Off. If not, the resulting content will use the background Matte output. Hidden segments in a sequence imported from Flame are displayed in Lustre, based on the Source Grading sequence import options:
- Enabled: The source is available in Lustre and is hidden when sent back to Flame.
- Disabled: Hidden segments are treated as gaps when imported in Lustre.
Markers
It is now possible to assign a duration to a Marker or Segment Marker.
- The duration can be modified using the Duration numeric field in the Timeline Markers menu or the Markers view.
- It is possible to separate a marker into two parts using the "Enable Duration Mode on Marker" shortcut. It is assigned to Shift+Click by default. It is also possible to automatically set a Segment Marker to its parent segment length using the "Set Marker Duration To Segment Length" shortcut. It is assigned to Ctrl+Shift+Click by default.
- The left and right parts of a Marker can be gesturally moved by grabbing the corresponding icons.
- You can move the Marker by grabbing the coloured strip between the left and right icons.
For more details, see this video from the Flame Learning Channel:
Marker and Segment Marker Durations.
You can now display more than one marker at once in a Burn-In Metadata layer. Lines are automatically added to the Marker layer when multiple Markers or Segment Markers are available at the same time. It is possible to control whether the layers are added towards the top or the bottom using the Stack Up and Stack Down options. Markers and Segment Markers still can't be displayed on the same layer. Two layers are required to display Markers and Segment Markers at once. See Using The Markers View for details.
MediaHub
New UID Columns
New columns are now available in the List view. These columns, hidden by default and enabled through the contextual menu, show the various Unique Identifiers of the source media files. Unique Identifiers are available in two cases:
- MXF generated by Avid Media Composer in a transcoding scenario can contain the following UID:
- Essence UID: A media file's unique identifier. In a Media Composer multi-track Master clip, each media file has its own unique identifier.
- Source UID: When transcoding media files in Avid Media Composer, this UID is the one assigned to the media that results from the transcoding. Media files referenced by a multi-track Master Clip (i.e. video and audio tracks) have the same UID for all tracks.
- Original Source UID: When transcoding media files in Avid Media Composer, this UID is the one from the original media. In the case of a multi-track movie file imported in Media Composer, this UID will be the same for every track from that file.
- The following file formats all contain unique identifier read by
Flame. This UID is listed in the MediaHub under the Unique ID column.
- Sony MXF
- Panasonic P2
- RED .r3d
UIDs can be used when performing a conform, since they are available as a Conform Match Criteria.
Media Import
Improved MediaReactor Integration
QuickTime and MP4 files with codecs that are not supported natively by Flame are now decoded through MediaReactor, when available.
Updated File Support
- Support for files encoded in ARRIRAW SDK 5.3.0.15.
- Support for Apple ProRes files generated by Panasonic Varicam LT, Varicam 35, and Varicam HS.
- Support for media files generated by Panasonic GH5 DSLR, including Long GOP and AVCHD files, but not HEVC-encoded files.
New OpenEXR Import Option
Default Colour Tagging option, located in .
When working with Multi-Channel OpenEXR files containing channels with custom naming (i.e. channel names that are not contained in the channelrules.cfg file), you can specify whether the channels should be tagged as Mattes, or the same as the Beauty pass. This is useful when working with OpenEXR files with Mattes for compositing and grading that are not named as alpha channels.
Any colour processing specified in the General Colour Management options (e.g. a LUT) is only applied to the Beauty pass and any other channels tagged as such and not to channels tagged as Matte or Data.
Miscellaneous Media Import Enhancements
- The aspect ratio from TIFF media files is now read.
- The Drop Frame timecode in 59.97/60p DPX from SAM Rio product is now supported.
- Improved grouping of the audio tracks from mono and stereo QuickTime files.
Media Export
OpenEXR Improvements
- When writing ACES-compliant OpenEXR files (SMPTE ST2065-4), Flame now sets the acesImageContainer attribute in the header and sets the chromaticities attribute to ACES2065-1. ACES-compliant files are tagged ACES2065-1, are uncompressed, use the 16-bit float datatype, and have a channel layout of BGR or BGRA. When reading these files, they are tagged as ACES2065-1 by default when the Colour Management mode is From File or Rules.
- When writing any other OpenEXR file, the colour space tag is now written into the header as the autodeskColorSpace attribute. When reading files that contain this attribute, the colour space tag is set by default when the Colour Management mode is From File or Rules.
Simplified Avid DNx Naming
The Avid DNx options available in the Media Export window have been renamed to simplify the menu options. The options themselves have not changed, only their names.
Renamed Avid DNxHD codecs options:
- DNxHD 36
- DNxHD 100
- DNxHD 145
- DNxHD 220
- DNxHD 444
Renamed Avid DNxHR codecs options:
- DNxHR Low Bandwidth
- DNxHR Standard Quality
- DNxHR High Quality
- DNxHR High Quality Extended
- DNxHR 4:4:4
Miscellaneous Media Export Improvements
- Exporting a Metadata Only AAF now shows video and audio tracks of a single Master Clip as Multi-Tracks Master Clips instead of a single track Master as in previous versions. This should make it easier to relink media in Avid Media Composer.
- Aspect ratio metadata is now written to TIFF media files.
- When exporting as Sony XAVC, you can now choose between two profiles: Variable Bit Rate (VBR) or Constrained Bytes per GOP (CBG).
- When using a Shot Publish preset, the ShotName token is now assigned to segments in the re-imported sequence.
- You should no longer see a No Media warning when exporting content without media in its handles.
- The Start Frame field in the Video Options tab is now set to 1 by default. Default was previously 0.
- The Shot Name token is now available in every export pattern field. It was previously available only to Sequence Publish exports.
Media Library
It is now possible to Flush Source Caching on a clip even if the same media is cached in other sequences.
Miscellaneous
Exporting Table Data
It is now possible to export the content of certain tables within the application to an XML file so it can be opened in third party software, such as Microsoft Excel. The "Export" option is found in the table header's Contextual menu. This option is available for the following tables:
- The Media panel
- The Markers view
- The Conform list
- The MediaHub list
The destination path can be set from the File Browser.
For more details, see this video from the Flame Learning Channel:
Exporting Lists.
Player
The Play cursor is now hidden when it hasn't moved for a short period of time during playback in the Fullscreen player. The cursor reappears as soon as you move it.
Flame Feedback
A link to the flamefeedback.autodesk.com page is now accessible directly from the Flame > Help submenu.
Modular Keyer
The "Toggle to MK Result View" keyboard shortcut has been modified in order to prevent a conflict with the "Action Context" keyboard shortcut:
- The shortcut is now assigned to the 5 key in the Flame and Lustre user profiles.
- The shortcut is now assigned to Shift+F2 in the Smoke Classic and Smoke FCP user profiles.
Open Clip Creator
The new Open Clip Creator greatly facilitates the creation and assembly of Open Clip XML. Using Open Clip Creator, you can create an OpenClip XML from the MediaHub or using the command line tool, with or without a GUI. See Using Open Clip Creator for details.
For more details, see these videos from the Flame Learning Channel:
Paint
- In the Batch Paint node, you can now load brushes created in the Paint Tool, including custom brushes. Use the Custom Brush Load button located in the Node Prefs menu. For information on creating brushes in the Paint Tool, see
Creating a Custom Brush.
For more details, see this video from the Flame Learning Channel:
Customizing Paint Brushes.
- You can now rename a Paint Source node as you would any node.
- The Batch Paint frame range is now compatible with the Duration mode of the Batch or Batch FX Timebar.
Preview
HDR monitoring options are now available for AJA HDMI output.
On Kona4 and IO4K with an HDMI 2.0 display, you can define the SDR/HDR viewing mode.
- In Flame/Flare/Flame Assist: Use the Preferences - Broadcast Monitor.
- In Lustre: Use the menu Editing/Playout
The options are:
- NONE (the default setting)
- BT-2020
- BT-2020-CL (Constant Luminance)
- DCI-P3-CL (Constant Luminance)
- DCI-P3
- CUSTOM: It is possible to define an XML file containing the various HDMI options and set an ENV to define the file location. This is a global setting, so you must start the application with the ENV applied, in order to avoid monitoring issues. In upcoming previews, this setting will be project-based.
- A sample file is available in the cfg folder of the application: /opt/Autodesk/Flame_2018.2/cfg/AjaHdmiHdrFileSample.xml
- To use a customHDR.xml file you created in /usr/tmp/ use: setenv DL_AJA_HDMI_HDR_CUSTOM_FILE /usr/tmp/customHDR.xml
Pybox
Pybox is a new node now available in Batch, exclusively available in Flame.
Pybox allows other applications to fully integrate the Flame compositing pipeline, while Flame artist does not have to know the third-party application to use it in Flame. For example, you can create a Pybox that uses Maya to render and produce content, and then have that content fed back into the Batch pipeline. Seamlessly. The artist simply adds a Pybox node to the Batch schematic, and selects the right handler.
See Pybox.
Python API
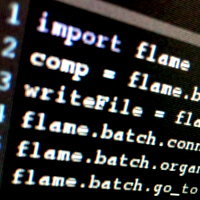
A new Python API allows you to script the creation and layout of Batch schematics.
The following components can be scripted:
- Batch Group creation
- The Import node
- The Comp node
- The Write File node
- Batch schematic layout
You can execute the Python script when launching Flame as a command option, or from the Shotgun console inside Flame. The latter option requires a valid Shotgun subscription.
See Python API.
For more details, see this video from the Flame Learning Channel:
Working With Python Scripting.
Shotgun
The following options have been added in Shotgun Classic tk-flame (v1.8.4), when creating a Flame Family project from Shotgun Desktop (also available in 2018.1 Update):
- Custom project folder setup location
- Group Ownership
- 32-bit float


It is now also possible to associate multiple Flame Family projects to a Shotgun project.
For more information on Shotgun Desktop, see https://github.com/shotgunsoftware/tk-framework-desktopserver/wiki/Documentation.
Timeline
It is now possible to colour code and hide timeline segments. See Colour-Coding & Hiding Timeline Segments for details.
For more details, see these videos from the Flame Learning Channel: