The Light Editor provides a convenient way for you to manage the lights in your scene. Use the Light Editor in conjunction with the Render Setup editor to easily create light overrides for your render layer.

Click
 on the status line, or double-click the
Lights tab at the top of the
Render Setup editor to open the
Light Editor. All the lights in your scene are listed.
on the status line, or double-click the
Lights tab at the top of the
Render Setup editor to open the
Light Editor. All the lights in your scene are listed.
Display the Light Editor for each layer
Lights are automatically added to each render layer by default.
 You can
override this behavior by
disabling
Options > Include all lights in each render layer by default in the
Render Setup editor.
You can
override this behavior by
disabling
Options > Include all lights in each render layer by default in the
Render Setup editor.
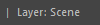
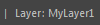
To switch to the Light Editor for each layer, set the layer as visible. The Light Editor toolbar indicates the layer that you are currently in:
- Scene
- Layer name
Create overrides for individual lights in your layer
- Open the
Light Editor.
You can click
on the status line, or double-click the
Lights tab on the scene layer or any of the render layers.
- Click the
 icon to switch to the layer for which you want to create a light override.
- In the Light Editor, select the light for which you want to create an override.
- In the
Light Editor
Property Editor, right-click the attribute and select
Create Absolute Override for Visible Layer or
Create Relative Override for Visible Layer to create an absolute or relative override.
Note: You must not have any collections selected in the render layer; otherwise, the override is created for the collection and not for the light you selected.
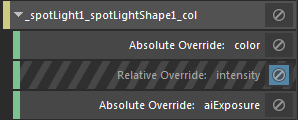
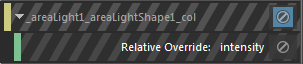
Overridden values are denoted in orange. As soon as an override is created, a Lights collection is created for your layer in the Render Setup editor, if it does not exist already. A collection containing the light you just modified is created within this Lights collection, as well as the corresponding override.
- Adjust the value of your override in the
Light Editor or
Render Setup
Property Editor.
You cannot drag and drop the Lights collection in a render layer into another collection within the same layer.
You can only cut, copy and paste the Lights collection from one render layer to another. You cannot cut, copy and paste individual light overrides or individual light subcollections.
Create overrides for multiple lights in your layer
To override the same attribute on multiple lights, create a collection and add to it your lights, then create an override on the collection.
- In the
Render Setup editor, click the
icon to switch to the layer for which you want to create a light override.
- Right-click the layer and select Create Collection.
- Double-click the Lights tab at the top of the Render Setup editor to open the Light Editor.
- Select the lights for which you want to create the override, then select the collection and click Add in the Property Editor to add the lights to the collection.
- Select Lights from the Collection Filters drop-down list to ensure that the lights are not filtered out from the collection.
- With the collection still selected in the
Render Setup editor, right-click the attribute that you want to override in the
Light Editor
Property Editor and select
Create Absolute Override for Visible Layer or
Create Relative Override for Visible Layer.
Now when you set the value for one light, all other lights in the collection are also updated.
Color of attributes in the Light Editor
Overridden attributes appear in orange, and animated attributes appear in red.
Attributes without any overrides applied appear in white. Locked attributes also appear in white, but cannot be edited.
Disable lights or light overrides in a layer
 button in the
Render Setup editor.
button in the
Render Setup editor.
 on the
Lights tab of the layer in the
Render Setup editor.
on the
Lights tab of the layer in the
Render Setup editor.

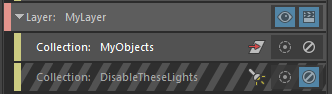
To disable a particular light or a subset of lights in a layer:
- Click
on the collection for the particular light, if it exists; or
- Create a collection and add to it your lights, then disable the collection.
Note:
Ensure that Collection Filters is set to Lights for this collection.
The Light Editor does not indicate that the corresponding lights are disabled in the Render Setup editor.