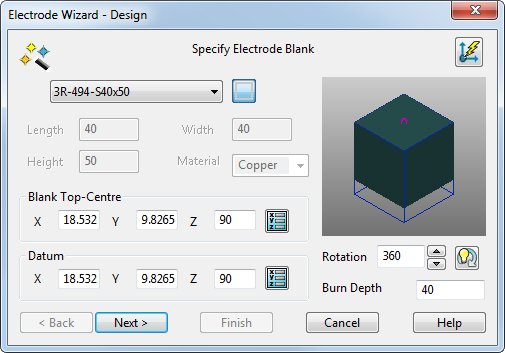
Use this page to specify the blank of the electrode when the productis an active solid and the electrodeis a pre-selected solid with a base.
To specify the blank:
 — This drop-down list contains standard blanks available, which fit the dimensions of the electrode. You can
add your own blanks to the list.
— This drop-down list contains standard blanks available, which fit the dimensions of the electrode. You can
add your own blanks to the list.
The selector also contains the User Defined option, which enables you to define your own blanks.
If a standard blank is selected, then its dimensions are automatically added to the wizard and you can't change the values.
 — This selects the shape of the user-defined blank. This shows a rectangle and so the blank is rectangular. For a circular blank, click this button. The image on the button changes to
 .
.
Length — This is the length of the rectangular blank. You can edit the length of a user-defined blank only.
Width — This is the width of the rectangular blank. You can edit the width of a user-defined blank only.
Diameter — This is the diameter of the circular blank. You can edit the diameter of a user-defined blank only.
Height — This is the height of the blank. You can edit the height of a user-defined blank only.
Material — This is the material of the blank. You can change the material of a user-defined blank only. If you change Material to either Copper or Graphite, the material of the electrode is changed so that the shaded blank looks like the material chosen.
- Blank Top-Centre — These coordinates default to the top-centre of the solids bounding box. They are used to position the electrode on the set up sheets. If the coordinates are not at the centre of the blank, edit the values so that they are.
Enter the X Y Z coordinates, or click the Position
 button to open the
Position dialog, where you can use position entry tools.
button to open the
Position dialog, where you can use position entry tools.
- Datum Point — This gives the position of the electrode in the model and is used for machining purposes. Input the required datum position for your electrode.
Enter the X Y Z coordinates, or click the Position
button to open the
Position dialog, where you can use position entry tools.
- Rotation — This rotates the blank around the Z axis by the given angle. Enter a rotation angle or use the arrow buttons to specify the angle.
Click
 to automatically rotate the electrode blank to the best position so that the minimum amount of blank material is wasted.
- Burn depth — Enter the height of the burn region in the burn direction.
- Next — Displays the Specify Electrode Holderpage of the Electrode Wizard - Design.