A walkthrough is a simulated tour of a site or building using camera positions placed along a path that you define. Create a walkthrough to present your model to clients or team members.
 Video: Create and Edit a Walkthrough Animation
The walkthrough path consists of camera frames and key frames. A key frame is a frame that can be modified to change the direction and position of the camera. By default, walkthroughs are created as a series of perspective views, but you can also create them as orthographic 3D views.
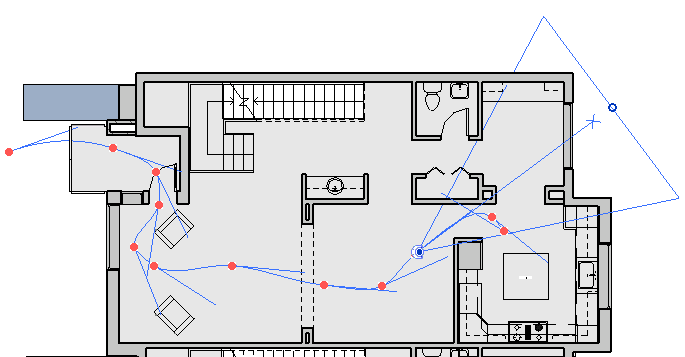
The following image shows an example of a walkthrough path. The red dots indicate key frames. The blue triangular shape shows the field of view, which defines the width and depth of the camera view.

After you've created a walkthrough, export it to share with others.
When exporting the walkthrough, you can create a series of static images or a video file. When someone views the video, they can't change the path through the model or the camera angles. The walkthrough provides a pre-defined experience of the model.
If you need a real-time walkthrough experience, use Revit Live instead. Revit Live allows you to navigate anywhere in the model without creating a path or setting up camera views. Revit Live does not create a movie file as the Walkthrough feature does, however.
Autodesk 3ds Max modeling and animation software is another alternative to the Revit Walkthrough feature. It allows you to have more control over camera movement and to animate elements in the scene, such as a door opening and closing.