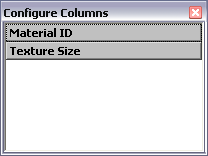
To add columns to the table:
- Right-click a column label and then choose Configure Columns from the context menu.
This opens the Configure Columns dialog.
 Tip: Another way to access Configure Columns is from the Customize menu.
 - Drag a column label from the Configure Columns dialog to one of the Material Explorer column labels.
The new column is inserted to the left of the existing column.
- Continue adding columns as desired. When finished, close the Configure Columns dialog.
To remove a column from the table:
- Drag the column label downward until the mouse cursor changes to an X icon.
- Release the mouse button. Note: Even if you remove the Name column, the hierarchy remains at the left side of the window.
To sort the list based on a column or columns:
- Click a column label.
This performs a single-level sort based on the column contents, in ascending order, as indicated by an up arrow on the right side of the label. For example, clicking the Name label sorts the table in ASCII order, starting with punctuation, then numbers, then letters.
Note: Object hierarchies remain together when the list is sorted. Child objects at the same level are sorted only with respect to one another, not objects on other hierarchical levels. - To reverse the sort order, click the same column label again.
Alternatively, right-click a column label and choose Sort Ascending or Sort Descending. You can sort any number of different columns this way to perform a multi-level sort.
To remove sorting:
- Right-click the column label and choose Clear Sort State.
To rearrange columns:
- Drag a column label on top of another one. This moves the column to the left of the target column.
To resize a column:
- Drag the divider on the right side of the column label.
Alternatively, to auto-resize a column, double-click the divider on the right side of the label.