Flame 2019 Highlights
 |
 |
 |
|
Effects Tab
|
MasterGrade
|
Creative Tools
|
Navigation tips:
- Make sure to check out https://area.autodesk.com/flame-central/, a new hub for all your Flame family links in one convenient tabbed page.
- Looking for the Release Notes for Flame Family 2019? Click here: Flame Family 2019 Release Notes.
- Many new feature videos (as well as other workflow videos) are available at
https://www.youtube.com/user/FlameHowTos. This Learning Channel is updated frequently, so be sure to subscribe or bookmark the page. Links to specific 2019 Update videos are denoted by this icon:

- In this What's New topic,
 indicates a new feature or enhancement that was suggested and voted up by Flame users on the Flame Feedback portal:
http://flamefeedback.autodesk.com (also accessible directly from the
menu).
indicates a new feature or enhancement that was suggested and voted up by Flame users on the Flame Feedback portal:
http://flamefeedback.autodesk.com (also accessible directly from the
menu).
- Look for the
 tag throughout the documentation for sections indicating new or updated 2019 content.
For details on all the new features and enhancements in this release, follow the links to navigate to the sections below:
- Action
- Archive
- Batch and Batch FX
- Colour Management
- Configuration (macOS-only)
- Conform
- Connected Conform Workflow
- Effects Tab
- GMask Tracer
- Keyboard Shortcuts
- Lustre
- Lustre-Flame Interoperability
- Matchbox
- MediaHub
- Media Import
- Media Export
- Media Panel
- Pybox
- Python API
- Scopes
- Additional Flame Improvements
Action
New Mode for Motion Warp
Motion Warp now has a new mode: Freeze (in addition to Warp and Hold). Freeze allows you to keep the current warp result at the reference frame, and then repeat it up to the next reference frame, without having to update the projection or the GMask's shape.
Improvements to Selectives
- You can now assign a custom name to a Selective node in . This name appears in the schematic, the HUD, and the Priority Editor.
- Deleting a GMask attached to a Selective node now automatically selects the parent Selective.
- Deleting a Selective node now automatically selects a Selective sibling.
- You can now use the contextual menu to add a Lift Gamma Gain shader when creating a Selective with the option Add Selective LiftGammaGain.
- The Selectives Manager has been improved to simplify the management of multiple selectives on a surface, or in an Image node.
FBX Improvements
You now have access to a new set of PBS FBX geometry, included in the FBX home folder.
These FBX load already textured, with a Physically Based shader set to 0.33 roughness. Add an IBL to the camera before loading any PBS geometry to see the proper physically-based rendering on load. The new geometries were subdivided and UV'ed in Maya, to be used right away with a Deform Mesh node and the Projector Motion Warp tracking.
Navigation Improvements
- You can now use keyboard shortcuts to go forward and back through selections in Action, as you would in a web browser.
- Action Selection Previous: Go back through the previous 10 selections. Keyboard shortcut: Right-Alt+,
- Use Action Selection Next: Got to the next object in the queue. Keyboard shortcut: Right-Alt+.
- In the contextual menu, the Assign Media option now displays Current next to the media currently assigned to the object.
- The UV map output now reflects the warping generated by Motion Warp tracking: output the UV created by a Surface Motion Warp, and then re-apply it anywhere without having to redo motion analysis and caching.
- A GMask node now displays its Blend mode and Invert state in the schematic, next to its name.
- The Schematic clean-up tool now allows you to tidy up your Schematic one node tree at a time. Select a node and press
Alt+T to tidy it up. Do this on a Surface with Matchbox and Selectives to re-order the nodes in order of processing, from left to right, mirroring the order in the Priority Editor and the HUD.
- The Smoke Classic user profile has been updated to include the following keyboard shortcuts by default:
- Action Create Free GMask Link: Space+G
- Action Create Ellipse GMask Link: Alt+Space+G
- Action Create Rectangle GMask Link: Ctrl+Space+G
Archive
General Improvements:
- Every clip that is skipped by the archiving process (at your request) is now displayed in red in the resulting archive. Any error that happened during the archiving process is now logged in a text file. That file is saved alongside the archive.
- In a secure network environment configured for user groups, you can now create an archive in a location that is owned by the Secondary group instead of the Primary group. In this context, Flame always asks for confirmation before creating the archive. Using a Secondary group might have the unintended consequence of opening up a confidential archive to users who should not have access. In this context, correct configuration of Secondary groups is essential.
Archive Conversion
You can now convert an archive from previous releases to the current version of the application.
When opening an archive created in a previous version of Flame Family, the archive is read-only. But you now have the option to convert the archive to the current version of the application. Once converted, the archive becomes read/write with the current version of the application but makes it incompatible with previous version of the application, and the conversion cannot be undone.
Tape Device archive (LTO) and VTR archive are not impacted by this change, and cannot be converted.
flame_archive Improvements
You can now exclude renders and media cache when archiving using the flame_archive command-line tool. Use the -O switch.
-O, --omit <LIST>
<LIST> is a comma-separated list of at least one of the following:
- sources : Do not include source caches in archive (only relevant with --linked).
- renders : Do not include intermediate renders in archive.
A log file is saved alongside the archive when using flame_archive.
You can also use flame_archive to migrate an archive. Use the following command to convert an archive to current format:
flame_archive -c <archive>
The log file saved alongside the archive is also updated with the conversion operation status.
Batch and Batch FX
New Playback Options
The following playback options are now available in Batch, from the Play drop-down button:
Playback Direction
- Forward
- Backward
Playback Range
- Normal
- In to Out
- Start to Out
- In to End
- Selection
- Custom ( The custom range can be set using start / end widgets similar to the ones available in the RAM Play option.)
Playback Mode
- Once
- Loop
- Back and Forth
Playback Speed
- Play All Frames
- Play Real-Time
Audio Monitoring is a new option that allows you to monitor an audio context while a node is selected.
Multi-Channel Render Node
The Render node can now generate multi-channel content.
Select the Multi-Channel or the Multi-Channel Stereo options from the Format drop-down menu, and define the number of Inputs that the Render creates. The resulting clip can then be exported as a multi-channel OpenEXR file sequence, or added in a sequence for Lustre-Flame Interchange.
Use the Expand/Collapse Current node keyboard shortcut: ALT+C (Smoke Classic) or Shift+C (Flame) to expand the Render node and simplify the connection of channels.
The channels are named Result_1 and Result_1_alpha, etc.
You can also use the new multi-channel capabilities of the Render node to provide mattes for secondary grading or modified beauty. For example, you have a back plate, composite, and content with text. Have the text matte connected to another channel so the colourist can grade the content around the text.
Multi-Channel Write File Node
When the Output File Format is set to OpenEXR, the Write File node can be configured to be multi-channel.
Select Multi-Channel or Multi-Channel Stereo from the Format drop-down menu to define the number of inputs for the Render node.
Use the Expand/Collapse Current node keyboard shortcut: ALT+C (Smoke Classic) or Shift+C (Flame) to expand the Render node and simplify the connection of channels.
Stereoscopic 3D content is created as left and right file sequences.
The OpenEXR multi-channel media generated by the node is multi-part, and complies with version 2.0 of the OpenEXR specifications. These files are only supported in third-party applications that support the current version of the OpenEXR SDK.
Drag & Drop Node Replace
You can now drag a node from a Batch Node Bin or the Schematic and replace an existing node, within the Batch Schematic, by dropping the new node on top of it.
If a node is replaced by a node of the same type, all the connections are kept intact. If a node is replaced by a different node type, only the default socket is connected.
The replaced node is deleted.
A setting controls the Replace Node function: .
You can also use a keyboard shortcut to temporarily override the preference: use Ctrl+Shift as you drag the node.
Additional Batch and Batch FX Improvements
- The Render node now supports Clip History.
- The Media / Segment / Timeline Range selection, available in Batch FX Timebar's Options, is independent from the same function in Effects.
Colour Management
Flame 2019 introduces the following changes to colour management.
- The PhotoMapLC viewing transform is now available in the Simple Linear Workflow colour policy viewing rules.
- Colour space metadata is now read from QuickTime (.mov), ARRIRAW (.ari), and SonyRAW (.mxf) files.
- The Input Colour Space list is no longer filtered based on the selected Working Colour Space. It now displays all possible input colour spaces.
Important: If you're working with projects set to Legacy Colour Management, we recommend setting the Tagged Colour Space option in the tab to Unknown (instead of From File or Rules). Because Flame now reads colour management metadata from some files, Unknown ensures that media display as you'd expect in a Legacy Colour Management project. And since Tagged Colour Space is saved per project, you set it only once per project.
Configuration (macOS-only)
You can now run Flame Family applications on macOS with the firewall enabled.
Security changes made to macOS 10.12 and 10.13 created issues when Flame Family applications and background services were running: firewall warning messages would appear repeatedly, preventing you from using the application.
But now, once you've survived that initial barrage of firewall exception requests, you won't be bothered any more: the permissions persist until the next installation.
Conform
2019 introduces improvements to AAF support, as well as add a new option for CDL support in AAF and EDL sequences.
Improvements to AAF Conform
AAF conform now supports Matte Key effects, and better handles relinking to PSD material.
Support for 2D and 3D Matte Key Effect
In Avid Media Composer, importing RGBA media files creates a MatteKey clip that, when added on top of a background, creates a MatteKey effect. In Flame, this effect is now supported, and is converted as a 2D Transform effect on a Matte Container.
The following MatteKey effects cases are supported:
- Imported / Linked RGBA media files (movie or file sequence)
- Nested MatteKey effect (Matte clip with nested foreground)
The following cases are not supported:
- Three layers effect (i.e. Matte clip with MatteKey effect on V3, foreground on V2 and background on V1). You will need to convert it manually to a Matte Container.
- Title Effect used as a Matte inside a MatteKey segment
Before importing the AAF sequence, make sure the Multi-Channel Processing () is set to matte container.
Improved PSD Support in AAF
A new Photoshop media file naming option is now available, and makes it easier to conform AAF files with Matte Key segments that reference the layers of a PSD file: Filename.ext: Layer.
With this option, you can use the Name criterion to match media when relinking in Conform.
To conform PSD layers from AAF compositions:
- Select the option Filename.ext: Layer from .
- Set to Create Matte Container.
- Import the AAF sequence.
- If Conform cannot automatically link to the media files, use Set Search Location to locate the media files.
- Click Match Criteria and set Name to Strict. The event is then seen as Matched.
- Click Link Sources.
The sequence now shows the event linked to the PSD media files.
Support for CDL in EDL and AAF
A new option handles the Colour Decision List information that is part of an imported EDL or AAF sequence.
To enable CDL-to-Look conversion:
- For an AAF: Enable
- For an EDL: Enable .
Enabling this option creates a Look Timeline FX on segments where ASC CDL data is available. Disable the option to copy CDL information to segment comments, without creating a Look Timeline FX.
The option is disabled by default.
Additional Conform Improvements
- CDL comments are now preserved when you import an EDL with ASC CDL data without using the option Convert CDL to Look.
- Support for Timewarps found in imported sequences has improved for sequences from FCP XML / FCP X XML and Adobe Premiere Pro CC 2018 XML.
- When searching a location for media to conform, you can now control how the Search behaves:
- Scan: Searches the current folder and any sub-folder. This is the default option.
- Set: Searches only the current folder.
Connected Conform Workflow
You can now sync individual or selected Timeline FX across segments when working with Connected Sources or Connected Segments.
Right-click the Timeline FX in the Effects Ribbon, and from the contextual menu, select an option:
- Sync FX to Connected Segments
- The Timeline FX syncs on all Shared Segments located in the current Reel Group.
- Sync FX to Shared Source Segments (Sequences Reels)
- The Timeline FX syncs on all sequences located in the Sequences Reel in the current Reel Group.
- Sync FX to Shared Source Segments (All Reels)
- The Timeline FX syncs on all Shared Sources located in the current Reel Group (including the source clips).
As usual, you can Ctrl+click or Shift+click to select more than one Timeline FX to sync.
When syncing with a segment that doesn't have the same Timeline FX, Flame attempts to preserve the sequence of effects in the ribbon. To review the Connected Sources or Segments, use the Jump to Shared Source Segment option from the contextual menu.
Timewarps do not sync.
Additional Connected Conform Improvements
- A connected segment now remains connected even if you copy it to the Desktop or the Freeform, and then add it to another sequence in the same Reel Group.
-
Update Source Sequences is now more robust when used with sequences that reference media found in multiple locations.
- Content with Timewarps is now more efficiently handled when creating or updating a Sources Sequence, especially in regard to handles.
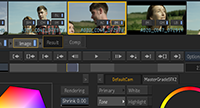
Effects Tab
A new tab, Effects, changes the way you work with Timeline FX. Whenever you open a Timeline FX editor, Effects is now displayed. This new tab provides you with an in-context view of the timeline shots.
It also provides you with new effects to augment your timeline-based workflow.
For additional details, see Effects Tab.
See this playlist from the Flame Learning Channel:
The Effects Environment.
Effects integrates the new Image FX, a tool inspired by Action's Selectives, for layered creative work.
See this playlist from the Flame Learning Channel:
Image Timeline FX.
GMask Tracer
2019 adds Motion Warp tracking to the GMask Tracer tool.
Also, a new Matchbox shader, Matte Viewer, allows you to visualize the matte coverage on the Comp result of the GMask Tracer.
To use the Matte Viewer Matchbox:
- Add Matte Viewer to the Camera node of the GMask Tracer schematic.
- Switch to the Comp output view.
You can then change the overlay colour and transparency of the Matte Coverage. You can view the semi-transparent region, or the whole matte output.
Keyboard Shortcuts
2019 adds new keyboard shortcuts, as well as changes some keyboard assignments.
-
The Duplicate Keep Connections keyboard shortcut available in the Batch or Batch FX Schematic is assigned to Control+Shift+D by default in all user profiles.
Modifications have been made to the rendering functions keyboard shortcuts in Timeline and Tools.
Timeline
- The following keyboard shortcuts have been modified:
- Render: Renamed Render (Current Mode). Assigned to \ in the Smoke FCP profile. Unassigned in other profiles.
- Render Selection: Assigned to \ in the Smoke Classic profile. Unassigned in other profiles.
- Render Top: Renamed Render Timeline. Assigned to Shift+\ in the Smoke Classic profile. Unassigned in other profiles.
- The following keyboard shortcuts have been added:
- Burn Selection: Assigned to Space+\ in the Smoke Classic profile. It remains unassigned in other profiles.
- Burn Timeline: Assigned to Shift+Space+\ in the Smoke Classic profile. It remains unassigned in other profiles.
- Background Reactor Timeline: Unassigned in all user profiles, by default.
- Background Reactor Selection: Unassigned in all user profiles, by default.
Tools
- The following keyboard shortcut has been modified:
- Render: Renamed Render (Current Mode). Assigned to \ in the Smoke FCP profile. Unassigned in other profiles.
- The following keyboard shortcuts have been added:
- Render: It is assigned to \ in the Smoke Classic profile. It is unassigned in other profiles.
- Burn: It is assigned to Space+\ in the Smoke Classic profile. It is unassigned in other profiles.
- Background Reactor: By default, it is unassigned in all user profiles.
Lustre
Lustre 2019 sees improvements in the following areas:
- DolbyVision HDR Enhancements
- The handling of floating point media
- Finishing LUT
- Media Import
- Media Export
- Panel and Surface support
These updates are all detailed in the What's New for Lustre.
Lustre-Flame Interoperability
Multi-Channel Interchange between Lustre and Flame
Lustre is now able to import a sequence with Multi-Channel segments from Flame, and use them for Secondary Grading.
If the Render node in Flame was configured to share the backplate metadata (tape name, source timecode, etc), it is possible to perform a Change Cut in Lustre, to apply grading decisions between a sequence that includes Multi-Channel segments and one that does not. Using Connected Conform and Create Batch Group helps preserve back plate metadata in this workflow.
Multi-Channel Support in the Connected Colour Workflow
The following improvements have been made to the multi-channel support in Flame-Lustre Connected Colour Workflow.
- Multi-channel sources from Lustre can be expanded in Batch to reveal the channels.
- The Lustre node now displays multi-channel inputs, allowing you to add inputs which can be used as Mattes for secondary colour correction. You can also modify existing Mattes or even replace Matte input.
- Connected Mattes used with Secondary colour correction can be modified in Batch.
- The Write File node is now automatically set multi-channel when used in the Connected Colour Workflow (or Stereo Multi-Channel, when working in Stereoscopic projects).
- Adding a Matte Input to the Lustre node automatically updates the Write File node with the same amount of channels. These channels are Batch FX-based, and resetting the shot-based grade in Lustre deletes these channels.
Warning: Do not modify the mattes' connections to the Write File node.
Matchbox
2019 introduces a series of powerful new Matchbox shaders, from beauty work-targeted work to lens effects, and including a powerful new colour correction tool.
- A2Beauty
- A shader that, while targeted at beauty work, can be used in a variety of scenarios for subtle defects to be removed or attenuated from an image. For additional information, see
A2Beauty Matchbox.
See this playlist from the Flame Learning Channel:
Retouch with A2 Beauty.
- Washer
- Also targeted at beauty work, but while not as capable as A2Beauty, it is faster. For additional information, see Washer Matchbox.
- Convolve
- Creates lens effects using an FFT-based convolution process. For additional information, see Convolve Matchbox.
- MasterGrade
- A powerful new colour correction toolset. It is the default colour tool in the Image node. For additional information, see
MasterGrade Matchbox.
See this playlist from the Flame Learning Channel:
MasterGrade.
- PhysicalBokehSFX
- Creates lens effects using a physical bokeh generator. For additional information, see PhysicalBokehSFX Matchbox.
- PhysicalBokeh3DSelective
- Creates Lens Effects. It is similar to PhysicaBokehSFX, but with the ability to use different types of 3D data, that Action is able to provide when used as a post-processing effect. For additional information, see PhysicalBokeh3DSelective Matchbox.
- PhysicalGlareSFX
- Creates camera lens glare effects. For additional information, see PhysicalGlareSFX Matchbox.
Matchbox API Updates
- Offset, Slope, and Power colour wheels now match the layout of their counterparts in the Look node. You can see the actual implementation of this layout in the CDL and CDLSFX Matchbox shaders. The Colour Wheel Matchbox example discusses the specifics.
- Matchbox Rays, RaysSFX, and Rays3DSelective now have the option to use the colours of the input image to define the rays' colours. This option can be turned off and a colour pot is still available to either add to the image's colours, or to override it completely.
- Matte Viewer can now preview the Matte over the solid colour of your choice.
- Matchbox shaders now have access to all light information of a scene. This allows you to create deferred lighting shaders, or drive effects using 3D scene light position. For more information, see the LightsAPI example.
- Matchbox shader passes can now be created to execute multiple times (number of times defined by a value in the shader's XML). For more information, see the MultiExecutionSeparableGaussianBlur example.
MediaHub
Pattern-Based Browsing
By accessing the Pattern Browsing tab in MediaHub, you can now browse content using patterns similar to the ones used to create patterned Open Clips.
In previous releases, you could create an Open Clip to build a multi-channel clip out of multiple files, or create versions out of multiple clips. But now you can do the same without first creating an Open Clip. These clips are then automatically updated when new versions matching the pattern are available on the file system.
For additional information, see To Browse Files Using Patterns
Additional MediaHub Improvements
Some LUT or colour transforms change the bit depth of imported clips. You can now preserve the original bit depth of the media, with the option . You can also see the media file bit depth in Metadata tab in the Preview panel.
When you select a Final Cut Pro XML file, the version of the XML is now displayed in the Preview window.
The status of the Background Wire button is now persisted between sessions.
You can now delete folders and their contents from MediaHub if you have the rights to do so.
There is now an option for faster browsing:
- Set the file browser to List View.
- Right-click the file browser column heading and select
Show Name Only.
By not parsing any metadata, MediaHub displays clips faster.
- For even faster browsing, disable clip thumbnails.
Media Import
GPU Debayering
Flame on macOS joins Flame on Linux to now support GPU debayering for ARRIRAW and RED files:
- Only the primary GPU is used.
- In the format's Debayering menu, an option allows you to switch between GPU and CPU debayering. Available in both macOS and Linux, set it to CPU when you need to free up the GPU for heavy Effects lifting.
Improvements to Supported Formats
ARRIRAW:
- Support for the ARRI ALEXA LF cameras.
- Automated colour space detection for ARRIRAW media files (.ari), based on information read from the file header. The Colour Space of the clips in MediaHub is LogC, but you can override it with Format Specific Options in .
QuickTime:
- Support for QuickTime (H.264 10-bit) from Panasonic EVA1 camera.
You can view the header metadata of Panasonic EVA1 QuickTime media files in the Metadata tab of the MediaHub's Preview. The Panasonic XML section displays additional data such as codecs, audio, device, ISO, and colour temperature.
- QuickTime video colour space metadata (the NCLC atom) now appears in the MediaHub's Preview, in the Metadata tab.
- MP4 files wrongly using the .mov extension are now visible in MediaHub.
RED:
- Support for RED SDK 6.3.0 (August 2017), which includes support for Helium 8K S35 Monochrome sensor.
SonyRAW and Sony X-OCN:
- Updated support for Sony VENICE cameras.
-
New options:
- : Full, Half, Quarter, Eighth, and Sixteenth resolutions have been added in addition to the defined Resolution. The default resolution is set to Half in Flame to make browsing and playback faster.
- Colour: Exposure and White Balance (Kelvin and Tint) controls have been added.
- Colour space detection for SonyRAW media files (.mxf):
The colour space of the clips in MediaHub is Scene-Linear / Rec709 prims. You can override it with the Format Specific Options ().
Updated Clip Naming Options
The clip naming options for both Photoshop and OpenEXR files are changing to reflect the way an imported clip is actually named.
PSD:
- Layer_Filename
- Filename.ext : Layer
A new option, introduced for easier AAF conform using PSD files. See Conform.
- Filename_Layer
OpenEXR:
- Channel_Filename
- Filename_Channel
QuickTime Colour Space
When importing QuickTime media files, the Colour Space is now read from the COLR/NCLC atom in QuickTime header.
This provides automatic colour space detection for QuickTime files generated by either ARRI or Panasonic EVA1 cameras. Log-C for the former, Rec 709, Rec.2100 HLG, or V-Log for the latter.
This new colour space detection preempts any colour space Input Rules you might have previously defined for QuickTime files. You might need to select a Tagged Colour Space if the colour space metadata of the media files is wrong.
Deprecated Media Options
Most media SDK vendors (ARRI, RED, and Sony) remove old options from newer SDK releases. The following options are no longer supported by their vendors and no longer available as an import option:
ARRIRAW
- Processing version 1 and 3
- Cameras D20 and D21
- Debayering Mode 1, 2 and 3
- Resolution SD
- Debayering from 2868px
SonyRAW
- Resolutions 0.25K, 0.5K and 1K
For media imported in a previous release, one of two things can happen:
- The media uses an option phased out (deprecated) but still supported by its vendor: The content remains identical to what was available in a previous release. The phased out options, as displayed in the Timeline's Format Options, are still available, but greyed out and marked Deprecated. If you edit a deprecated setting, the deprecated setting disappears and is no longer available.
- The media uses an option no longer supported by its vendor: The media displays a checkerboard.
Additional Media Import Improvements
- Bit Depth box in MediaHub now uses the LUT or LUT Editor Bit Depth option to define the bit depth of imported clip (i.e. in previous releases, the original bit-depth of the media files was used.)
- Auto Tape Name option has been added for QuickTime, MP4, and MXF formats. This option is now the default option and can be changed in the Metadata menu of Format Specific Options tab for each format.
Media Export
RGBA Export Option
You now have the option to export RGBA media as either RGB or RGBA. Use Include Alpha in the Media Export dialog box, an option only available to formats that support RGBA.
Sequence Publish Updated for Multi-Channel
You can now use Sequence Publish to create multi-channel OpenEXR media files, as either RGB or RGBA. For this, simply use a Sequence Publish preset for OpenEXR to publish multi-channel media files that can be used in third-party applications for grading and visual effects.
Limitations:
- Multi-channel export only works with content without Timeline FX. Make sure to select Use Original Media from Sequence Publish to publish multi-channel content.
- Publishing multi-channel media prevents you from using the Linked Media option: only Generate Media is available.
- Any colour management option defined in Media Export is applied to every RGB channel. The alpha channel is not modified.
The following presets are updated to publish multi-channel OpenEXR media files:
- Shot Publish - Flame Root Directory (16-bit OpenEXR Multi-Channel and No Audio)
- Shot Publish - Job Directories (16-bit OpenEXR Multi-Channel and No Audio)
They differ from the original presets in that they now produce multi-channel OpenEXR files for multi-channel timeline segments, when using Use Original Media.
These presets are also available in the Shotgun Shot Export available in the Shotgun Classic integration. Look for the 16 bit OpenEXR - Multi-Channel preset.
New Sequence Publish Presets
The following presets are new to Flame:
- AAF for Filmlight Baselight (Apple QuickTime ProRes 4444)
- AAF for Filmlight Baselight for Source Grading (Apple QuickTime ProRes 4444)
- AAF for Filmlight Baselight for Source Grading (Sequence Only)
- EDL Publish for Source Grading (16-bit fp OpenEXR and WAVE)
- EDL Publish for Source Grading (16-bit fp OpenEXR Multi-Channel (PIZ compression) and WAVE)
- EDL Publish for Source Grading (16-bit fp OpenEXR Multi-Channel (PIZ compression))
- EDL Publish for Source Grading (16-bit fp OpenEXR Multi-Channel)
- EDL Publish for Source Grading (16-bit fp OpenEXR (PIZ) and WAVE)
- EDL Publish for Source Grading (16-bit fp OpenEXR (PIZ))
- EDL Publish for Source Grading (16-bit fp OpenEXR)
Colour Space in Exported QuickTime Files
When exporting QuickTime media files, the colour space of the content is now used to set the colour metadata of the file (COLR atom).
- The following colour spaces are supported:
- Rec.601 (PAL/NTSC)
- Rec.709
- Rec.2020
- DCDM-X'Y'Z' (DCI white)
- DCI-P3 (DCI white)
- DCI-P3 (D65 white)
- sRGB Display
- ST-2084 (PQ), Rec.709 primaries
- ST-2084 (PQ), DCI-P3 (DCI white)
- ST-2084 (PQ), DCI-P3 (D65 white)
- Rec.2100 HLG (Lw=1000 nits, gamma=1.2)
- Rec.2100 PQ
For the above colour spaces, the NCLC data (Primaries, Transfer Function, and Matrix) are encoded in the header of the QuickTime files, and available in the Metadata tab of MediaHub's Preview.
Colour spaces not listed above cannot be encoded in the exported media files. If there is no colour space data, the YUV Encoding Colour Matrix is used for default.
When in Auto mode, the resolution specifies the Color Space data if the tagged colour space cannot be mapped:
- SD: Rec.601
- HD: Rec.709
- UHDTV: Rec.2020
flame_export Improvements
- Exporting RGBA content using the
flame_export command-line tool now exports RGBA when Timeline FX provides an alpha output.
Timeline FX must be rendered before export to ensure that the alpha channel generated by any Timeline FX is available to the export. If the Timeline FX are not rendered, the resulting alpha channel is a white frame, instead of the one generated by the effect.
- You can now export multi-channel content with flame_export running in foreground mode.
Additional Media Export Improvements
- You can now define YUV Headroom option for QuickTime ProRes 4444 and 4444XQ codecs.
- YUV Auto Mode now uses content colour space information for Rec601, Rec709, and Rec2020.
- ASC CDL comments that are part of a sequence are now published as EDL comments.
Media Panel
Colour-Coding
It is now possible to apply colour coding to clips, using the Colour menu, from a clip's contextual menu. The selected colour fills the background of the clip name in the following areas:
- The Media Panel
- The Reels View
- The Freeform View
- The Batch Schematic
- The Player
The colour coding of a source clip also appears in its segment representation in the Timeline view. Conversely, the colour of a segment extracted from a timeline applies to the newly created clip. However, setting a colour on the Timeline segment of a source clip doesn't propagate to the clip itself.
Save Desktop
Save Desktop is now available from the Desktop Contextual menu.
Pybox
- You can now assign a Source Timecode, Record Timecode, and Frame Rate from a node to a Pybox node using the T+Click keyboard shortcut.
- A Pybox can now display a text field. Up to 255 characters can be used.
- String can be displayed using a Dynamic UI element.
- Display a dialog box using self.set_dialog_msg(). An example can be found in image_magick_polaroid_text.py: it prompts one of two different messages based on the invert-state of the image.
Python API
Media Panel Scriptability
You can now script the Media Panel.
Scriptable Media Panel components:
- Workspace
- Desktop
- Reel Groups and Reels
- Batch Groups and Iterations
- Libraries and Folders
The API has also been augmented with additional Batch commands.
Catching Exception
Exceptions can now be caught in a Python script. For example, the following will now work:
from flame import batch
try:
   batch.import_clip("bad_path", "bad_reel_name")
except Exception,e:
   print str(e)
Additional Python API Improvements
- The address of a python object is now preserved, allowing for two variables to share a single address pointing to the same python object.
-
The default names defined for the Render and Write File nodes set using the Preferences or Python Hooks are now respected when one of these nodes is created using <PyBatch>.create_node.
- flame.project is now available, but no Flame project attributes can be modified using the Python API. It is only used to store the current Project and Workspace in variables.
For additional information, see the Python API reference.
Scopes
New Scopes
There are four new scopes available from the new Vectorscopes submenu in the Scopes contextual menu.
The new vectorscopes are:
- Dolby CtCp
- CIELAB a*b*
- CIELUV u*v*
- CIE xy
There are three new waveform options available from the new Waveforms menu inside the Scopes. The new Waveform options show a wider dynamic range of values than a traditional video waveform monitor.
The new waveforms options are:
- Log
- F-Stop
- PQ
A new histogram widget is also available. Available from the Scopes contextual menu, it offers the following options:
- Video
- F-Stop
Colour Management
The colours displayed within a Vectorscope, Waveform, or Histogram widget set to Luminance - Colours, are now colour managed, to better represent the colours as they are displayed in the image you are monitoring.
Additional Scopes Improvements
The Scopes view can be enabled from any viewport, even the ones that are not showing an image like a Schematic or an Animation view. The result view is then selected by default if Follow Selected Viewport is disabled.
A new preference in the Scope Settings menu allows you to display the information from the image displayed in the selected viewport or the broadcast monitor inside the Scopes view.
For additional information, see Using Scopes.
Additional Flame Improvements
- Batch Paint
- It is now possible hide the Batch Paint Control Points, in the Edit mode, by using the Paint Stroke or its associated keyboard shortcut:
Ctrl+I.
- Copy & Paste Improvement
- In previous releases, the location of a copied clip would determine where you could paste it: a clip copied from the Timeline could only be pasted to a Timeline. But now, you can copy-paste a clip from anywhere to anywhere. For example, you can now copy a clip from the Timeline to Batch, or from Media Panel to a Timeline.
- Desktop
-
Alt+click the Save button at the bottom right of the user interface to bypass the
Save Desktop dialog, and save immediately to the current save destination.
- General
- A link to the Flame Support page has been added to the Help submenu.
- Paint
- The range of the selected stroke is now indicated by white brackets in the Timebar, when the Edit mode is selected .
- Player
-
A Timeline representation of a clip can be displayed by double-clicking on the clip in a Player viewport.
The Custom playback range option is now available in both the Player and the Fullscreen Player.
- Stabilizer
- The Stabilizer / Tracker module now offers an Image Type selection box, similar to the one available in the different Keyers and Regrain tools. Use it to specify the colour space of the material being used: linear or not. The Auto option lets Flame determine if the image is in linear space or not. This function should improve the tracking result on linear footage.
- Timeline
- A new preference allows you to control the behaviour of the positioner after a copy/paste. Move Positioner on Paste is available in the Timeline tab, under the Editing section.
- Enabled: The Positioner moves to the end of the pasted segment in the Timeline. This is the default.
- Disabled: The Positioner doesn't move when a segment is pasted in the Timeline.
- Tangent Panel
- Global Keyboard Shortcuts available in most of the application are now available in the Tangent Mapper. The list of available Timeline FX has also been updated.