Define which triangles will be affected by a semi-automatic repair action
There are several commands available in the repair module to select triangles.
Jump to:
- To use the basic selection commands
- To use the selection primitive
- To expand or shrink the selection
- To select triangles around a hole
To use the basic selection commands
- Select the part to be repaired and choose to enter the repair module.
- Click one of the basic selection commands from the toolbar. Available options include:
 Select Triangles: Selects individual triangles.
 Select Surfaces: Selects entire surfaces.
 Brush Selection: Selects individual triangles by painting over them with a brush.
 Select Shells: Selects entire shells.
Tip: Hold Ctrl and click on a triangle, surface, or shell to add entities to or remove entities from the selection. If you hold Ctrl and move your mouse around the display, entities are added to or removed from the selection.

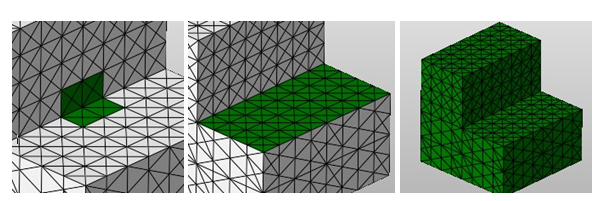
Left: Selected triangles. Center: A selected surface. Right: A selected shell.
In addition to these basic selection commands, you can quickly select all triangles, clear the selection, or toggle the selection.
- Click
 Select all Triangles to select every triangle in the mesh.
- Click
 Clear Selection to deselect all triangles.
- Click
 Toggle Selection to flip the selected and unselected triangles.
To use the selection primitive
- Select the part to be repaired and choose to enter the repair module.
- Click one of the selection options from the toolbar listed under
 Selection Primitive. Available options include:
- Select All Triangles: Selects all triangles that lie within the selection primitive, regardless if they are on the backside of the part or covered by another surface.
- Select Front-Facing Triangles Only: Selects triangles facing the front of the display, even if they are covered by another surface.
- Select Uncovered Triangles Only: Selects triangles which face either the front or back, but are not covered by other surfaces.
- Select Front-Facing and Uncovered Triangles Only: Selects only the triangles visible from the current viewing perspective.
- Choose a selection type. Available options are Triangles or Shells.
- Choose a primitive selection shape. Available options are Rectangle or Circle.
- In the display, click and drag with the mouse to create the primitive shape.

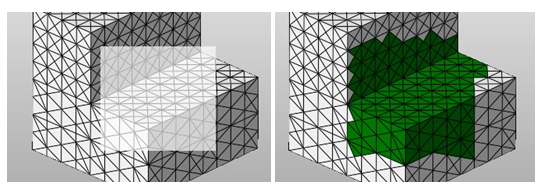
Left: Drag a primitive shape. Right: The resulting selection.
To expand or shrink the selection
If you have already selected triangles or surfaces, you can quickly expand or shrink the selection.
- Select one or more triangles or surfaces.
- Right-click the selection and choose
 Expand Selection to include the adjacent triangles or surfaces in the selection.
- Right-click the selection and choose
 Shrink Selection to remove the adjacent triangles or surfaces in the selection.
To select triangles around a hole
If you have a part that contains a hole, some actions benefit from, or even require, selecting one or more of the triangles directly touching the hole.
- Right-click an edge of the hole.
- Choose
 Select all Surrounding Triangles to select every triangle touching the hole.
- Choose
 Select Attached Triangle only to select the triangle adjacent to the edge.

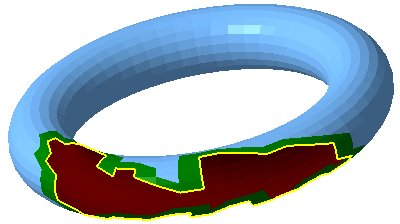
In preparation for repair, the triangles surrounding the hole have been selected.
 Repair Part