The Netfabb workspace for HP allows sending jobs to HP Jet Fusion 3200/4200 printers.
Important: When the printer is not connected, the workspace will fall back to a default size.
Context view of the HP Jet Fusion Workspace
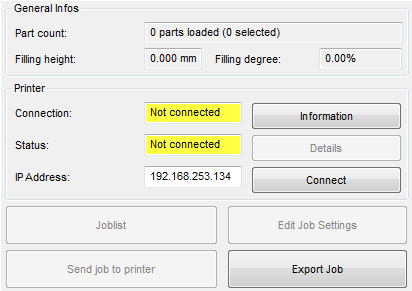
The HP Workspace UI has the following elements:
- General Infos section
- Part count: number of parts in the workspace
- Filling height: height of the build job
- Filling degree: percentage of the build space used by the loaded parts
-
Printer section
- Connection: the field (yellow not connected in the image) shows the connection state of the engine. This field turns green if the connection was established to a printer or red in case of an error. The “Information” button provides information about the connected printer and the workspace
- Status: the status of the printer. The field (yellow not connected in the image) turns green if no errors or warnings are reported by the printer or red if errors or warnings are reported. The Details button shows a detailed overview over the errors and warnings the printer reports. This button is only enabled if errors or warnings are reported
- IP Address: this edit field must be used to enter the hostname or IP address of the printer to connect to. The connect button tries to establish a connection to the entered hostname or IP address and the fields in the Connection and Status section will be updated depending on the result of the connection attempt
- Joblist: shows a list of the jobs stored on the printer. This button is only enabled if a connection has been established.

Job list dialog
- Edit Job Settings: opens a dialog to configure the settings of a job (Material, Print Profile, Cooling Profile, Annealing Profile). This button is only enabled if a connection has been established
- Send Job to Printer: sends a job to the printer. Before sending the job a name for the job must be entered and the settings can be reviewed. This button is only enabled if a connection has been established.
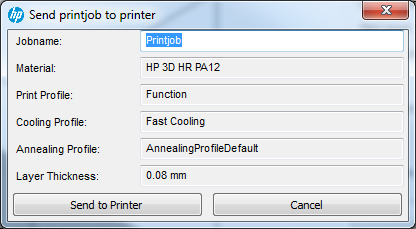
Send job to printer
- Export Job: exports a job to a .3MF file that can be used for preview purposes, but is not intended for printing.
The Job Details dialog can be accessed using the Job Details button in the Joblist dialog. It shows the state of all parts of the job in the upper part and the job tasks with their stat in the lower part of the window.
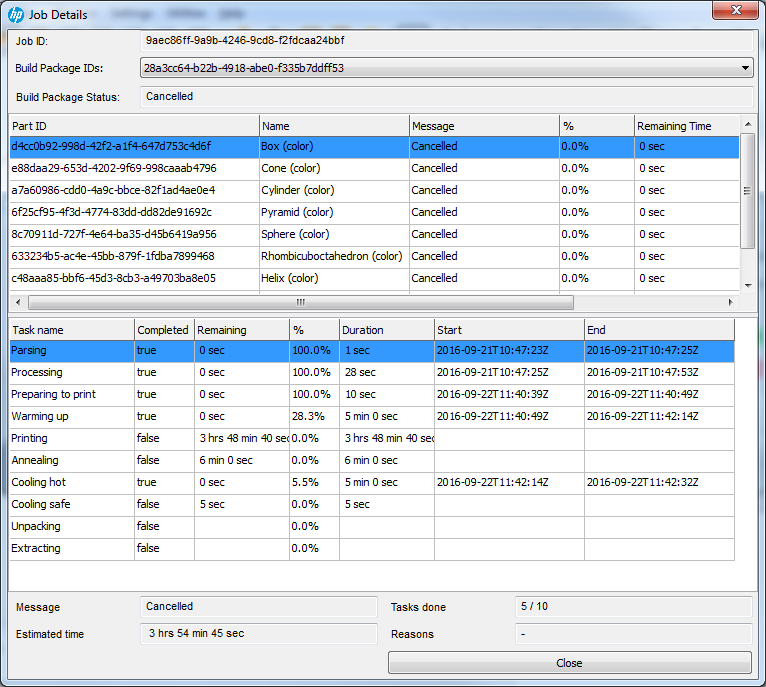
Job Details dialog
Step-by-Step Guide:
- Load the HP Workspace through
Prepare >
 Load Machine Workspace .
- Enter the IP address or hostname of the printer and click the
Connect button.

- The connection is established.

- Add the parts to print to the workspace.
- Set the job settings using the Edit Job Settings button. These settings are stored and will be reloaded.
- Click the Send Job to Printer button.
- Enter a name for the job and verify the settings in the Send printjob to printer dialog shown below.
- Click Send to Printer to send the job to the printer. You can cancel the processing of the job during the preparation and upload phases.