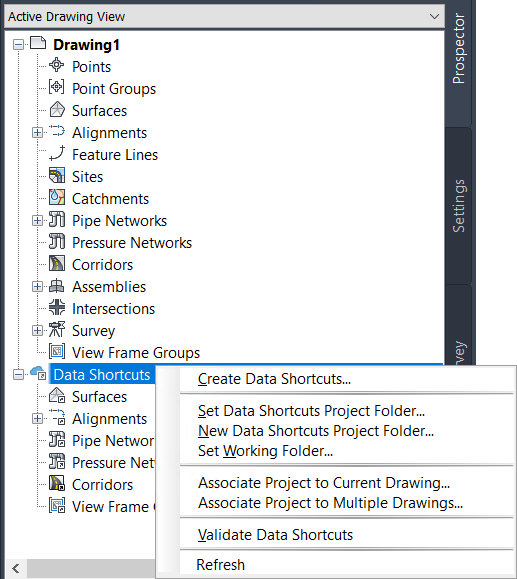
To create a data shortcut project in BIM 360, you will be working with familiar commands in Civil 3D, but you will select a connected drive instead of a local or LAN data storage environment for the project.
- To create and manage a BIM 360 data shortcut project, you'll need access to Autodesk Collaboration for Civil 3D, which is available when you subscribe to BIM 360 Design.
- You don't need to be an Account Administrator to create a data shortcut project within an existing BIM 360 project. However, if you want to create a new BIM 360 project for your data shortcuts, you will need to be an Account Administrator and use the Account Admin module in the
BIM 360 web interface.
Note: The Account Administrator who sets up the BIM 360 project can use an existing project folder in BIM 360 as a template when creating a new project. A template project can be set up in advance to include a set of folders and files that you typically use.
To create a data shortcut project in BIM 360
This procedure assumes that you have an existing BIM 360 project in which the data shortcut project will be created.
- In Toolspace, on the Prospector tab, right-click the Data Shortcuts node
 Set Working Folder.
- In the Set Working Folder dialog box, navigate to the project folder location in BIM 360.
The working folder for data shortcut projects needs to be at least one folder level below the BIM 360 project folder. For example, <BIM 360 Drive>\<Account Name>\<Project Name>\<Working Folder Name>. It is not permitted to set the working folder to a folder outside the project.
Note: It is possible to set the top level \Project Files folder as the working folder, but only administrators can see the \Project Files folder so it is recommended that you use a subfolder within \Project Files. - Click Select Folder.
The Data Shortcuts node in Prospector changes to
 to indicate that the working folder is in BIM 360.
- Right-click the Data Shortcuts node
 New Data Shortcuts Project Folder.
- Specify the name and the other project details, such as a template, and click OK.
- Right-click the Data Shortcuts node
 Set Data Shortcuts Project Folder.

- Select the data shortcut project to use and click OK.
- Create drawings and data shortcuts in the project as you normally would, and save them all in BIM 360.
Note: A data shortcut project and its associated drawings need to be stored in the same data storage environment. When you are working in a data shortcut project that is stored in BIM 360, the drawing files must also be stored in BIM 360.