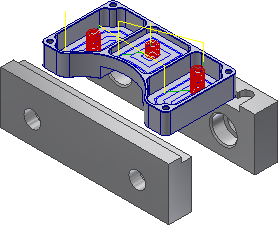
After roughing out the pockets, use a 2D Pocket strategy to create a finished cut.
- On the ribbon, click
CAM tab
 2D Milling panel
 2D Pocket
 .
.
 Tool tab
- Make sure that #1 - Ø1/4" flat is still the current tool.
 Geometry tab
- Click the Geometry tab.
- Click the Pocket selections button and, once again, select the three faces at the bottom of the part.
 Passes tab
On the Passes tab, change the following:
- Enable the Finishing passes check box.
- Stepover to: 0.025 in
- Finish feedrate to: 60 in/min
- Maximum stepover to: 0.125 in
- Disable the Stock to Leave check box.
 Linking tab
Change these values on the Linking tab:
- Maximum stay-down distance to: 1.25 in
- Enable the Lead-in (entry) check box.
- Horizontal lead-in radius to: 0.025 in
- Linear lead-in distance to: 0.025 in
- Vertical lead-in radius to: 0.025 in
- Maximum ramp stepdown to: 0.625 in
- Helical ramp diameter to: 0.2375 in
- Minimum ramp diameter to: 0.2375 in
Start the Calculation
- Click
 , or right-click in the graphics window and select OK from the marking menu, to exit 2D Pocket and create the toolpath.

Continue to To Rough Cut the Outside of the Part...