Inventor 2012 introduced a color style option called Realistic Appearance for use with Realistic Visual Styles. Inventor 2013 built on this capability introducing new materials and appearances and tools to assist in managing the libraries and individual material and appearance properties. The new materials and appearances are used by the Realistic Visual Style and the real time rendering capability in Inventor 2013 and Inventor 2014.
The goal is to continue the progress toward a more seamless experience when working between Autodesk products.
To assist in supporting this change to material and appearance handling in Inventor, you will probably want to review and update your materials and color styles strategy.
Likely, you will want to move your custom or modified color and material styles into the new libraries. Thereafter, maintaining and improving the libraries so they are compatible across applications will require less effort. To manage these libraries we recommend either an Overwrite method or a Versioning method. The overwrite method has you copy and rename the library and perform edits on the copy. Then, replace the existing library with the modified copy. The versioning method describes how to copy, rename using a version naming convention. You modify the new version and distribute it. The details for each method are below.
IMPORTANT: In either management case, the source and copied libraries must not be used in the same project file or an error occurs.
If you routinely update your materials and appearances we recommend that you create a project file specifically for managing these assets.
Overwrite method In this method we guide you on how to reliably update your 2014 libraries. You start with a copy of the 2014 material library, make the needed modifications, and replace the working library with the updated library. This method enables safe incremental updates to the material and appearance definitions. The advantage of this method is that you do not modify the working project file.
Overwrite method
In this method we guide you on how to reliably update your 2014 libraries. You start with a copy of the 2014 material library, make the needed modifications, and replace the working library with the updated library. This method enables safe incremental updates to the material and appearance definitions. The advantage of this method is that you do not modify the working project file.
Copy the file
- Locate the InventorMaterialLibrary.adsklib file or your own custom library that requires modification. The Inventor Material Library location varies depending on your installation and deployment methods. - Standard Standalone install: C:\Users\Public\Documents\Autodesk\Inventor 2014\Design Data\Materials
- Make a copy of the file, and apply a different name, such as My_ InventorMaterialLibrary.adsklib
Creating an Asset Management project file
The following steps guide you in creating an asset management project file.
- Start Inventor.
- In the Welcome dialog box, click Projects. Or, in Inventor click Get Started > Launch > Projects.
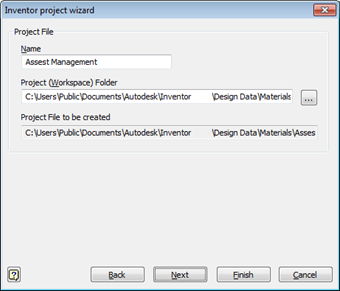
- In the Project Editor, in the upper section, create a new project for asset management. All that is required is to define the project name and point the project to the folder where the materials libraries are located.
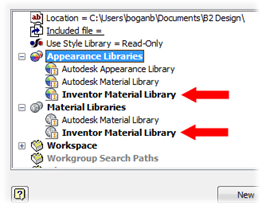
- In the Project File Editor, Appearance Libraries , right-click the Inventor Material Library node and select Remove Library. Repeat this step in Material Libraries. Save the changes.
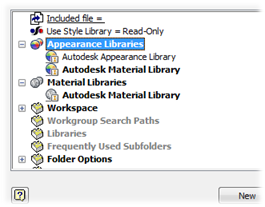
- You must Exit and Restart Inventor. After restarting Inventor, the project should resemble the following image:
- Edit the Project File.
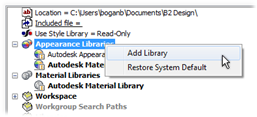
- Right click the Appearance/Material Libraries node and click Add Library.
- Navigate to and select My_ InventorMaterialLibrary.adsklib
- Right-click the library node and click Active Library. Note: After adding your custom library, you can remove all other libraries if you do not want them available by default. You can always navigate to them during a session, they just would not be available automatically.
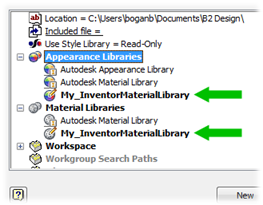
- Save the project changes.
Modify the Library content
- Create a new part file, such as AssetMgmnt.ipt. For library management purposes, it is advisable to keep the part free of geometry.
- In the QAT, click Material Browser.

- In the Material or Appearance Browser, confirm My_InventorMaterialLibrary is the active library.
- To edit materials or appearances these must be added to a document.
- Modify materials and appearances according to your requirements.
- Drag and drop the modified materials and appearances into the respective libraries.
- Save the part file for future asset tasks and exit Inventor.
Overwrite working libraries
Customize the following general description to work with your corporate policies and procedures. Set an appropriate time to make the library switch and ensure that NO ONE is accessing the material library file you are replacing. These steps apply to Inventor libraries and custom libraries you create.
- In Windows Explorer, navigate to the folder where the InventorMaterialLibrary.adsklib file is located.
- Copy My_InventorMaterialsLibrary.asklib and paste into the folder location of the InventorMaterialLibrary.
- Ensure the file permissions for My_InventorMaterialsLibrary.asklib are Read-Only.
- (for Vault only) Check out InventorMaterialLibrary.adsklib. To avoid an error message, ensure no one is accessing the library.
- Delete the old InventorMaterialsLibrary.adsklib file. If server-based, take the necessary precautions for a centralized access point.
- Rename My_InventorMaterialsLibrary.asklib to InventorMaterialLibrary.adsklib.
- (for Vault only) Check-in the renamed library.
- (for distributed use) Distribute the library to the appropriate machines overwriting the existing library. Before distributing the library, ensure NO ONE is accessing the target libraries you will overwrite.
- In line with your policies and procedures, notify users that they can begin working. The project file for users continues to point at the InventorMaterialLibrary.
IMPORTANT: If, when switching between project files, one of the libraries displays an error  exit and restart Inventor to resolve the library access issue.
Important information
- Both methods apply to the Inventor Material Library and custom libraries you create.
- Vault has a known issue, when you check out a library that is in use in someone's document. The following error message displays:
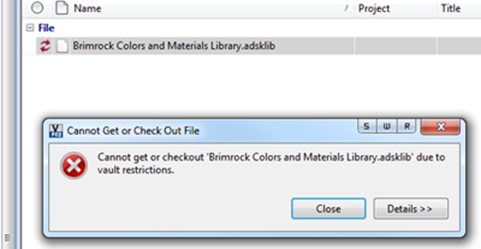
- If you edit a material library while someone is still using Inventor the following error message displays:
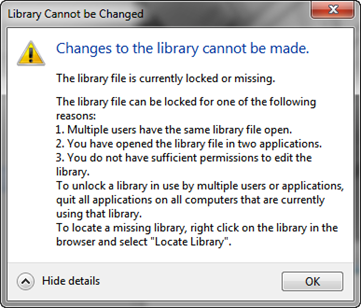
- From within the Material or Appearance Browsers, If you open a library and its copy in the same session, this error message displays:
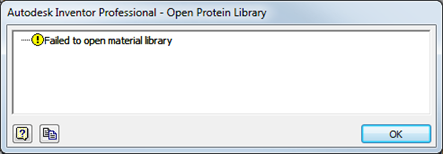
The two methods involve editing both the project files and library copies. If material library modifications occur frequently, we recommend that you establish a project dedicated to asset management.