The following sections describe two methods for applying stamps when sculpting.
Sculpt using a repeating stamp image
- In the Sculpt Tools tray, select the Sculpt tool.
- In the
Stamp tray, select a stamp image.
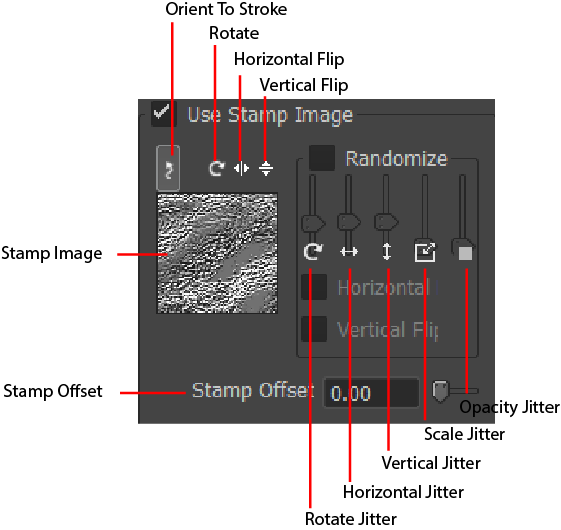
The stamp image appears in the Sculpt properties window with Use Stamp Image turned on.
- In the
3D View, stroke on the model to apply the stamp detail.
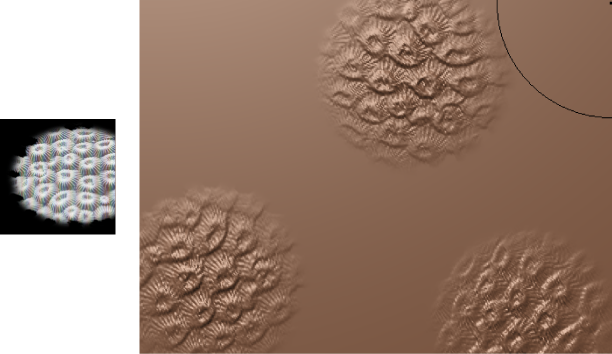
As you stroke, the stamp detail is applied and repeated along your stroke automatically. For more space between the individual stamps, increase the Stamp Spacing property in the Properties window. You can also have the stamp orient to the stroke path. See Sculpt Tool properties.
Note: A stamp or stencil image can reduce the strength of a sculpt tool depending on the amount of white in the image. White values in the image displace the vertices with full strength, while black values are not displaced at all. If the stamp or stencil image has a lot of gray tones, you may need to compensate by increasing the tool’s Strength property when using a stamp or stencil.
If you want to apply a single instance of a stamp, see Sculpt a single stamp using the Imprint tool.
Sculpt a single stamp using the Imprint tool
The Imprint tool lets you apply a single instance of a stamp image to your model. Imprint is useful for applying raised or recessed features such as buttons, logos, and so on. You can scale the imprinted stamp image as you apply it to the model.
- In the Sculpt Tools tray, select the Imprint tool.
-
In the
Stamp tray, select a stamp image.
The stamp image appears in the Imprint properties window with the Use Stamp Image option turned on.
-
In the
3D View, drag on the model to apply the stamp detail.
As you drag, the stamp image displays and either scales or rotates from the location you click. The image is immediately applied in that area as a single stamp.
Note: If you do not click above the surface of the model when using Imprint, the Imprint effect is not applied.
View stamp properties
You can display the properties for a stamp as follows:
- In the
Sculpt Tools tray, select a tool that has a stamp loaded on it.
The Properties window displays the tool properties. Several options modify how the stamp gets applied to the surface. See Sculpt Tool properties.
Change a stamp's impression
You can configure your stamp so that it makes a deeper imprint on a surface with the Stamp Offset property.
The default value is 0.00, which means that black areas of the stamp image make no surface impression, and the deformation strength increases until it reaches white.

Comparison: Stamp Offset default versus 0.50 setting
Turn off a stamp image
Do one of the following:
- In the Stamp tray, select the Off icon.
- In the current tool’s Properties window, turn off Use Stamp Image.
Import a stamp image
Do one of the following:
- Click an image in the Stamp tray to load it as a stamp and make it active on the currently selected sculpt tool (until you select another image or turn off the stamp image).
- Select an image using the
Image Browser then click
Set Stamp to copy the image path to the stencil.
Note: A stamp image does not automatically appear in the Stamp tray until you save it as a preset by selecting Add > Stamp in the Stamp tray menu (
 ).
).