Learn how to set the calculation options and how to start the calculations of the required reinforcement area.
- Continue working in your project or open the project Plate_Results_Tabular.rtd.
Note: The Tutorial files are located in C:\ProgramData\Autodesk\Examples\Tutorials.
- Click Design
 Required Reinforcement of RC Slabs/Walls.
The Slab - Required reinforcement layout opens. The layout is divided in three parts: View, Reinforcements dialog, and Plate and Shell Reinforcement dialog.
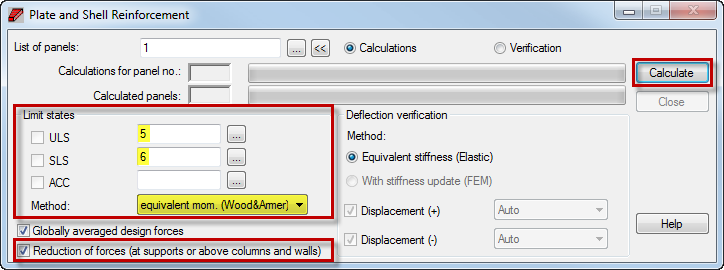
- Go to the Plate and Shell Reinforcement dialog, and in the Limit states area ensure that the following options are set:
- ULS: 5,
- SLS: 6,
- Method: select equivalent mom. (Wood&Amer).
- Select Reduction of forces (at supports or above columns and walls).
Note: This option reduces the forces on a support point, such as a column, by using the average value of the moments and stresses around a support point.
- Click Calculate.

The Calculation Status dialog opens and displays information about the admissible plate deflection value which has been exceeded.
- Close the Calculation Status dialog.
- Save the project as Plate_Required_Reinforcement.rtd.