
Alias provides several Dynamo scripts that are setup to be run in Dynamo Player. To load a sample script in Dynamo Player:
- Click the browse
 icon, and then browse the
Dynamo Player folder located in your Alias installation directory here:
icon, and then browse the
Dynamo Player folder located in your Alias installation directory here:
C:\Program Files\Autodesk\AliasAutoStudio2021.2\Dynamo\Sample Files\
If you edit or customize the sample scripts in Dynamo, be sure to save them to a local directory to preserve the originals.
- Open the script, then MMB-drag the Dynamo Player icon from the Transform tool palette to your custom shelf.
- Ctrl + double-click the icon in the shelf.
- In the Rename Tool window, type a name and a label for the script.
You can now access the script by clicking the icon in your custom shelf.
About the Dynamo Player sample scripts
The following sections provide information about each sample script, such as what it does, inputs required, and details about how the script can be modified to be used with different types of geometry.
Scripts for NURBS surfaces
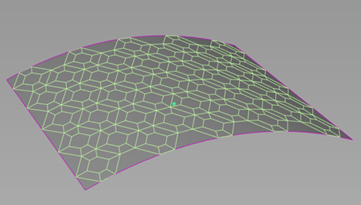
- Nurbs-Hexagon-Pattern-2021.2.8.dyn
- Uses a single NURBS surface as an input and creates a NURBS Hexagon pattern on it.
Tip:
- If you want to continue modifying the surface by modeling symmetrically, use Object Edit > Symmetric Modeling rather than using layer symmetry. Layer symmetry can invert the pattern.
- When using this script on large surfaces, you may need to increase the maximum value range for the sliders. See Customize scripts for Dynamo Player.
- Nurbs-Tire-2021.2.61.dyn
- Uses construction points (Construction > Point) as an input, and creates NURBS models of tires at the point positions. Adjust the values for and view the tire(s) updating live. You can use adjust several parameters to quickly generate the desired tire model size and shape. The resulting tire geometry is made up of multiple surfaces. This allows you to add different textures to the surfaces, such as a side wall label and tread patterns.

Scripts for subdivision bodies
- Export-to-tsm-2021.2.2.dyn
- Lets you export a single subdiv body to the .tsm T-Spline file format. Use this script to export subdivision bodies for applications that do not support the .tss T-Spline files such as Autodesk Fusion.
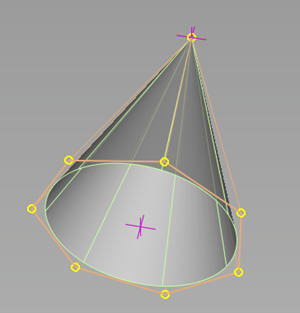
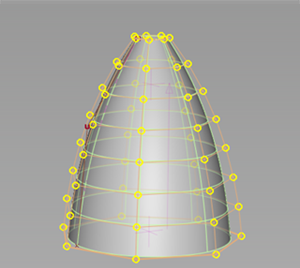
- Subdiv-Cone-2021.2.1.dyn
- Uses two construction points as inputs to create a subdivision cone.
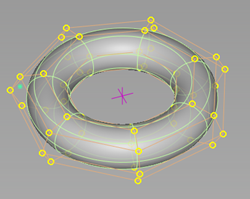
- Subdiv-Torus-2021.2.3-Torus.dyn
- Uses a construction point as an input to create a subdivision torus.
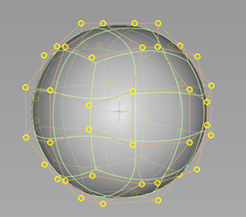
- Subdiv-Sphere-2021.2.1.dyn
- Uses a construction point as an input to create a subdivision sphere.
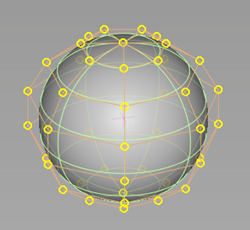
- Subdiv-Quadball-2021.2.1.dyn
- Uses a construction point as an input to creates subdivision sphere with quad topology.
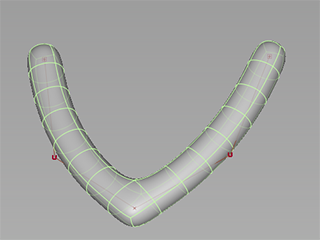
- Subdiv-Pipe-2021.2.2.dyn
- Uses two curves as inputs to create a subdivision pipe.
At the connection point between two tangential curves, the pipe geometry merges without additional topology.
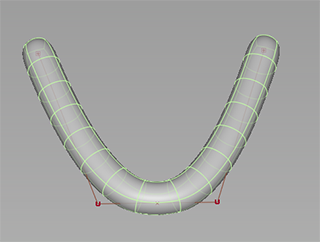
At the connection of two position continuous curves, the script adds topology to create the proper angle in the pipe.
- Subdiv-Revolve-2021.2.3.dyn
- This script uses three inputs: a curve for the profile curve that gets revolved around the axis, a construction point, which defines the axis origin for the revolve, and a vector to specify the direction of the curve sweep.
- Subdiv-Sweep-2021.2.1.dyn
- Uses two curve inputs, one as a sweep profile and the other as a sweep path, to create a subdivision body.

- Subdiv-Subdivide-2021.2.2.dyn
- Creates a copy of the selected subdivision body and subdivides each face of the new object into four faces. The original subdivision body is not deleted by the script.
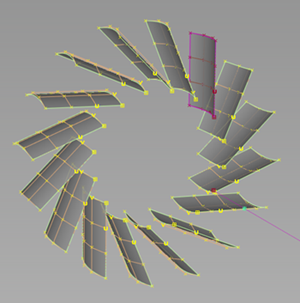
- Rotate-2021.2.3.dyn
- Uses an Object input, such as a surface or infinite plane, as an instance that rotates around an axis. A curve input defines the start and end of the rotation axis. Use the Total Amount slider to set the number of instances that rotate around the axis.
- Subdiv-Morph-between-2-Objects-2021.2.1.dyn
-
Use two subdivision bodies as source inputs and generates a third body which is an intermediary object of the source objects. Use the Morph Ratio to adjust the ratio of influence either subdivision source input has on the resulting shape of the third body. This script includes a WIRE file for reference purposes.
For best results, follow these guidelines:
- The two source subdivision bodies should derive from the same model and be only slight variations of each other. Copy and paste the model to create the second source object.
- Each source body needs to have the same number of CVs. This ensures that the script works correctly since it uses the internal IDs to determine the connecting vector between each ID matching CV pair.
- Place the two source objects on two separate layers. When the script generates the third object, it gets put on its own layer. You can then easily hide the source objects, and then adjust the Morph Ratio parameter to the update the intermediate object.
- Subdiv-Wheel-Arch-2021.2.3.dyn
-
This script generates the curve topology for wheel arches. After loading the script, press the spacebar or click Build to generate the geometry. You do not need to provide curve inputs for the script.
Radius - Radius of the wheel arch to the center point.
Width - Width of the topology around the arches.
Wheel Arch Radial Spans - Number of spans along the arch.
Wheel Arch Across Spans - Number of spans from bottom to topic of the arch
Spans Front to Back - Number of spans between the front and back wheel arches.
Width Offset Back - Offsets the rear arch along the X axis by pushing it out.
Height Offset Back - Offsets the rear arch along the Z axis by moving it up or down.